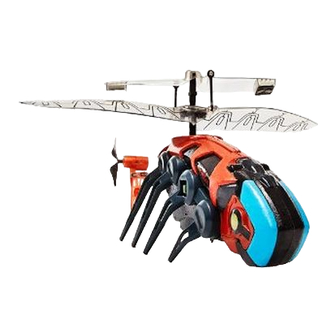
Air Hogs Havoc Stinger Manual de instruções - Página 3
Procurar online ou descarregar pdf Manual de instruções para Brinquedo Air Hogs Havoc Stinger. Air Hogs Havoc Stinger 8 páginas. Spin master remote controled toy helicopter user manual
Também para Air Hogs Havoc Stinger: Manual do utilizador (4 páginas)

4. FLIGHT CONTROL (After Trimming)
- Put the helicopter on a smooth surface. Uneven floor surface will affect its lifting off.
- Slowly increase the throttle.
- DO NOT look at the controller/charger but focus on the helicopter.
- As soon as the helicopter leaves the ground, reduce throttle slightly. (in the worst case, the helicopter will
drop back to the floor, but that is better than crashing against the ceiling)
- VERY gently add throttle if the helicopter goes down.
- VERY gently reduce throttle if helicopter goes up.
- For turning, give short, small inputs to the direction stick. (Most beginners will easily over control the helicopter)
Hover up and down:
When the helicopter flies steadily, you can slowly push the throttle stick up
to make the helicopter fly higher, or release the stick a bit to make the
helicopter fly lower. Only small amounts of stick position change are required
for smooth flying (Pic.4 & Pic.5).
Hover up
pic.4
Accelerates & Decelerates:
If you turn the helicopter slowly counterclockwise, the helicopter will
decelerate. And when you turn it clockwise, it will accelerate.
FORWARD WEIGHTING
If you would like to adjust the directional control
of your Havoc Stinger
®
, you have the option of
putting on the optional Center of Gravity
Adjuster labels. Stick the labels on the bottom of
the helicopter's nose as shown. This will forward
weight the helicopter and allow for a
different flight performance.
You can also adjust the speed by
moving the rear fin forward or backward.
Moving it forward increases the
forward flying speed. Moving it
backward decreases the forward flying speed.
HOW TO FIX YOUR TWIN ROTORS
If the linkage between your twin rotors comes undone and is dangling below the bottom rotor,
it is very EASY to fix! (A)
Carefully re-attach the linkage back onto the top connector and gently push it into place. (B)
While your there, you might want to check around the area for any fibers or debris that might
affect your flight performance. Carefully remove it with tweezers and you are ready to start
flying again!
PROBLEM
Main rotor won't move.
Tail rotor is broken or not moving.
Suddenly stops and drops while flying.
The helicopter is not reacting to the
controller.
Hover down
pic.5
HOW TO ADJUST YOUR HELICOPTER'S FLIGHT PERFORMANCE
Rear Fin
TROUBLESHOOTING
CAUSE
ON/OFF switch is set to OFF.
Weak battery.
Something may be caught in the rotor.
Rotor may have chipped during flight.
Try steering left/right to activate tail rotor.
Weak power.
Helicopter may be out of range from controller.
A,B,C channel selection on controller is not
correct.
Helicopter may not be turned ON.
Turn counterclockwise and clockwise:
Hold the helicopter at a height. Push the rudder stick toward left to turn
counterclockwise (pic.6), and push the rudder stick toward right to turn
clockwise (pic.7).
pic.6
Fly forward and stop:
The helicopter will slowly fly forward when a gentle clockwise turn is
made. To make it stop, it is sufficient to give a short counterclockwise
turn command. By alternating this flight technique, the helicopter can
be directed anywhere and come back to it's starting position.
A
Set switch to ON.
Re-charge the helicopter using the charging port OR
check batteries in the controller.
Remove hair or dirt caught in the rotor.
Replace tail rotor with the spare set in the package.
Re-charge helicopter or check battery power in controller.
Move closer to the helicopter with the controller.
Double check the letter on the bottom of the helicopter
and adjust the channel selector on the controller.
Turn helicopter ON.
3
NOTE: Hovering is half the
battle. If you can maintain your
helicopter in a stable position
in the air you are on your way
to becoming a PRO.
pic.7
Optional Center of Gravity
Adjuster labels
Stick the Center of
Gravity Adjuster labels
here to obtain different
performance.
B
WRONG
RIGHT
SOLUTION
