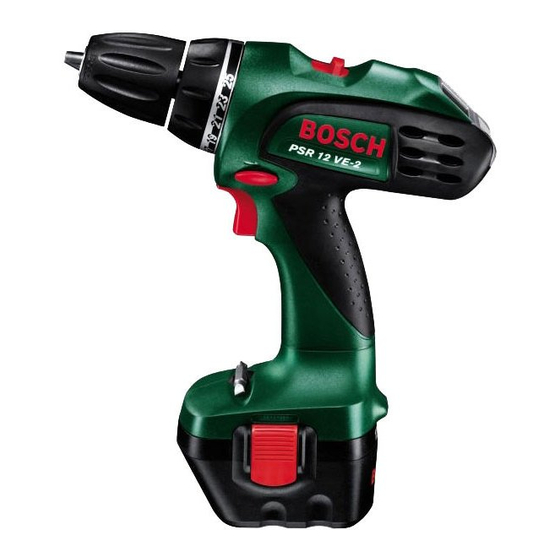
Bosch PSR 14,4 VE-2 Manual - Página 3
Procurar online ou descarregar pdf Manual para Perfurar Bosch PSR 14,4 VE-2. Bosch PSR 14,4 VE-2 8 páginas.
Também para Bosch PSR 14,4 VE-2: Manual de Instruções (12 páginas), Manual de Instruções (10 páginas)

- 1. Intended Use
- 2. For Your Safety
- 3. Before Putting into Operation
- 4. Changing the Tool
- 5. Initial Operation
- 6. Practical Advice
- 7. Maintenance and Cleaning
- 8. Environmental Protection
- 9. Noise/Vibration Information
- 10. Declaration of Conformity
- 11. Tekniske Data
- 12. Beregnet Anvendelsesområde
- 13. For Deres Egen Sikkerheds Skyld
- 14. Før Ibrugtagning
Inserting the Tool
Open the drill chuck sufficiently for the tool to be in-
serted. Insert the tool. Turn the sleeve of the quick-
clamping drill chuck 3 forcefully by hand until a distinct
"click" is heard. The drill chuck is thereby automatically
locked.
Turn the chuck casing in the reverse direction to remove
the tool.
Clamp the screwdriver bit 12 directly in the drill chuck or
use an additional universal bit holder for screwdriver bits
(accessory magazine 13 ).
Initial Operation
Inserting the Battery
Set the rotational direction switch 5 to the cen-
tre = locked position, and notch the charged battery 7
into the grip.
Switching On and Off
Press the On/Off switch 4 and then let go again.
Run-On Brake
As soon as the On/Off switch 4 is let go, the speed of the
drill chuck is immediately slowed down together with the
inserted tool.
Stepless Speed Control
The machine runs with variable speed be-
tween 0 and maximum depending on the
pressure applied to the On/Off switch 4 .
Changing the Rotational Directions
The rotational direction switch 5 serves for alternating
the directional rotation of the machine. However, this is
not possible if the On/Off switch 4 is being pressed.
a
b
Speed Selector, Mechanical
Two speed ranges can be preselected with the gear se-
lector 1 :
1st gear:
Low rotational speed, high power.
2nd gear:
High rotational speed, low power.
The speed settings may only be changed when the ma-
chine is motionless. If the speed setting has not quite
notched in properly, briefly press the On/Off switch 4 .
2 609 932 035 • TMS • 18.10.00
For drilling and inserting
screws, set the rotational di-
rection CLOCKWISE
b
For unscrewing, switch to the
rotational
direction
ANTICLOCKWISE
a
.
Setting the Torque
In order to insert screws so that they are flush, one of the
5 settings must be chosen on the torque setting ring 2 :
Low setting, e. g., small screws, soft materi-
1
als.
High setting, e. g., large screws, hard materi-
5
als.
When the setting is correct, the overload clutch opens as
soon as the screw has been screwed in flush into the
material or as soon as the set torque has been reached.
When unscrewing screws, select a higher setting or set
to the drill symbol. The proper setting is best determined
with practical trials.
Drilling
Set the torque setting ring 2 to the drill sym-
bol.
Hammer Drilling (PSB..)
Set the torque setting ring 2 to the hammer
symbol.
Replacing the Drill Chuck
To change the chuck, place the setting ring 2 in
the
position.
The locking screw 6 safeguards the drill spindle from
loosening in the chuck. Open the chuck fully and com-
pletely unscrew the locking screw 6 (Note: lefthanded
thread!) .
Mounting the drill chuck takes place in the reverse order.
Practical Advice
Use only screwdriver blades/bits that fit properly in
the head of the screw.
It is advisable to first drill a pilot hole before attempt-
.
ing to screw in large, long screws in hard material.
For drilling in metal, use only flawlessly sharpened
HSS drills. The appropriate quality is guaranteed by
the Bosch accessories program.
Maintenance and Cleaning
Before any work on the machine itself, remove
the battery.
For safe and proper working, always keep the
machine and the ventilation slots clean.
If the machine should fail despite the rigorous manufac-
turing and testing procedures, repair should be carried
out by an authorised after-sales service centre for Bosch
power tools.
In all correspondence and spare parts orders, please al-
ways include the 10-digit order number given on the
nameplate of the machine.
English - 3
