BECSys 2 Manual do operador - Página 6
Procurar online ou descarregar pdf Manual do operador para Controlador BECSys 2. BECSys 2 14 páginas.
Operator's Manual
A – 1: The Program Menu
A – 1.1: Entering the Program Menu
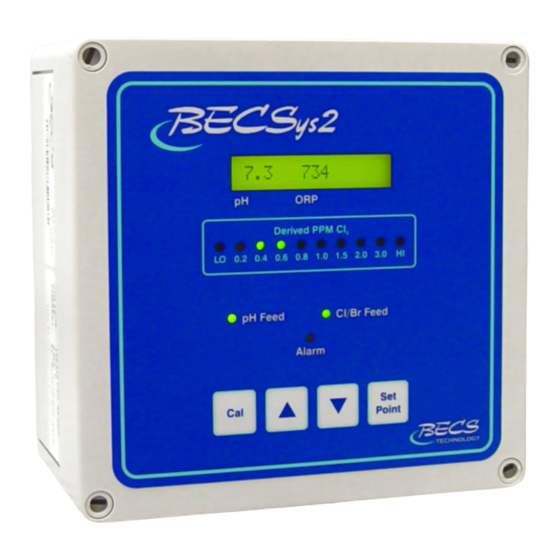
To enter the program menu, press and hold both the
Cal and Up keys for 3 seconds. When the LCD
screen clears, release the keys and "Program" should
appear on the display. Press the Up key to enter the
menu and press the Down key to exit. Use the Up
or Down Arrows to scroll to the setting you wish to
change. Press the Cal key to select the setting, then
use the Up or Down Arrows to modify the value.
Press the Cal key again to enter the new value and
return to the menu. To exit the program menu,
scroll to the "Exit menu" option and depress the Cal
key.
NOTE: After two minutes of no programming
activity, the Time-Out feature will
automatically exit the programming
menu.
A – 1.2: Selecting Language
The BECSys2 can be programmed to display in
three different languages. Once you have entered
the program menu the screen will display
Language ENG, signifying that the display is
currently set to English. Pressing the Cal key will
display a question mark (?) before the language.
Use the up and down buttons to select between
ENG (English), ESP (Spanish), and FRA (French),
and press the Cal key to select the language you
would like to use for the display.
A – 1.3: pH High Alarm Point
Pressing the down arrow displays pH High
followed by the current pH high alarm point. To
change this setting, press the Cal key, use the up or
down arrows to input the value you would like,
then press the Cal key again to save the new value.
Page 4
9487 Dielman Rock Island Industrial Dr. St. Louis, MO 63132 Tel:(314) 567-0088
Section A: Programming the Controller
A – 1.4: pH Low Alarm Point
Pressing the down arrow displays pH Low
followed by the current pH low alarm point. To
change this setting, press the Cal key, use the up or
down arrows to input the value you would like,
then press the Cal key again to save the new value.
A – 1.5: ORP High Alarm Point
Pressing the down arrow displays ORP High
followed by the current ORP high alarm point. To
change this setting, press the Cal key, use the up or
down arrows to input the value you would like,
then press the Cal key again to save the new value.
A – 1.6: ORP Low Alarm Point
Pressing the down arrow displays ORP Low
followed by the current ORP low alarm point. To
change this setting, press the Cal key, use the up or
down arrows to input the value you would like,
then press the Cal key again to save the new value.
A – 1.7: ORP/ppm
Pressing the down arrow displays ORP/ppm
selection. This option selects whether to use an
ORP set point or a ppm set point for the main
Cl/Br feed control. It is set to ORP by default.
To change this setting, press the Cal key, use the
up and down arrows to change between ORP and
ppm, then press the Cal key again to save the new
value. This option is only available if configured
to allow ppm control.
A – 1.8: Exiting the Menu
Pressing the down arrow displays Exit menu.
Pressing the Cal key exits the programming menu.
Rev: D08