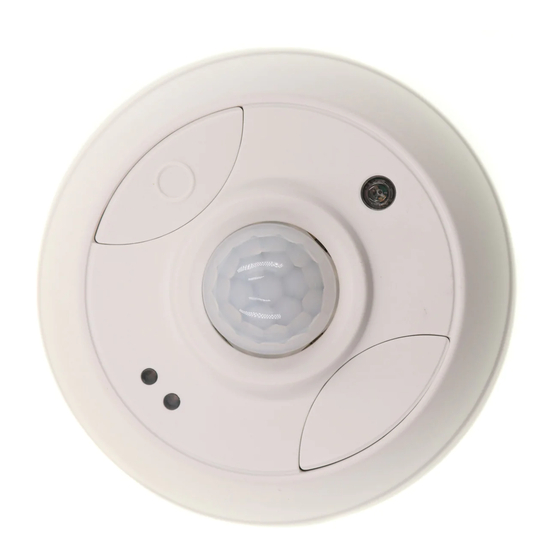
Daintree DT108 Manual de instalação - Página 2
Procurar online ou descarregar pdf Manual de instalação para Acessórios Daintree DT108. Daintree DT108 4 páginas. Wireless occupancy sensor, ceiling mount

Daintree
Networked Wireless Occupancy Sensor, Ceiling Mount (WOS2-CM)
®
1
Installation Process (continued)
A. Walk test the sensor. Walk outside the coverage area and
wait for the red LED to stop flashing. Step inside the desired
coverage area and observe the red LED.
B. Repeat from various positions in the coverage area.
C. If necessary, adjust the sensor as described in Adjustments:
PIR Sensitivity. Repeat the walk test.
D. If you do not observe the proper behavior,
see Troubleshooting.
7. Exit Installation Test Mode. Momentarily press the Utility button
again, or wait 5 minutes for the mode to time out..
8. Complete the installation by resetting the device: press and
hold the Utility button for 5 seconds. Release the button when
the Network LED begins to flash rapidly. The sensor attempts to
join a ZigBee network for up to 30 seconds. See LED Operation
and Joining the ZigBee Network.
LED Operation
Green LED:
Description
Network Indicator
Rapid flash (12 times
Device is trying to join ZigBee
per second) for up to 30
network. If it fails to join, it will
seconds
retry after 15 minutes.*
Device successfully joined a ZigBee
Solid for 10 seconds
network.
Utility button was pressed to initiate
Flashes once
Installation Test Mode.
Daylight level is greater than the
While unit is in
hold-off level set with trimpot.
Installation Test Mode,
turns On
Flashes twice
Utility button was pressed for
2 seconds and the device is currently
joined to a network.
On for 2 seconds every
The batteries are low; replace
30 seconds
the batteries.
Red LED: Installation
Description
Test Mode, Motion
The red LED flashes each time sensor
While unit is in
detects occupancy. Test mode times out
Installation Test Mode,
after 5 minutes.
Flashes
Normal operation: either not
Off
detecting occupancy, or detected
occupancy and in Off Delay. LED
turns on with initial occupancy.
* A network join can be retriggered manually at any time using
one of the following methods:
• Reset to factory defaults: This causes the device to leave any
network to which it is currently joined. Following the reset, the
device attempts to join a network. Press and hold the Utility
button for 5 seconds. Release the button when the Network
LED begins to flash rapidly.
• Activate device: Press and hold the Utility button
for 2 seconds. If the device is already joined to a network,
the Network LED flashes twice. If the device is not joined to a
network, the Network LED flashes rapidly and the device will
attempt to join a network. For more information about
configuring the lighting control network, see the instructions
and on-line help provided with the DCS application.
2
Joining the ZigBee Network
After successfully completing the Installation Test the occupancy
sensor is ready to communicate with the Daintree Wireless Area
Controller (WAC) and the Daintree Controls Software web-based
lighting management user interface.
For more information about configuring the lighting control
network, see the instructions and on-line help provided with
the DCS application.
3
Placement
The PIR sensor can only be installed indoors. It is extremely
important to select the appropriate installation location to avoid
false occupancy reporting while obtaining the best sensitivity.
A proper installation should meet the following conditions:
• The PIR sensor is typically mounted 6.5' to 10' (2m to 3m)
from the floor. The height affects the coverage area.
• The PIR sensor must be 4' to 6' away from hot or cold source
such as heat or air conditioner vents, refrigerators, stoves, etc.
The PIR sensor should not be installed in places with strong
airflows.
Coverage Pattern, WOS2-CM-S, Standard Coverage
Installation Height
Detection Angle
Detection Radius
2
Installation Guide
10' (3m) from floor
100°
up to 13' (3.9m)
