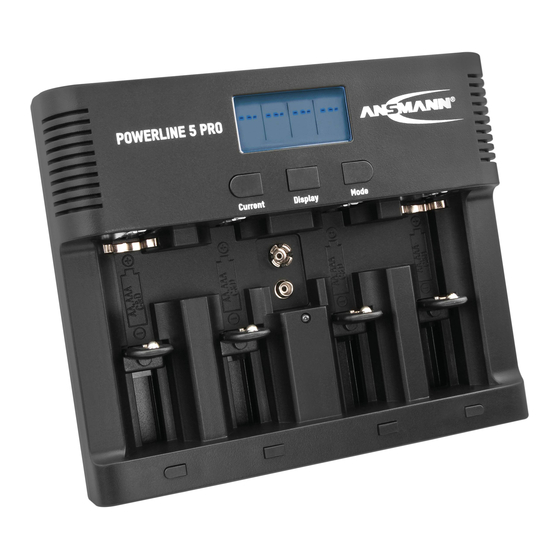
ANSMANN POWERLINE 5 PRO Manual - Página 3
Procurar online ou descarregar pdf Manual para Equipamento de iluminação ANSMANN POWERLINE 5 PRO. ANSMANN POWERLINE 5 PRO 5 páginas.
Também para ANSMANN POWERLINE 5 PRO: Manual (20 páginas)

INSTRUCTION MANUAL POWERLINE 5 PRO
FOREWORD
Dear Customer,
Thank you for purchasing the multifunction POWERLINE 5 PRO
charger. These operating instructions will help you to get the
best from your charger. We hope you will be happy with your new
charger,
Your ANSMANN Team
SAFETY INSTRUCTIONS
Please read these operating instructions carefully before
using the charger!
Do not use the device if there are any signs of damage to the
housing, plug or cable. If you do find any damage to the unit,
please contact an authorised dealer!
Use only with NiMH/NiCd cells. Other battery types may ex-
plode!
Please make sure batteries have been inserted with the cor-
rect polarity (+/-) prior to use!
Please note that due to the high charging current, only high
performance brand rechargeable batteries should be char-
ged with this device! Low quality cells may leak and damage
the charger and invalidate the warranty!
Keep the charger in a dry place away from direct sunlight!
In order to avoid the risk of fire and/or electric shock, the
charger must be protected against high humidity and water!
Before cleaning the unit, disconnect it from the mains and
only use a dry cloth!
Never attempt to open the charger!
Keep out of children's reach! Children should be supervised
to ensure that they do not play with the charger!
The device is not to be used by children or people with re-
duced physical, sensory or mental capabilities. In addition,
novice users who have not fully read these instructions
should be supervised or given instruction before use!
If the safety instructions are not followed, it may lead to
damage to the device or battery and could cause injury to
the user!
We recommend the use of ANSMANN rechargeable batteries
with this product!
TECHNICAL OVERVIEW
Charger for 1-4 AAA, AA, C or D and 1 9V E-block; includes
USB charging output (5V / 1000mA) that can be used at the
same time as charging batteries.
Suitable for NiCd, NiMH batteries
Reverse polarity protection
Trickle charging
Deutsch |
Italiano | Nederlands | Dansk | Slovenščina | Čeština | Slovenský | Polski
English
| Français | Pусский | Español | Português | Svenska
For worldwide use (100V-240V AC / 50-60Hz) and car use
(12V DC only. Not 24V used in trucks)
FOR ROUND CELLS:
Multifunction clear LCD display with backlight
Adjustable charging current for each charging slot
400mA, 600mA, 800mA for 1-4 rechargeable batteries
400mA, 600mA, 800mA, 1500mA, 1800mA for 1-2
rechargeable batteries
Individual charging programs for each charging slot:
CHARGE
DISCHARGE (discharges battery before charging to
minimize the "memory effect" of batteries
REFRESH (cycle of charging and discharging to refresh
old batteries)
TEST (fully charges battery - discharge battery and
measures capacity recharges battery)
Capacity measurement in mAh/Ah
The selected charging program can be easily read on the LCD
display
Microprocessor controlled charging and supervision of each
battery
Individual monitoring of the current parameters:
VOLTAGE (V)
CAPACITY (mAh/Ah)
TIME (hh:mm)
CURRENT (mA)
Multiple over charging protection per bay and auto cut-off
function
Faulty cell detection / accidental Alkaline insertion detection
FOR 9V RECHARGEABLE BATTERY:
LED charging indication
Charging current 15mA
Automatic termination of the charging process by 24 hour
timer
OPERATION
USING THE CHARGER IN A MAINS POWER OUTLET
(SEE ILLUSTRATION [1]
Insert the input plug included on the two power contacts, located
on the power supply, and push the plug until it clicks in to place.
Please ensure that you hear the input plug click into the power
supply to ensure the unit is safe to use. Connect the power sup-
ply to the charger with the cable supplied. Finally, connect the
power supply to the mains (100-240V AC 50-60Hz).
To change the input plug, push the locking lug below the plug
(e.g. using a pen) until the plug can be moved slightly upwards.
Then remove the plug.
