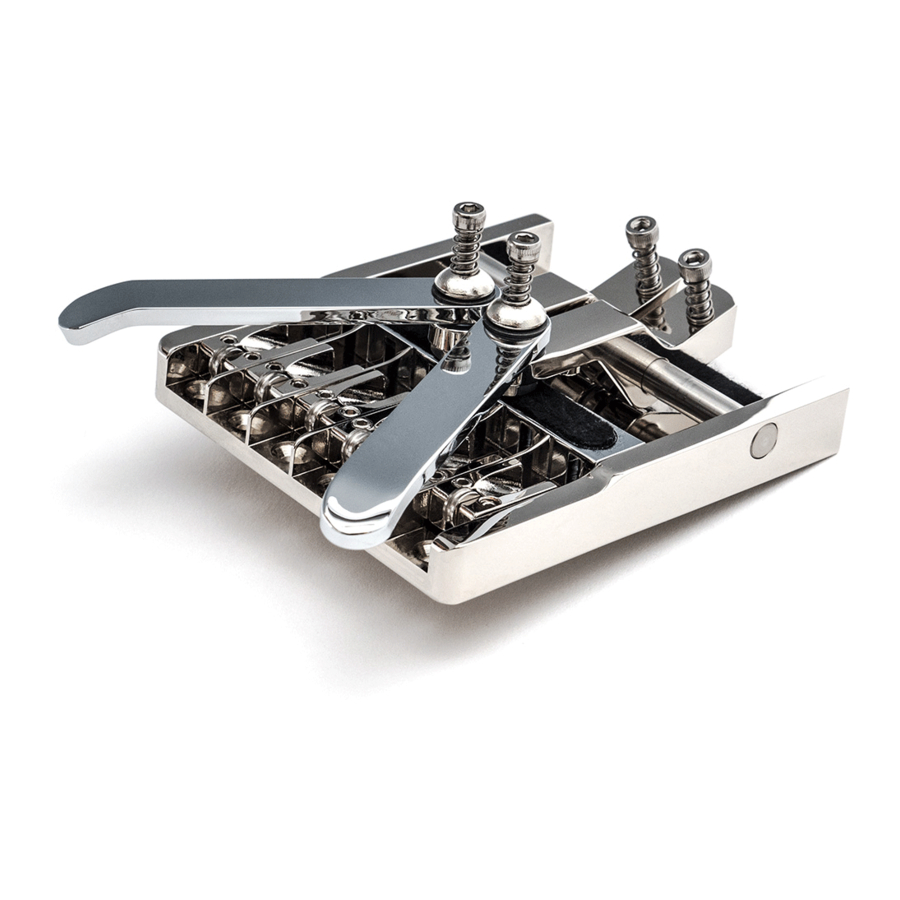
Duesenberg MULTIBENDER Manual - Página 2
Procurar online ou descarregar pdf Manual para Acessórios para instrumentos musicais Duesenberg MULTIBENDER. Duesenberg MULTIBENDER 2 páginas.

The rear two attachment holes shall not be used. Instead
use the enclosed mounting bracket to secure the Multi-
bender under the lip of the tremolo routing. The bracket is
screwed into the base plate with the supplied Allen screw.
The metal ear on the right side of the base plate is meant to
cover the visible part of the routing.
Mounting Bracket
Installed Multibender
If you decide to remove the Multibender and re-install the
original tremolo no visible marks will have been left on the
guitar. The six mounting holes will however need to be
re-drilled.
Stringing
Align each lever so that the string runs straight through
the center support under the roller and then over the brid-
ge saddle. There are no rollers for the low E and A string.
If the pitch of the string is to be raised by the bender, then the
ball-end needs to be inserted at the end of the lever. If the
pitch is to be be lowered, the other string mounting hole in
front of the axle should be used. The string should then be
threaded through the center support and over the saddle.
Interval adjustment
Rest position adjustment
Rear string slot
The non-levered strings are fed directly into the center
support.
The levers that lower the pitch of a string require an
extra spring which is inserted underneath. The spring must
be clamped between the small pin on the lever and the
corresponding screw head on the base plate.
Lever spring
This somewhat tricky job is made easier if you first unscrew
the rear tuning screw completely so that you can lift the
lever as far as possible. Then push the lever in question side-
ways slightly out of its position, clamp the spring and then
push the lever back into place.
Adjustment
The string height is adjusted using the two 1.5mm Allen
screws near the front of the saddle. To adjust the intonation
loosen the third Allen screw (first loosen the string tension!)
and push the saddle into the proper position. Then push
down the end of the saddle and re-tighten the screw.
One screw to lock the saddle
Front string slot
Two screws for height adjustment
The two longer threaded screws are used to adjust the ad-
justment range of the multibender levers. The rear screw
determines the rest position of the lever. The front screw
is used to set the interval by which the string should be
detuned when the lever is operated.
To adjust the lateral mobility of the front lever section, the
front screw incl. spring must be removed. Then use a 3mm
hex wrench to adjust the strength of the lever (see photo
below).
The large nut on the bottom holds everything together
and must not be loosened under any circumstances!
3mm hex screw
Additional levers for the Multibender as well as other acces-
sories are available directly at the Duesenberg Store:
store.duesenberg.de
Duesenberg Guitars - Hannover, Germany
duesenberg.de
