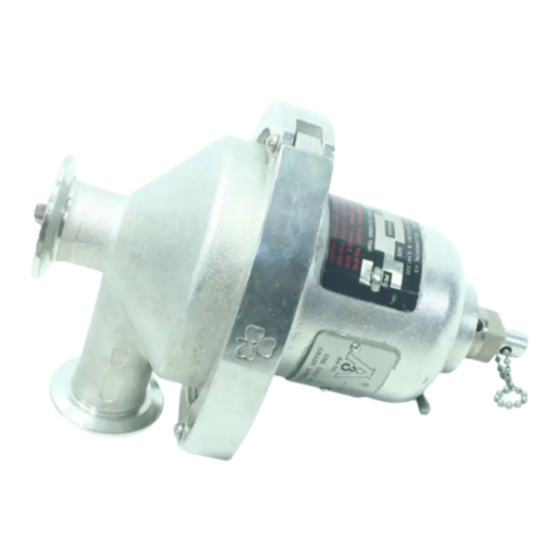
cashco C-PRV Manual de instalação, operação e manutenção - Página 3
Procurar online ou descarregar pdf Manual de instalação, operação e manutenção para Controlador cashco C-PRV. cashco C-PRV 9 páginas. Pressure reducing regulator

Do not apply spring load or operate regulator with
hitch pin (15) removed from top of guide post (18).
Pre ma ture di a phragm failure will re sult.
5. Loosen thumbclamp screw (13) and remove.
For Opt-80: 2 piece clamp (13A): Loosen and
remove clamp nuts (13B), washers (13D),
bolts (13C) and clamps (13A). See Figure 1.
6. Place matchmarks between body (1) and
spring chamber(2) to assist in final orientation
when reassembled.
7. Lift spring chamber (2) vertically up and off
guide post (18) and body (1) and set aside.
NOTE alignment of spring button (4) tab (ears)
with slot guides inside spring chamber (2).
8. Remove bearing seal (22). Lift up to remove
adjusting screw assembly (5), spring button
(4) and spring (7) off guide post (18).
9. Grasp cap (5.1) of adjusting screw assembly
with hand and lift up to separate cap (5.1) from
(5.3) to reveal and remove two u-cup seals
(5.4). Do Not remove dowel pin (5.2).
10. Install two new guide seals (5.4) in adjusting
screw cap (5.1). NOTE: There are two sizes
of u-cup seals - install the seal with the bigger
diameter spring first, open face into the wall
of the cap recess. Ensure that the u-cup is
pressed all the way in. Install the second u-cap
seal, open face exposed to face of adjusting
screw (5.3). Look into the hole to confirm that
the white seal material is showing and not the
spring material. (Spring side of u-cup should
be visible.
11. Slide adjusting screw cap (5.1) with new u-cup
seals (5.4) and adjusting screw (5.3) together,
use the dowel pin (5.2) for alignment. NOTE;
Top end of pin (5.2) should be flush with top
surface of adjusting screw cap (5.1). Place
new seal (22) on adjusting screw cap (5.1).
Set parts aside for final assembly later.
12. Remove set screw (19) rotate CCW. Rotate
guidepost (18) CCW and remove.
For 1" Investment Cast Body:
a. Remove spacer (21).
b. Remove set screw (24) CCW.
IOM-C-PRV
CAUTION
13. For Metal Seat: Place a wrench on flats of the
adapter nut (20) and rotate CCW to remove.
For Composition Seat: Use a wrench to
secure the flats on the top of the stem (17.1).
Place a wrench on flats of the adapter nut (20)
and rotate CCW to remove.
14. Remove pressure plate (3), diaphragm (16)
and diaphragm spacer (26). NOTE: Correct
orientation of spacer (26) has the side with
the I.D. radius facing towards the clamping
surface of the plug (17).
15. Lift body (1) over end of plug (17).
16. Inspect seating surface of plug. For Metal
Seat: Replace plug if surface is worn or
damaged.
For Composition Seat: Use a wrench to
secure the flats on the top of the stem (17.1).
Rotate the stem CCW to remove it. Remove
seat disc (17.2) from tail piece (17.3).
17. Clean parts in accordance with owner's
specifications.
Owner's cleaning solution must be com pat i ble with
regulator trim materials.
18. Secure bottom part of plug (17) or tailpiece
(17.3) in a smooth jawed vise. Set body (1)
over top of plug. Ensure that the plug or seat
of tail piece is in contact with the seating area
of the body (1) and the face of the inlet flange
of the body (1) is resting on the vise.
For Composition Seat:
of medium strength, Food Grade threadlocker
on threaded end of stem (17.1). Insert threaded
end of stem into tail piece, rotate CW tight fit.
19. Install diaphragm spacer (26) on plug (17).
Place new diaphragm (16) with convolution
side facing up, onto plug (17) and fit it around
the diaphragm spacer (26). Align tab on O.D.
of diaphragm (16) with the tab slot cut in the
body flange lip.
20. Lay pressure plate (3) on top of diaphragm
(16).
21. Apply Emhart Bostic White Food Grade "Never
Seeze" or equivalent to threaded end of plug
(17). Thread adapter nut (20) onto plug (17)
and tighten to 60 in-lbs of torque.
CAUTION
Place a small amount
3
