Datavideo MCU-100 Manual do utilizador - Página 9
Procurar online ou descarregar pdf Manual do utilizador para Controlador Datavideo MCU-100. Datavideo MCU-100 18 páginas. Multi-camera controllers for panasonic cameras
Também para Datavideo MCU-100: Manual de início rápido (2 páginas)

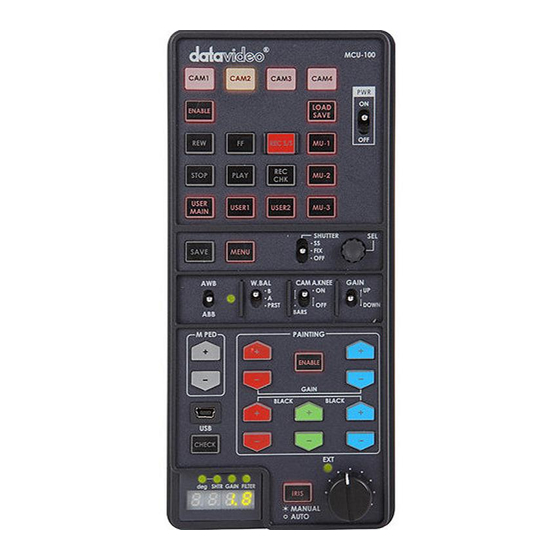
MCU-100 Keyboard Guide
Power switch
Use this switch to power the MCU-100 On or Off.
Camera selection
Select the button for the camera that you wish to control.
MCU-100 Memory stores
Using the LOAD SAVE button it is possible to transfer the current setting
from one camera to another, see
MU-1, MU-2 and MU-3 can be used to store settings within the MCU-
100.
Recorder / Playback functions
ENABLE when selected activates the recorder / playback functions of
the chosen camera. This includes rewind [REW], fast forward [FF],
record start/stop [REC S/S], stop, play and record check [REC CHK].
REC CHK makes it possible to check what has just been recorded (2
seconds REC review) by pressing this button during REC pause.
With a DVCPRO HD camera recorder, the tape is cued to provide
continuity from one shot to the next when this button is pressed while
playback is paused.
User defined functions from the Camera
These buttons match the user defined functions of the USER MAIN,
USER1 and USER2 buttons on the chosen camera. Operation will
follow the function that was assigned by the user in the chosen cameras
OSD menu. NOTE: USER 2 button will work as a thumbnail ON switch
for the AG-HP255 and AG-HPX371. MENU button is back lit orange at
this time.
Data save – save defined functions from the camera
When this function is enabled, the button is back lit orange and the
MCU-100 settings are stored into the chosen camera.
If this function is disabled - the button is back lit green; any chosen
MCU-100 settings will not be stored in the chosen camera. The current
camera/MCU-100 settings will be reset to defaults when the power of
the unit or the camera is turned off.
Menu
When this function is enabled, the button is back lit orange and the OSD
menu is shown on the LCD panel/view finder of the camera. This OSD
menu may also be shown on the AD-1's composite output (if supported).
Some camera models also allow this OSD menu to be displayed on the
SDI or HDMI output of the chosen camera. Refer to your cameras
manual for more details on its OSD Menu outputs and change settings
where necessary.
Shutter switch
To change operation of the shutter.
OFF : To turn off the shutter operation.
FIX : To turn on fixed shutter mode.
SS : To turn on synchro scan mode.
9
page 13
for details.
