Cook's essentials K48311 Manual - Página 7
Procurar online ou descarregar pdf Manual para Utensílios de cozinha Cook's essentials K48311. Cook's essentials K48311 15 páginas. Butter sprayer
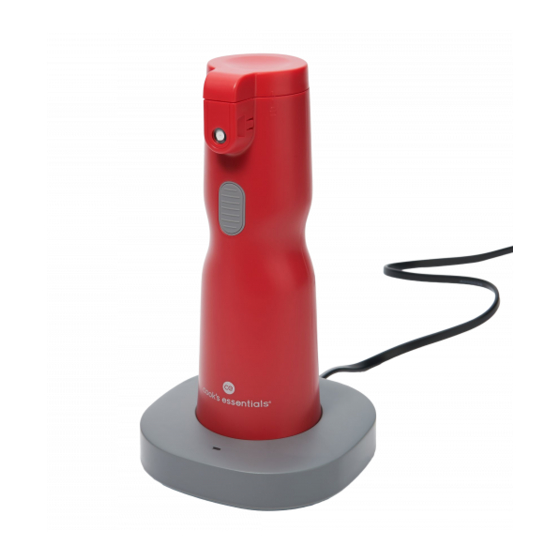
PAGE TITLE
Charging & Melting Chart
Below are two charts to help you read the Charging Indicator Light and Melting Indicator Light.
BASE LIGHT
LIGHT COLOR
solid or BLINKING
Blue
Solid
Orange
Solid
BUTTER SPRAYER LIGHT
LIGHT COLOR
solid or BLINKING
Orange
Blinking
Orange
Solid
Blue
Blinking
Blue
Solid
Red
Blinking
Red
Solid
12 ∙
Charging & Melting Chart
INDICATION
Power on
The Butter Sprayer is connected to the base
INDICATION
The Butter Sprayer needs to be heated
The Butter Sprayer is heating
The butter is melting and the Butter Sprayer is ready
for use
The butter is completely melted and the Butter
Sprayer is ready for use
Low battery, charge the sprayer
This indicates that there is an issue with the battery.
Stop use immediately and contact customer service
Cleaning & Maintenance
Always disconnect the appliance from the power outlet and allow it to cool completely before cleaning.
The Butter Sprayer is not dishwasher safe.
Never immerse the Power Cord or Charging Base in water or other liquids, or allow moisture to contact these
parts.
To clean the exterior of the Butter Sprayer, wipe the Main Body with a damp cloth. Never use rough, abrasive,
or poisonous cleaners.
To clean the filter of the Butter Sprayer, soak and wash with hot water.
To clean the interior of the Butter Sprayer remove any excess butter with a nylon, silicone, or rubber utensil.
Once the butter sprayer is emptied, place it on the charger with the power cord plugged in. When the
indicator light begins flashing blue, fill the butter sprayer with hot water and spray into a sink. Repeat until the
interior chamber is clean.
The Butter Sponge is included to prevent butter from dripping onto the sprayer. Extra sponges are included
as replacements.
A spare Spray Nozzle is included as a replacement for a clogged, damaged or lost Spray Nozzle. To
replace the Spray Nozzle, first, remove the Nozzle Cap and Butter Sponge. Then, unscrew the Spray Nozzle
counterclockwise. Then, unscrew the Spare Nozzle from the Charging Base by unscrewing counterclockwise.
Then, screw the Spare Nozzle clockwise onto the Main Body.
It is recommended to place the Butter Sprayer on the Charging Base for an hour after first use. This will fully
charge the Butter Sprayer for future use.
Your Butter Sprayer comes with an automatic shut-off feature that will activate if the Butter Sprayer is left
unused for 20 minutes, or if the Butter Sprayer is left charging for more than an hour. This will turn the
heating element off and your butter will cool.
maintenance
Cleaning & Maintenance ∙
13