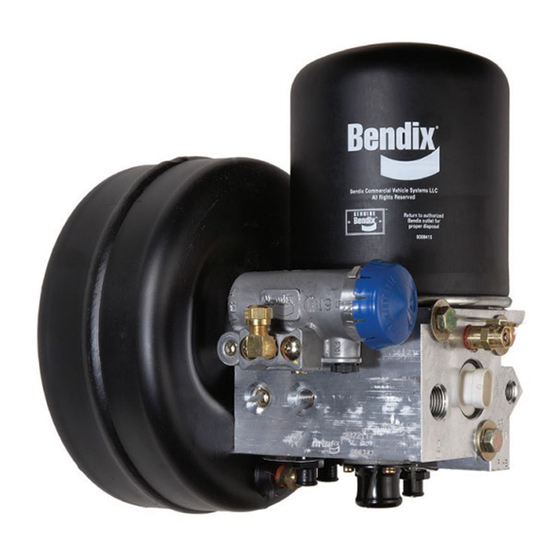
BENDIX SD-08-2418 Manual - Página 10
Procurar online ou descarregar pdf Manual para Desumidificador BENDIX SD-08-2418. BENDIX SD-08-2418 17 páginas.

ROADSIDE INSPECTION
In the event of a roadside inspection the system behavior
will be as follows: When the system is charged to
governor cut-out and then one reservoir drain valve is
opened, initially both reservoir gauges will fall; however,
the Bendix
AD-IS
air dryer primary and secondary
®
®
pressure protection valves will close at pressures above
70 psi, protecting the remaining brake circuit from further
loss of pressure.
TEMPORARY AIR DRYER & RESERVOIR SYSTEM
BYPASS
To temporarily bypass the air dryer, follow these procedures:
Adhere to the General Safety Guidelines outlined
elsewhere in this document.
Make sure that all residual pressure has been released and
the air dryer purge reservoir has been drained to 0 psi,
then remove the air supply line from the compressor to the
inlet port (1/IN). Remove the safety valve from the Bendix
AD-IS air dryer (see Figure 1 for location). Note that a short
puff of trapped air may vent from the safety valve port when
removing the valve. Install a T-fitting into the port. Using
any adapters necessary, reinstall the safety valve in one of
the branches of the T-fitting. Using any adapters necessary,
install the air supply line into the remaining T-fitting port.
After testing the T-fitting for any air leakage – by using a
soap solution after charging to system cut-out pressure (a
1" bubble in 10 seconds is acceptable) – the vehicle may
be returned to temporary service.
Note: This is a temporary bypass of the air dryer. Full
repair of the unit must be carried out at the earliest
opportunity.
With the air dryer removed from the system, contaminants
will be entering the air brake system: reservoirs will need to
be manually drained daily until the repairs are completed.
At the end of each working day, park the vehicle and slowly
drain pressure through the drain valves – leave open to
the atmosphere – for several hours, if possible. When
repairs are carried out, be sure to check that all reservoirs
(including the air dryer purge reservoir) are emptied of all
contaminants.
If, after bypassing the air dryer & reservoir system, the
system pressure still does not build, use the following
procedure to remove, clean, and reinstall the delivery
check valve.
DELIVERY CHECK VALVE CLEANING PROCEDURE
(Note: This is only required if system pressure does not
build after temporary bypass is completed.)
Refer to Figure 6 throughout the following procedures.
Depressurize the air brake system following the General
Safety Guidelines outlined elsewhere in this document.
10
Maintenance Kits
Kit Description
Delivery Check Valve Replacement Kit
Desiccant Cartridge Replacement Kit (Standard)
Desiccant Cartridge Replacement Kit - Bendix
AD-IS
PuraGuard
air dryer (can be used to
®
®
replace the standard cartridge)
Drain Valve
Governor and Check Valve Replacement Kit
Governor Gasket
Heater & Thermostat Replacement (12 volt)
Heater & Thermostat Replacement (24 volt)
Bendix
PuraGuard
Oil Coalescing Desiccant
®
®
Cartridge Service New Kit
Mounting Bolt Kit
Protective Boots (for pressure protection valves)
Safety Valve
Splash Shield Kit (includes bracket and cover)
Splash Shield Cover
Silencer Kit
Wiring Harness & Splice Kit
Purge Valve
Assembly Type
Purge Valve Assembly for
climate conditions above
-40°C (-40°F)
Arctic Purge Valve Assembly
for climate conditions of
-40°C to -50°C
(-40°F to -58°F)
Also, always depressurize the air dryer purge reservoir
before servicing the air dryer.
This procedure does not require removal of the Bendix
AD-IS air dryer & reservoir from the vehicle.
1. Remove the line from the governor and mark for easy
reinstallation.
2. Remove the bolts attaching the governor to the AD-IS
air dryer & reservoir system and retain for reassembly.
3. Remove the governor from the air dryer. Be aware that
a short puff of trapped air may vent when the governor is
removed. Retain the governor gasket for reassembly if
a new governor gasket is not available. Remove and
retain the o-ring from the adapter.
4. The spring / delivery check valve can now be removed.
5. Remove and retain the o-ring from the check valve
body.
Piece No.
5004052
5008414
®
5008414PG
5004961N
5004049
5007834
109495
109496
K020366
5009233
5005163
800350
K052469
5005266N
K021189
109871N
Service
Configuration
Kit Pc. No.
Bendix
AD-IS
®
®
K022105
Air Dryer
AD-IS
EverFlow
®
®
K031560
Module
AD-IS
Discharge
®
K031562
Line Unloader
AD-IS
Air Dryer
K031559
®
AD-IS
EverFlow
®
®
K031561
Module
AD-IS
Discharge
®
K031563
Line Unloader
