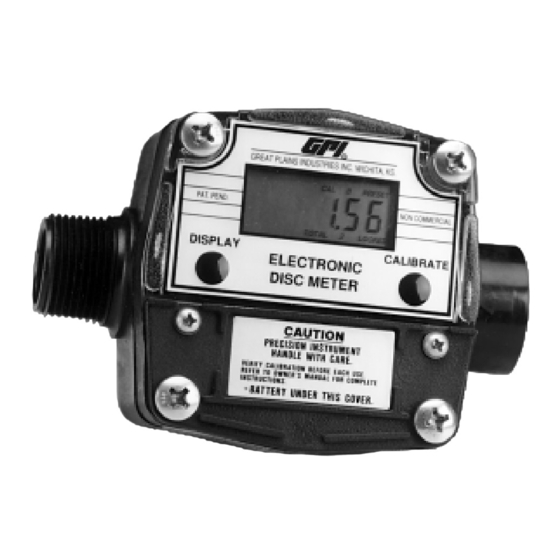
Great Plains Industries FM-300HR Manual do Proprietário - Página 13
Procurar online ou descarregar pdf Manual do Proprietário para Instrumentos de medição Great Plains Industries FM-300HR. Great Plains Industries FM-300HR 16 páginas. Electronic disc meter
SYMPTOM
C. NORMAL FLOW-
RATE BUT
METER DOES
NOT COUNT
(Meter comes on
when DISPLAY
button pushed.)
D. REDUCED FLOW- 1. Meter clogged with
RATE & METER
DOES NOT
COUNT
(Meter
comes on when
DISPLAY button
pushed.)
E. CANNOT GET
METER INTO
FIELD CALIBRA-
TION
F. COMPUTER
BLINKS "NO"
AFTER FIELD
CALIBRATION
G. METER
CONNECTIONS
LEAK
PROBABLE CAUSE
1. Field Calibration not
performed correctly
2. Nutator misaligned
3. Signal generator disc
missing or damaged
4. Computer defective
dried liquids
1. Factory Calibration
(PRESET) curve active
2. Button push sequence
incorrect
3. Computer circuit
board defective
1. Flowrate too low
2. Button push sequence
incorrect
1. Meter installed without
thread sealant
2. Connecting threads
damaged
3. Screws on back of
meter loose
4. Coverplate O-ring
missing, damaged, or
improperly installed
5. Meter housing
cracked
CORRECTIVE ACTION
Field calibrate again or select Factory
Calibration.
Disassemble meter and install nutator
again. Ensure O-ring and retainer clips
are in place.
Replace signal generator disc. Contact
the factory.
Contact the factory.
Remove meter. Disassemble and clean
dried chemical from the nutator. Make
sure the nutating disc moves freely.
Assemble again.
Hold down CALIBRATE and push and
release DISPLAY until PRESET flag
goes off. Proceed using instructions in
the Calibration Section.
Make sure PRESET flag on readout is off.
Make sure CALIBRATE is held down
while DISPLAY is pushed. Hold both
buttons for 3 seconds. Readout will then
show dd-CAL. Release both buttons.
Proceed with calibration according to
Calibration Section.
Contact the factory.
Try again and increase flowrate to at
least 2 GPM (7 LPM).
Make sure PRESET flag on readout is off.
Make sure CALIBRATE is held down
while DISPLAY is pushed. Hold both
buttons for 3 seconds. Readout will then
show dd-CAL. Release both buttons.
Proceed with calibration according to
Calibration Section.
Remove meter. Wrap male connections
with 3 to 4 wraps of Teflon
patible sealing compound. Install again.
Remove meter and inspect threads. Re-
place damaged connections. If threads
are damaged, contact the factory.
Tighten screws. Torque to 25 to 35 in.
lbs.
Install O-ring on coverplate again.
Inspect housing for cracks. If cracks
present, contact the factory.
®
tape or com-
13