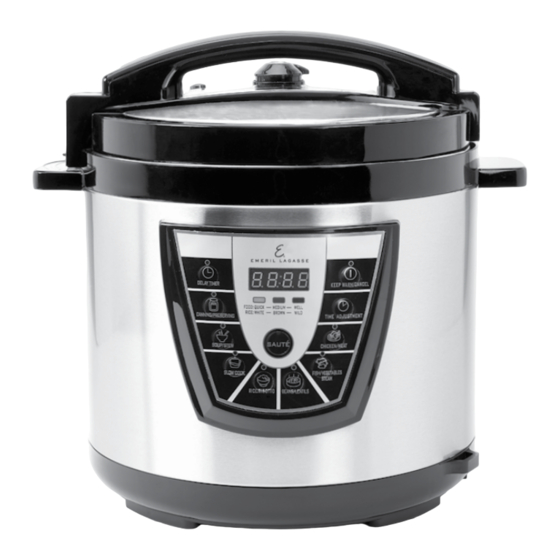
Emeril Lagasse PPC771 Manual do Proprietário - Página 9
Procurar online ou descarregar pdf Manual do Proprietário para Panela de pressão eléctrica Emeril Lagasse PPC771. Emeril Lagasse PPC771 17 páginas.

Preparing for Pressure Cooking
CHECK PARTS & ACCESSORIES
1. Before first use, remove parts and accessories
from the package and ensure all parts have
been included before discarding any packaging
materials. Remove all packing materials, such
as plastic film, cardboard, and stickers, on
the Pressure Release Valve and Condensation
Collector (see PARTS & ACCESSORIES, p. 8).
2. CLEAN INSIDE: Remove the Inner Lid from the
Pressure Lid by pulling the Knob. Remove the
Rubber Gaskets from the Inner Lid (see INNER
TEST RUN CONDUCTED WITH WATER ONLY
FIG. A
FIG. B
(Float Valve Rubber Gasket)
(Condensation Collector)
Before first use and periodically afterward, perform a test
run conducted with water only to ensure that the Unit is
operating properly. To perform the test:
1. Place the Unit on a clean, flat surface.
2. Attach the Condensation Collector to the side of
the Unit by sliding it into the slots (see Fig. B).
NOTE: The Condensation Collector may be
preassembled.
3. Remove the Pressure Lid. Place the Inner Lid Outer
Gasket around the outside of the Inner Lid and the Inner
Lid Center Gasket in the center hole. Ensure the Float
Valve and Rubber Gasket are in place in the Pressure
Lid (see INSTRUCTIONS FOR PRESSURE LID
ASSEMBLY, p. 14).
4. Place the Inner Pot in the Base. Pour 2 cups (473 ml) of
water into the Inner Pot.
16
Emeril Lagasse Pressure Cooker Plus™ | Models: PPC771, PPC772 & PP772P
LID ASSEMBLY, p. 14). Wash the Inner Lid,
Rubber Gasket, Inner Pot, and other accessories
with warm, soapy water; rinse; and dry. NOTE:
Be sure to reattach the Rubber Gaskets (see
INNER LID ASSEMBLY and FLOAT VALVE
AND RED PRESSURE INDICATOR ASSEMBLY
sections) before reinstalling the Inner Lid.
Periodically check that the Inner Lid Rubber
Gaskets are not cracking, breaking, or stretching
and are properly installed.
5. Attach the Power Cord to Base and then a wall outlet
(see ATTACHING THE POWER CORD, p. 7). When the
Unit is first plugged in, "0000" will appear on the LED
Display. The Unit is automatically "ON" when plugged
in.
6. ATTACHING LID: With the LED Display facing you, place
the Pressure Lid on the Unit, aligning the Magnetic Safety
Sensor with the Condensation Collector (see Fig. C). Twist
the Pressure Lid counterclockwise about 30° to the Closed
position until the lid clicks into place (see Fig. D) and a
single beep sounds.
NOTE: The Magnetic Safety Sensor ensures that the
Pressure Lid is properly closed before the Unit can
pressurize. If the lid is not closed correctly when starting
a cooking cycle, a beeping noise will sound and the
word "LID" will appear on the display, indicating the lid
is either not properly attached or not fully closed.
7. CLOSE PRESSURE RELEASE VALVE: Rotate the
Pressure Release Valve until the
symbol aligns with
the arrow on the side of the valve (see Fig. E). If the
valve does not click or lock into place, the lid is not
secured and pressure will not build.
8. Once the lid is properly attached, select the Canning/
Preserving Button, which will automatically set a
10-minute cooking time. The LED Display will show a
"rotating effect," which indicates that the Unit is building
pressure. Allow pressure to build in the Unit.
Preparing for Pressure Cooking
9. When the Unit has reached full pressure, the Red
Pressure Indicator on the lid will move to the "UP"
position (see Fig. G). CAUTION: DO NOT ATTEMPT
TO OPEN THE LID WHEN THE RED PRESSURE
INDICATOR IS UP. DO NOT TOUCH OR PRESS THE
RED PRESSURE INDICATOR DURING OPERATION.
Doing so will release hot steam and may cause injury.
10. SAFELY RELEASE PRESSURE: Select the Cancel
button. Use tongs or a similar utensil to rotate the
Pressure Release Valve counterclockwise from the
Closed position (
) to the Open position (
) (see
Fig. F). Allow all pressure to escape.
WARNING: KEEP YOUR BODY (FACE, ARMS,
TORSO) AWAY FROM THE PRESSURE RELEASE
VALVE AREA WHEN RELEASING PRESSURE TO
AVOID BEING EXPOSED TO THE STEAM RELEASED
FROM THE VALVE. FOLLOW THESE SAFETY
PRECAUTIONS WHEN RELEASING PRESSURE TO
PREVENT SERIOUS INJURY.
FIG. C
FIG. E
FIG. D
FIG. F
11. OPEN LID: When no steam is visible coming out of the
Pressure Release Valve, the Red Pressure Indicator will
drop to the Down position, indicating the Unit is not
under pressure and that the lid can be removed.(see
Fig. H). Open the lid by rotating the handle clockwise.
A single beep will sound. Lift the lid with the handle.
WARNING: PREVENT BURNS! DO NOT TOUCH
THE STAINLESS STEEL EXTERIOR. ONLY USE THE
BLACK HANDLE ON THE LID TO OPEN. CONTENTS
IN THE UNIT ARE HOT. ALWAYS OPEN THE LID
AWAY FROM FACE AND BODY.
12. Allow the water in the Inner Pot to cool. Remove and
empty the Inner Pot. Rinse and towel dry. WARNING:
DO NOT LIFT THE BASE TO REMOVE CONTENTS
from the Inner Pot. Lift the Inner Pot with caution when
contents are hot.
The Emeril Lagasse Pressure Cooker Plus is now
ready for use!
FIG. G
FIG. H
Emeril Lagasse Pressure Cooker Plus™ | Models:PPC771, PPC772 & PP772P
17
