Hidden 208119 Manual do utilizador - Página 4
Procurar online ou descarregar pdf Manual do utilizador para Câmara digital Hidden 208119. Hidden 208119 5 páginas. Camera and bug detector
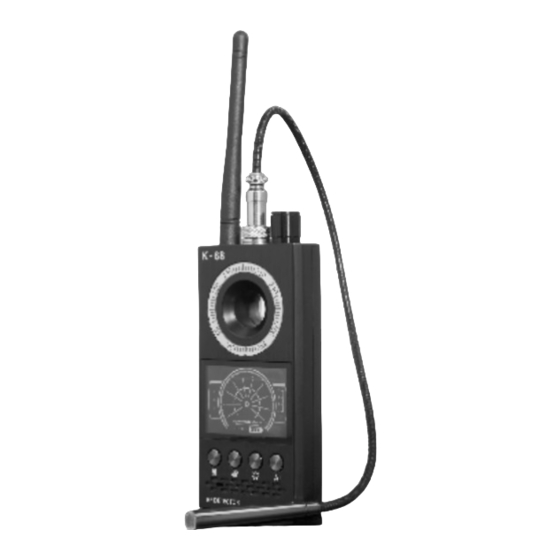
RF WIRELESS SIGNAL DETECTION
1. Turn on the Power and adjust the knob to the first stage of the signal strength pointer to
enter the standby mode. The code-type signal strength indicator is divided into 10 levels in 4
color-coded fields: White, Green, Yellow and Red:
White = Safe
Green = Suspicious
Yellow = Danger
Red = Locked onto signal source
2. During normal detection, first adjust the pointer to the white part of the LED display
(between 1 and 2). If there is a strong signal environment, the pointer will fluctuate back and
forth, and the buzzing alarm will be activated. The closer the detector gets to a transmitting
spy device, the louder and faster the alert becomes, until it becomes an uninterrupted alarm
(level 10).
3. The detection range can be set with the power/sensitivity knob. The higher the level of
adjustment, the wider the range. (If the buzzer alarm is not working when the red area is
adjusted, the pointer has no fluctuation. That is, there is no signal in a wide range.)
NOTE: If you are using this device in a city or metropolitan environment, you must adjust the
sensitivity knob gradually to check for suspicious devices. Otherwise, you may pick up stray
signals.
MAGNETIC FIELD DETECTION
1. Install the Magnetic Field Probe.
2. Turn on the power, and then press the Strong Magnetic Detection button.
3. When the purple light is on, the device is in magnetic field signal detection standby mode.
4. Use the magnetic field probe to scan a vehicle or a room. If a magnetic field (spying device)
is detected, the LEDs will light up and the buzzer will sound.
NOTE: Magnetic locators and eavesdroppers are mostly used in cars, often hidden in the bottom
of the car, or inside the car. Use the Magnetic Field Probe to search inside the car, under the car,
under the hood and in the trunk.
CAMERA DETECTION
1. Turn on the power, and then press the Camera Detection button.
2. The scanning function is turned on at this point, and the laser scanning light on the back
flashes.
3. Scan in a fixed range of the Scanning Window. If a suspicious reflective spot is found, the
buzzer will sound. Turn the sensitivity knob to widen the range if needed.
- 4 -