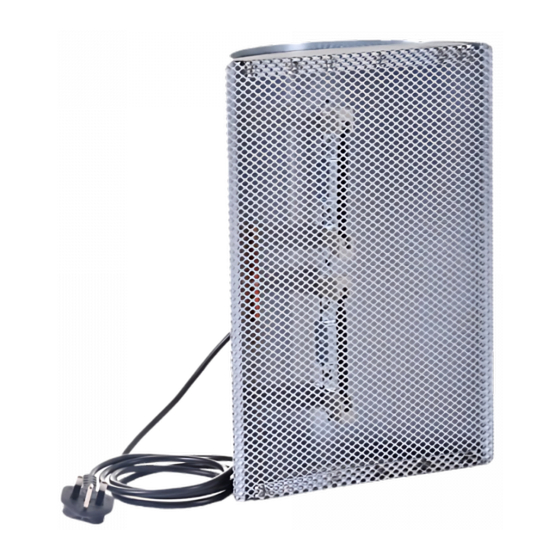
Maino Caldo Bello CB2 Instruções
Procurar online ou descarregar pdf Instruções para Acessórios Maino Caldo Bello CB2. Maino Caldo Bello CB2 2 páginas.

The linked image cannot be display ed. The file may hav e been mov ed, renamed, or deleted. V erify that the link points to the correct file and location.
ATTENTION!
a. The lamp should be hung from above. It should not be supported on boxes, cages
or any other kind of object. Neither should it be placed on the ground in direct
contact with the floor or with the animals.
b. MAKE SURE THE ELECTRIC POWER CABLE IS A WAYS OUT OF REACH OF THE
LIVESTOCK.
c. Attention: Please ensure that liquid does not come in contact with the
heater or bulb.
Hook a chain or a cable on the eyelets on the back of the lamp:
For chicks of hen, pheasant, duck, goose, bantam, turkey, quail, grey partridge and red partridge: hang the
lamp at ca. 50 cm. from the ground up to 20 days from their birth;
For chicks of Ratite (Ostrich, Emu and Rhea): hang the lamp at ca. 70 cm. from the ground up to 20 days
from their birth.
BEFORE CONNECTING THE APPLIANCE TO THE ELECTRICITY LINE AND/OR SWITCHING IT ON READ THE
FOLLOWING CAREFULLY. THE MAKER DOES NOT TAKE ANY RESPONSIBILITY FOR INJURIES OR FOR DAMAGES
THAT MIGHT OCCUR TO PEOPLE AND TO THE HEAT LAMP DUE TO LACK OF ATTENTION TO THE FOLLOWING
PROCEDURE. MAKE SURE THAT THE VOLTAGE IS THE SAME OF THE ONE WRITTEN ON THE TECHNICAL
INFORMATION PLATE. IF THE ELECTRIC INFORMATION PLATE STATES A DIFFERENT VOLTAGE CONTACT YOUR
DEALER. DO NOT CONNECT THE POWER CORD TO THE ELECTRICITY LINE AND DO NOT SWITCH ON THE
APPLIANCE ON. MAKE SURE THAT THE PLUG OF THE HEAT LAMP YOU USE TO CONNECT TO THE ELECTRICITY
LINE IS SUITABLE TO THE SOCKET YOU WANT TO USE; IF IT IS NOT SO CONTACT YOUR DEALER. DO NOT TRY
TO CHANGE THE PLUG BY YOURSELF, OTHERWISE THE GUARANTEE CERTIFICATE IS NOT VALID ANYMORE.
SWITCHING ON OF THE APPLIANCE: AFTER HAVING CHECKED ALL THE DIRECTIONS LISTED ABOVE AND ONLY
IN THE CASE THAT NO FURTHER INTERVENTIONS ARE NECESSARY PUT THE PLUG IN THE SOCKET to SWITCH
ON THE APPLIANCE. To switch off the appliance disconnect the plug from the socket.
PLEASE ENSURE THE PLUG IS REMOVED FROM THE ELECTRICAL SOCKET BEFORE
ATTEMPTING ANY MAINTAINANCE/CLEANING ON THE HEAT LAMP .
Place a thermometer (optional accessory not provided with the lamp) below the lamp and adjust the
temperature with the knob on the upper part of the lamp. Rotate it clockwise to increase it and anti-clockwise
to decrease it until you reach the required temperature. Once you finish the adjustment: Remove the
thermometer, place it in the proper case and keep it carefully for next use.
E LE C TRI C FE AT URE S : B RI T I S H P LUG 2P O L E+ E – 1 3 A . FU S E – NO R M SC O D E: BS 1363A/95
DO NOT DISASSEMBLE THE BUFFLE AND THE PROTECTION NET. DO NOT REMOVE OR
TOUCH THE INFRARED LAMP WITH YOUR HANDS. THERE IS GREAT DANGER OF BURN AND
DANGER OF BREAKING THE HEATING ELEMENT! ATTENTION: IT IS AN HALOGEN LAMP AT
HIGH TEMPERATURE COVERED WITH A SPECIAL INFRARED FILTER. DO NOT IMMERSE THE
STRUCTURE OR THE LAMP INTO WATER, DO NOT WET IT AND DO NOT WASH IT. CLEAN DRY
USING A BRUSH OR COMPRESSED-AIR.
Call the technical assistance. Together with the heating bulb you will receive the instructions to change it.
Infrared heating lamp
CALDO BELLO CB1, CB2, CB3, CB4
INSTALLATION OF THE LAMP:
ELECTRIC CONNECTION:
HOW TO ADJUST TO THE REQUIRED TEMPERATURE:
TE CH NI C AL F E ATU RE S:
TE N SIO N: 2 30 Va c + 10 /- 15 %
TO TAL P OW ER C B 1 A ND C B 2: 0 .2 5 KW – C B 3 A N D CB 4: 0. 5 KW
HOW TO CHANGE THE LAMP:
C A L DO B E LLO H E AT LA M P
;
F R E Q UE NC Y: H z. 5 0 ±0, 5 %
