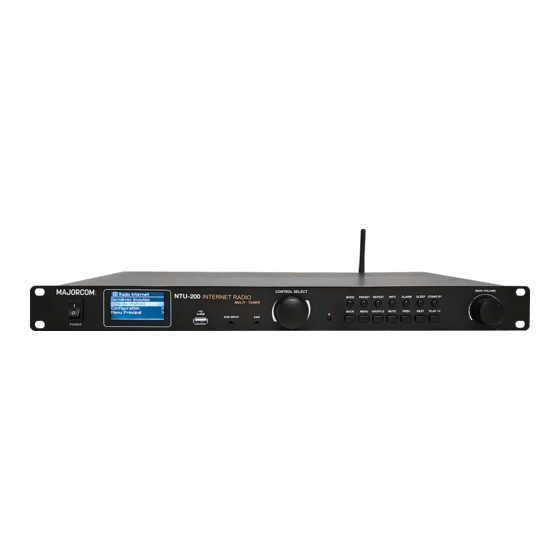
Majorcom: NTU-200 Manual do utilizador - Página 14
Procurar online ou descarregar pdf Manual do utilizador para Rádio Majorcom: NTU-200. Majorcom: NTU-200 17 páginas. Internet radio / dab / dab+ /
fm rds / usb reader
Também para Majorcom: NTU-200: Manual do utilizador (20 páginas)

26
NTU-200
Internet radio / DAB / DAB+ / FM RDS / USB reader
8.1
Selecting stations
To find a station, press Select . The frequency display starts to run up as the unit scans
the FM band. Alternatively, you can scan up or down by pressing and holding the
>> or << buttons or tune manually with quick presses, or by turning the Select
control.
Presets
To store an FM preset, press and hold Preset until the display shows the Save preset
screen. Select one of the 10 presets to save the currently playing station.
To select a preset, press Preset briefly, then select one of the listed preset stations.
When a preset station is playing, it shows Pn (P1, P2 etc) in the bottom right of the
screen.
8.2
Now playing information
While an FM station is playing, the screen shows one of the two following sets data:
•
If RDS information is available, by default the service name (i.e. station name) is
displayed. You can cycle through further RDS information by pressing Info .
Each time you press Info , another set of information is displayed, cycling
through RDS radio text, RDS programme type, frequency and today's date.
•
If no RDS information is available, the currently tuned frequency is shown.
8.3
Settings
Scan settings
By default, FM scans stop at any available station. This may result in a poor signal-to-
noise ratio (hiss) from weak stations. To change the scan settings to stop only at stations
with good signal strength, select Menu > Scan setting > Strong stations only? >
Yes.
Audio settings
By default, all stereo stations are reproduced in stereo. For weak stations, this may
result in a poor signal-to-noise ratio (hiss). To play weak stations in mono, select
Menu > Audio setting > FM weak reception: Listen in mono only > Yes.
9
Aux in mode
Aux in mode plays audio from an external source such
as an MP3 player.
To play audio with Aux in mode,
1. Turn the volume low on both the unit and, if
adjustable, the audio source device.
2. Connect the external audio source to the Aux In
3.5 mm stereo socket.
3. Either press Mode until the display shows AUX in or select Menu >
Main menu > AUX in.
4. Adjust the volume of the unit (and, if necessary, the audio source device) as
required.
User manual
5 6 , c h e m i n d e l a Fl a m b è r e · 3 1 3 0 0 To u l o u s e · F R A N C E · T é l . 3 3 ( 0 ) 5 6 1 3 1 8 6 8 7
F a x 3 3 ( 0 ) 5 6 1 3 1 8 7 7 3 · c o m m e r c i a l @ m a j o r c o m . f r · w w w . m a j o r c o m . f r
Internet radio / DAB / DAB+ / FM RDS / USB reader
10
Alarms and sleep
As well as a clock/calendar, there are two versatile
wake-up alarms with snooze facility, and a sleep
function to turn the system off after a set period. Each
alarm can be set to start in a particular mode.
To set the clock/calendar, see Getting started/setup .
10.1
Alarms
To set or change an alarm, either press Alarm or
select Menu > Main menu > Alarms.
Select the alarm number (1 or 2) then configure the
following parameters:
•
Enable: on/off,
•
Frequency: Daily, Once, Weekends or
Weekdays,
•
Time,
•
Mode: Buzzer, Internet radio, DAB, FM
•
Preset: Last listened or 1-10,
•
Volume: 0 – 20.
To activate the new settings, scroll down and select Save.
The screen shows active alarms with an icon at the bottom left.
At the set time, the alarm will sound. To temporarily
silence it, press SLEEP . You can change the snooze
period with the Select control if you like. The radio
returns to standby for the set period, with the silenced
alarm icon flashing.
10.2
Sleep
To set the sleep timer, select Menu > Main menu > Sleep then choose from
Sleep OFF, 15 MINS, 30 MINS, 45 MINS or 60 MINS.
Once you select a sleep period, the system returns to the main menu. Press Menu to
return to the Now playing screen.
11
Factory reset
A factory reset resets all user settings to default values, so time/date, network
configuration and presets are lost. However, the radio's current software version is
maintained, as is registration with the Internet radio portal. Internet radio favourites
therefore remain unless you re-register your radio with another account on the portal
website.
To perform a factory reset, select Menu > System settings > Factory reset
Proceed > Yes.
5 6 , c h e m i n d e l a Fl a m b è r e · 3 1 3 0 0 To u l o u s e · F R A N C E · T é l . 3 3 ( 0 ) 5 6 1 3 1 8 6 8 7
F a x 3 3 ( 0 ) 5 6 1 3 1 8 7 7 3 · c o m m e r c i a l @ m a j o r c o m . f r · w w w . m a j o r c o m . f r
27
NTU-200
User manual
