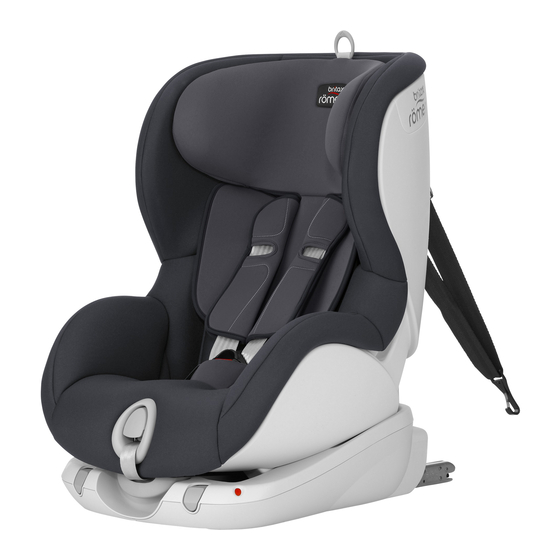
Britax TRIFIX Instruções para o utilizador - Página 2
Procurar online ou descarregar pdf Instruções para o utilizador para Assento para automóvel Britax TRIFIX. Britax TRIFIX 2 páginas. Britax trifix
Também para Britax TRIFIX: Manual do utilizador (2 páginas)
Take the time to carefully read through these instructions, and always keep them ready to hand in the designated pocket on the child seat.
For the protection of all vehicle occupants
In the case of an emergency stop or an accident, persons or objects which are not properly secured in the car can cause injury to other vehicle
occupants. For this reason, please always check that...
• the backrests of the vehicle seats are locked (e.g. that the latch on a folding rear seat bench is engaged).
• all heavy or sharp-edged objects in the vehicle (e.g. on the parcel shelf) are secured.
• all persons in the vehicle have their seatbelts fastened.
• the child safety seat is always secured in the car via the ISOFIX anchoring and the Top Tether, even when there is no child in the seat
For the protection of your child
• The more snugly the harness fi ts over your child's body, the safer your child will be.
• Please do not ever leave your child unattended in the child safety seat in the vehicle.
INSTALLATION
Preparatory work
01
02
1. If your vehicle is not equipped with the ISOFIX insert guides as
standard, clip the two insert guides
which are included with the
02
seat* with the cut-out facing upwards onto the two ISOFIX attach-
ment points
of your vehicle.
01
TIP: The ISOFIX attachment points are located between the surface
and the backrest of the vehicle seat.
2. Move the head restraint on the vehicle seat to the upper position.
* The insert guides make it easier to install the child safety seat with the aid of the ISO-
FIX attachment points and prevent damage to the seat covering. When not in use, they
should be removed and stored in a safe place. On vehicles with a folding backrest the
insert guides must be removed before the backrest is folded.
Any problems which occur are usually caused by dirt or foreign objects on the insert
guides and on the hooks. Clean off any dirt or foreign objects to remedy this type of
problem.
G
H
10. Tension the strap of the Top
9. Hook the snap hook
into the
26
Tether
14
until the tension
Top Tether anchoring point recom-
mended in your vehicle owner's
27
indicator
turns green and the
guide.
Top Tether
is tightly tensioned.
14
For the safety of your child, before every journey in the car check that...
• the child safety seat is engaged on both sides with the ISOFIX locking arms
indicators
12
are completely green;
• the child safety seat is securely fastened;
• the Top Tether
is tightly tensioned over the backrest of the car seat and the tension indicator
14
• the straps of the child safety seat are close to the body without constricting the child;
• the shoulder straps
07
are correctly adjusted and the straps are not twisted;
• the shoulder pads
06
are in the right position on your child's body;
• the buckle latches
are engaged in the harness buckle
21
Caution: If your child attempts to open the grey ISOFIX locking buttons
portunity. Check that the child safety seat is correctly attached and make sure that your child is properly secured. Teach your child about the
dangers involved.
A
B
click!
14
16
15
17
1. Pull the grey fabric loop
to pull
2. Take the Top Tether
16
user guide compartment
out both locking arms
until you
17
hear a clicking sound which indi-
lay it over the child safety seat.
cates they are fully engaged.
3. Place the child safety seat facing
in the direction of travel on the
vehicle seat.
I
J
06
14
07
27
08
13. Pull the shoulder straps
Caution: Check that the child
one side and put the two buckle
safety seat is correctly attached
latches
11. Press the adjusting button
08
retainer
and at the same time pull both
shoulder straps
07
forwards.
14. Make sure that the buckle
Caution: Do not pull on the shoul-
folded forwards and place your
der pads
06
.
child in the child safety seat.
12. Open the harness buckle
05
15. Put the shoulder straps
(press the red button).
the shoulders of your child.
Caution: The shoulder straps
must not be twisted or swapped.
in the ISOFIX attachment points
17
01
is green;
27
05
.
11
05
or the harness buckle
, make sure to stop at the earliest op-
• Use on the rear seat:
Move the front seat forward far enough that you child's feet cannot hit the backrest of the front seat (to prevent risk of injury).
• The child safety seat can get hot in direct sunshine. Caution: Children's skin is delicate and could be injured as a result. Protect the child
seat against intensive direct sunlight when it is not currently in use.
• Only allow your child to enter and exit the vehicle on the pavement side.
• Make stops during longer journeys to give your child an opportunity to run about and play.
.
To protect your vehicle
Some vehicle seat coverings made of more delicate materials (e.g. velour, leather, etc.) may develop wear marks when child seats are used.
For optimum protection of your seat covers, we recommend using the BRITAX RÖMER Car Seat Protector, which is available from our range
of accessories.
C
click!
12
4. Grasp the child safety seat with
from the
14
both hands and slide the two
and
15
locking arms
fi rmly into the
17
insert guides
until the locking
02
arms engage with a clicking noise
on both sides.
Caution: The locking arms are
only correctly engaged if both
of the ISOFIX indicators
are
12
completely green.
K
03
21
04
07
05
07
to
A correctly adjusted headrest
03
ensures optimal protection for your
child in the safety seat:
21
into the harness
The headrest
03
must be adjusted
04
so that the shoulder straps
are at
07
is
the same level as your child's shoul-
05
ders or slightly above.
07
over
07
Removing the child safety seat with ISOFIX
and that both ISOFIX
1. Loosen the Top Tether
14
2. Unhook the snap hook
26
3. Press on the grey ISOFIX unlocking buttons on the left and right-hand side of the seat shell
The ISOFIX locking arms
4. Pull the seat forwards and stow the Top Tether
5. Slide the ISOFIX locking arms
A rattling noise is produced when the locking arms are pushed back in.
TIP: The locking arms are protected against damage when they are pushed back into the seat base.
Caution:
Remove the child safety seat from the vehicle.The child safety seat must never be transported in the car if it is not properly secured.
E
D
14
28
12
5. Push the child safety seat with a
7. Take the Top Tether
substantial amount of force as far
the metal tongue
back as it will go.
the strap to lengthen the strap and
pull the Top Tether
6. Shake the child safety seat to
hook
26
until it makes a V-shape.
make sure it is safely attached
and re-check to the ISOFIX indi-
cators
12
to make sure that both
of them are completely green
L
M
13
03
21
05
17. Pull the adjusting ring of the head
19. Guide the two buckle latches
rest
upwards
13
together and engage them before
putting them into the harness
18. Move the head rest
to the
03
buckle
05
correct shoulder strap height and
clicking noise.
check that it is properly engaged
by lightly sliding the head rest
03
downwards.
from the anchoring point and lay the Top Tether
to the front over the child safety seat
14
will release and the two ISOFIX indicators
will change colour to red.
17
12
back in the user guide compartment
14
back into the seat shell
17
18
F
26
14
8. Guide the Top Tether
on the
14
and press
14
left and right-hand sides past the
away from
28
headrest.
by the snap
14
N
28
09
20. Pull on the adjusting strap
09
21
until the harness lies fl at and
is close against your child's
- this should make a
body.
Caution: Pull out the adjus-
ting strap to the front.
Caution: The hip straps
28
must be positioned as low as
possible over your child's hips.
18
.
.
15