Jandy DEV Series Manual de instalação e operação - Página 6
Procurar online ou descarregar pdf Manual de instalação e operação para Filtro de piscina Jandy DEV Series. Jandy DEV Series 16 páginas. Diatomaceous earth pool filters
Page 6
#12x1" Pan
Head Screw
(Qty 8)
Anchor
Bracket
(Qty 4)
Filter Tank Anchor Bracket Installation
Figure 3.
Anchor Filter to Equipment Pad
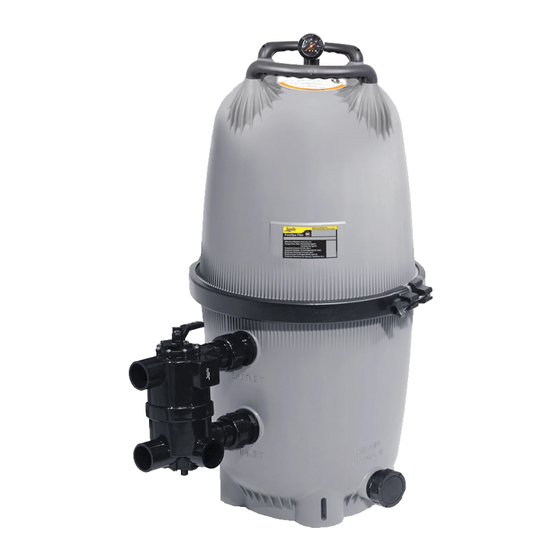
3.4 Filter Plumbing
WARNING
To avoid an electrical shock hazard, which can result
in serious injury or death, ensure that all electrical
power to the system is turned off before approaching,
inspecting or troubleshooting any leaking valves
or plumbing that may have caused other electrical
devices in the surrounding area to get wet.
1.
This fi lter operates under pressure. When clamped
properly and operated without air in the water
system, this fi lter will operate in a safe manner.
Jandy Heater
Waterfall
Pool Return
Figure 4. Basic Pool/Spa Combination Plumbing
#12x1" Pan
Head Screws
Mounting Bracket
1/4" x 2-1/4" Tapcon
Screw and Washer
Drill 5/32" Hole
Tank Bottom
Spa Make Up
Jandy
Check
Valve
Anchor Bracket to Platform Installation
2.
If doubt exists as to the pressure which the system
will be subjected to, install an ASME
automatic Pressure Relief Valve or Pressure
Regulator in the circulation system set to the
lowest working pressure of any of the components
in the system.
3.
Place the fi lter on the concrete pad, lined up with
the inlet/outlet pipes (see Figure 4). Remove the
shipping screw.
4.
To mount the pressure gauge/air release assembly
to the top of the fi lter tank (located in the
accessory bag):
From Outlet Port
Jandy Filter
From Pool
Drain
Spa Return
From Pool Skimmer
Filter Base
Mounting Tab
3-1/2" Thick
(Min.)
Concrete Pad
approved
®
To Inlet Port
Jandy Pump
Spa Suction