2. Safety instructions
Electrical Safety:
DANGER! Electric shock!
With a cut off mains plug, moisture can get
into electrical parts via the mains cable and
cause a short circuit.
v Never cut the mains plug off (e. g. to feed
through wall).
vDon't use the power cable for plugging off.
DANGER! Electric shock!
A damaged pump must not be used.
v In case of damage, please have the pump
checked by our GARDENA Service Centre.
v Before operating the pump, first make
a visual check, if there is any damage of
the pump (esp. regarding power cable and
plug).
In accordance with DIN VDE 0100
(AZ/NZS 3000), Deep Well Pumps may only
be operated in swimming pools, garden
ponds and fountains via a residual current-
operated-circuit-breaker (RCD) with a nominal
residual current ≤ 30 mA. The pump must not
be operated when there are persons in the
swimming pool or garden pond.
For safety reasons, we recommend operating
the Deep Well Pump with a residual current-
operated-circuit-breaker (DIN VDE 0100-702
and 0100-738).
v Please contact your electrician.
The power cable of the pump must be
connected to a socket which is positioned
at a height of max. 1.10m (measured from
ground). Take care that the power cable leads
downwards.
Data indicated on the type plate must match
technical data of the mains supply.
Only use extension cables authorised in
accordance with HD 516.
v Consult your qualified electrician.
v Take care that the electrical connections
are made within dry area, protected from
flooding.
v Keep mains plug dry.
10
Protect plug and power cable from heat, oil and
sharp edges.
The power cable must not be used for mount-
ing or relocating the pump. For submerging
or lifting / securing the pump, please use the
fastening rope.
In Austria:
In Austria, according to ÖVE B/ EN 60 555
part 1 to 3, pumps which are used in swimming
pools and garden ponds, and equipped with
firm power cable should be fed via an ÖVE
approved isolating transformer – rated voltage
must not exceed 230 V.
In Switzerland:
In Switzerland mobile appliances which
are used outdoors, must be connected via
a residual-current device.
Notes on use:
v Before operation, clear the pressure line
(e. g. open closed valve, closed outlet
connector etc.).
For Art. 1489/1492 only: Running dry leads to
increased wear or damage and is to be avoided.
v The pump must be immediately switched off
when water fails to flow.
v Observe max. delivery height.
When connecting the pump to the water
supply system, the country-specific sanitary
regulations must be observed to prevent
water not of drinking water quality being drawn
back in.
v If necessary, contact your sanitary expert.
Sand and other abrasive substances
cause increased wear and reduce the pump's
output. Fibres in the water can block the
turbine.
During operation, the pump must always be
submersed in the water up to the minimum
submersion depth (see 9. Technical Data).
For Art. 1489/1492 only: Do not allow the
pump to run for more than 10 minutes against
the closed pressure side (e. g. closed valve,
closed dispenser etc.).
The pump is automatically switched off
on overheating by the built-in thermal motor
protector. After having cooled down,
the motor automatically switches on again
(see 7. Trouble-Shooting).
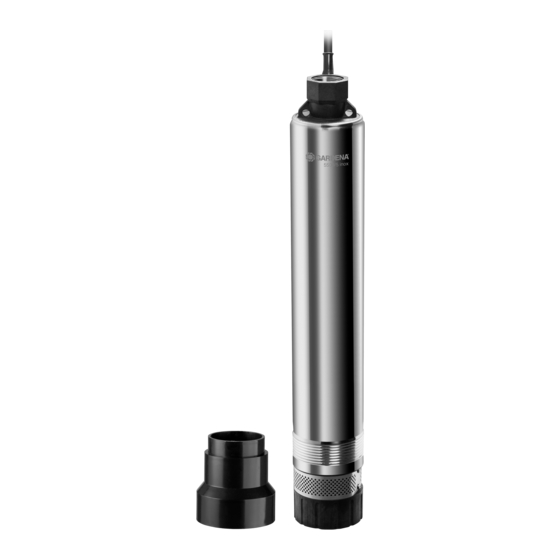
3. Assembly
Install foot
Only when the pump is sited on the ground does the foot have
(only for use in cisterns):
to be fitted to prevent the pump from taking in any sand or dirt.
2
1
1. Push the foot
2. Screw the foot
2
Connecting the hose:
The 40mm (1 1/4") internal thread (Art. 1499: 33mm (1") female
thread) on the outlet of the Deep Well Pump can be converted
if necessary with the pump fitting provided
5
5
(1") external thread. The pump can then be connected to the
GARDENA Hose Connection System and the GARDENA
Fitting Art. 1723 / 1724.
3
3
1. Screw the pump fitting
6
tighten it manually until the washer
7
In Art. 1499 the sealing ring is integrated in the pump fitting
4
2. Connect pressure hose
6
3. Tie the fastening rope
7
rope.
For the best pumping results, connect 25mm (1") hoses with the
GARDENA Suction Hose Fitting Art. 1724 and one hose clamp.
7
If you need to disconnect the hose frequently from the pump,
we recommend using the GARDENA Pump Connection Set
Art. 1752 in connection with a 19mm (3/4") hose.
Art. 1499
Art. 1489
Art. 1492
4. Operation
Pump water:
For the pump to deliver, the inlet filter of the pump must be
submersed at least 15cm in the water.
a) Without the foot, the pump must be fixed at least 50cm
above the ground.
9
b) If the foot has been fitted (cistern use), the pump may be
placed on the ground.
6
8
1. Immerse pump on the fastening rope
The mains power cable must not be subjected to tension.
2. Secure the fastening rope
a)
b)
3. When using the pump in deep wells or shafts (from approx. 5m
>15 cm
deep) guide the connecting cable
6
using clips
4. Plug the power cable
>50 cm
Attention! The pump starts immediately.
1
onto the pump from below.
1
to the pump
2
with the two screws.
3
to a 33mm
3
onto the outlet of the pump and
4
fits closely.
5
to the relevant adapter.
6
7
to the two eyes
for the fastening
6
into a well or shaft.
6
.
8
along the fastening rope
9
.
8
into a mains socket.
3
.
11

