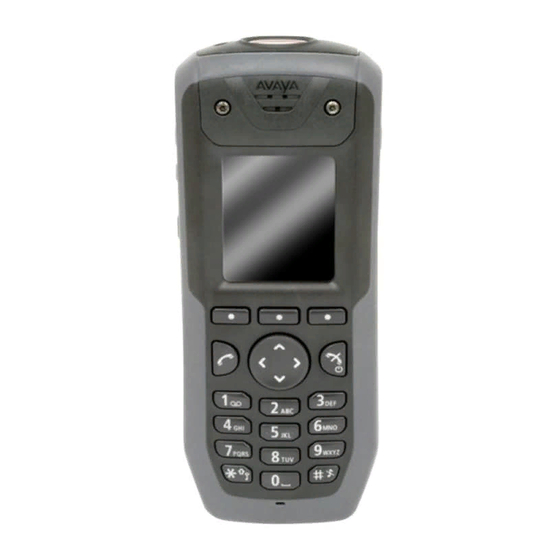
Avaya 3740 Manual de referência rápida - Página 5
Procurar online ou descarregar pdf Manual de referência rápida para Telefone Avaya 3740. Avaya 3740 5 páginas. 374 series dect handset
Também para Avaya 3740: Manual de referência rápida (11 páginas)
3. Select Inbox to view the message list.
4. Select a message that you want to delete, and then
press More.
You can scroll the message list with the up and down
arrows on the navigation key.
5. Select Delete, and then press Yes.
The system deletes the message.
Checking voicemail
A new voice mail is indicated in the display by the text
MW. Only one voice mail at the time will be displayed in
the message list.
Do any of the following:
• Select Messaging > Message list > MW-Consult.
• A long press on the digit key 1 will call your
voicemail.
If the extension number is not available, the system
displays a pop-up Voice mail number not
defined.
Using the local phone book
Use the phone book to:
• Find and call a name.
• Add a contact.
• Edit a contact.
• Delete a contact.
1. To find and call a name, do the following:
a. Select Contacts > Call contact.
b. Do one of the following:
• Enter the first few letters in the name or the
whole name. While entering the text,
suggestions that match the entry are displayed
in the Search field.
• Go to the contact list.
c. Select the name, and press Call.
2. To add a new contact, do the following:
a. Select Contacts > Add contact.
b. Select New or From call list.
c. Press Add.
d. Enter the name, and press OK.
e. Select Number, enter the number, and press OK.
f. Press Save.
3. To edit a contact, do the following:
a. Select Contacts > Edit contact.
b. Select the name, and press Edit twice.
c. Make the required changes, press OK, and then
press Save.
A contact from the company phone book is marked
with the
, which means that it is not editable.
4. To delete a contact, do the following:
a. Select Contacts > Delete contact.
b. Select the name, press Delete, and then press
Yes.
Using the central phone book
The central phone book looks for contacts in central
company phone book database.
1. Select Contacts > Central phonebook.
2. Select any of the following:
• Search by name
• Search by number
• Last result
3. Enter the first letter(s) in the first name, and/or the first
letter(s) in the family name.
4. Press Search.
The system searches the central phone book and
displays a list of matching names.
5. (Optional) You can step to the next entry in alphabetic
order by pressing the Navigation key.
6. Press More to add contact, or press Call or the Off-
hook key to make the call.
Using the company phone book
The company phone book has to be imported via the PDM
before it will be visable in the handset.
1. Enter Call list.
2. Select name or number and press Call.
Only work number is available for the contact and it is
not editable.
Accessories
Belt clips
You can use from the three belt clip options available:
• Hinge-type clip: To prevent the telephone from
slipping out of for example pocket or belt
• Swivel-type clip: To be able to rotate without
slipping out from the case
• No clip: To be able to use the telephone without a
clip, a cover plate without a clip is also available.
Leather casing
The leather casing is especially designed for the
telephone. The casing comes with a swivel type belt clip
and the telephone is fully operational while placed in the
casing.
Headset
Headsets are available with specific connectors if you
frequently use the telephone and/or want to have both
hands free.
You can order a headset adapter for Peltor headset with
the telephone.
Important:
In hazardous areas, you are permitted to use only the
headset adapter for Peltor headset in combination with
an ATEX/IECEx classified Peltor headset.
In order to achieve optimal audio quality with different
headset types, you must select the corresponding headset
profile.
The default setting is microphone on a boom, that is, the
audio is optimized for using a headset with microphone on
a boom. The headset profile can be changed in the
Connections menu.
If the preconfigured headset profiles do not match the
headset in use, or the audio performance needs to be
optimized for a certain environment or user, you can
configure your own headset profile. You can perform the
configuration in the PDM. See Installation and
Administration Manual, IP DECT. If a customized headset
profile is configured in the PDM, you can select the profile
in the telephone menu.
Support
Go to the Avaya Support website at
support.avaya.com
for the most up-to-date
documentation, product notices, and knowledge articles.
You can also search for release notes, downloads, and
resolutions to issues. Use the online service request
system to create a service request. Chat with live agents
to get answers to questions, or request an agent to
connect you to a support team if an issue requires
additional expertise.
http://
5