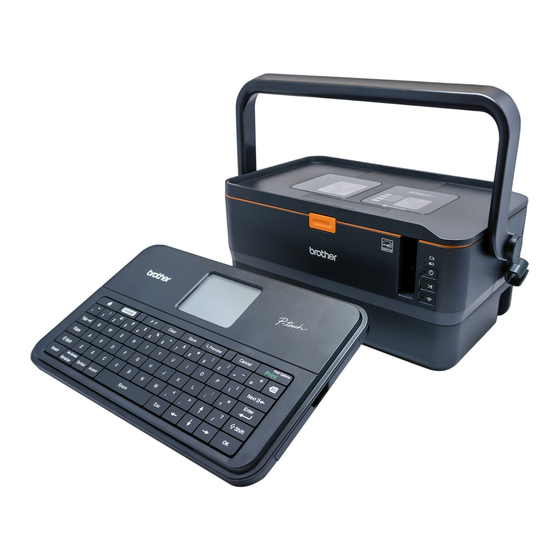
Brother P-Touch PT-E800W Manual de configuração rápida - Página 5
Procurar online ou descarregar pdf Manual de configuração rápida para Fabricante de etiquetas Brother P-Touch PT-E800W. Brother P-Touch PT-E800W 9 páginas.

Label Creation Screen
1
2
10
11
16
17
1
Caps mode
Indicates that the Caps mode is on.
2-8 Style Guidance
Indicates the current font (2), character size (3), character width (4),
character style (5), line (6), frame (7), and alignment (8) settings.
9
Layout Guidance
Indicates the orientation, layout, separator, reverse, and repeated text
settings. The displayed items vary according to the selected label type.
10 Block Number
Indicates the block number.
11 Line Number
Indicates the line number within the label layout.
12 Page Separator Line
Indicates the end of one page and the beginning of the next page.
13 Block Separator Line
Indicates the end of a block.
14 Enter/Return Symbol
Indicates the end of a line of text.
15 Cursor
Indicates the current data input position. Characters are entered to the
left of the cursor.
16 Wireless Connection
Indicates the current status of the wireless connection. See Wireless
Connection in the Home Screen section.
17 Tab Length Setting
Indicates the set tab length.
18 Tape Size
Indicates the tape size as follows for the text entered: Tape width × Label
length. If the label length has been specified,
side of the tape size.
19 Battery Level
Indicates the remaining battery level. It appears only when using the
Li-ion battery. See Battery Level in the Home Screen section.
Feeding Tape
IMPORTANT
•
Be sure to feed tape to remove any slack in the tape and ink ribbon
after inserting the tape cassette.
•
Do not pull the label when the P-touch labeling system is
ejecting it from the tape exit slot. Doing so will cause the ink ribbon
to be discharged with the tape. The tape may no longer be functional
after the ink ribbon discharges.
•
Do not block the tape exit slot during printing or when feeding tape.
Doing so will cause the tape to jam.
Feed and Cut
The Feed and Cut function feeds approximately 22.3 mm of blank tape, and
then cuts the tape.
1.
Press the
(Feed and Cut) button.
[Feed & Cut?] appears on the LCD.
2.
Select [Feed & Cut] using the
Enter key. The message [Feeding Tape... Please Wait] appears
while the tape is fed, and then the tape is cut.
NOTE
To exit or cancel this function press the Esc key.
Feed Only
This function ejects the tape approximately 22.3 mm, resulting in a blank label
sticking out of the tape cassette. This action is recommended when using
Fabric tapes, which should be cut with scissors.
1.
Press the
(Feed and Cut) button.
[Feed & Cut?] appears on the LCD.
2.
Select [Feed Only] using the
Enter key. The message [Feeding Tape... Please Wait] appears
while the tape is fed.
3
4 5 6 7 8
9
12
13
14
15
18
19
also appears on the right
or
key, and then press the OK or
or
key, and then press the OK or
NOTE
To exit or cancel this function press the Esc key.
Setting Language and Unit
Language
1.
Select [Settings] in the Home screen using the
and then press the OK or Enter key.
2.
Select [
Language] using the
or Enter key.
3.
Select a language for menu commands and messages shown on the
LCD using the
or
key.
The following languages are available: [Čeština], [Dansk],
[Deutsch], [English], [Español], [Français], [Hrvatski],
[Italiano], [Magyar], [Nederlands], [Norsk], [Polski],
[Português], [Português(Brasil)], [Română], [Slovenski],
[Slovenský], [Suomi], [Svenska], and [Türkçe].
4.
Press the OK or Enter key.
NOTE
To return to the previous step, press the Esc key.
Unit
1.
Select [Settings] in the Home screen using the
and then press the OK or Enter key.
2.
Select [Unit] using the
key.
3.
Select a unit for dimensions shown on the LCD using the
Either [inch] or [mm] can be selected.
4.
Press the OK or Enter key.
NOTE
The default setting is [inch].
To return to the previous step, press the Esc key.
Adjusting the LCD Settings
LCD Contrast
You can change the contrast setting of the LCD to one of five levels (+2, +1,
0, -1, or -2) to make the screen easier to read. The default setting is "0".
1.
Select [Settings] in the Home screen using the
and then press the OK or Enter key.
2.
Select [LCD Contrast] using the
or Enter key.
3.
Set the value using the
key.
NOTE
•
To return to the previous step, press the Esc key.
•
Pressing the Space key on the contrast setting screen sets the
contrast to the default value of "0".
Backlight
You can change the backlight setting either to "On" or "Off".
The display is easier to see with the backlight on. The default setting is "On".
1.
Select [Settings] in the Home screen using the
and then press the OK or Enter key.
2.
Select [Backlight] using the
Enter key.
3.
Select [On] or [Off] using the
Enter key.
NOTE
•
Power can be saved when the backlight is turned off.
•
The backlight automatically turns off. Press any key to turn the
backlight on again.
During printing, the backlight is turned off. The backlight turns on during data
transmissions.
,
,
or
key, and then press the OK
,
,
or
key, and then press the OK or Enter
,
,
or
key, and then press the OK
or
key, and then press the OK or Enter
,
,
or
key, and then press the OK or
or
key, and then press the OK or
or
key,
or
key,
or
key.
or
key,
or
key,
