Chris King R45 DISC Manual do utilizador - Página 11
Procurar online ou descarregar pdf Manual do utilizador para Acessórios para bicicletas Chris King R45 DISC. Chris King R45 DISC 16 páginas. Hub
Também para Chris King R45 DISC: Manual (20 páginas)
re i n s t a l l u s i n g t h e s a m e o r i e n t a t i o n a s w h e n t h e y we re o r i gi n a l l y i n s t a l l e d, a s t h i s
will minimize drag.
7 . Tu r n i n n e r ra ce o f b e a r i n g by h a n d to te s t fo r b i n d i n g. I f b e a r i n g s d o n o t r u n s m o o t h ,
repeat steps 1-7. Binding is often a result of improperly seated seals and/or snap rings.
U s e d s n a p r i n g s a n d s e a l s c a n b e r e i n s t a l l e d u n l e s s w a r p e d , p u n c t u r e d , o r o t h e r w i s e
damaged. If damaged, replacement seals and snap rings are available from any authorized
C h r i s K i n g d e a l e r s o r d i r e c t l y f r o m C h r i s K i n g P r e c i s i o n C o m p o n e n t s . w w w. c h r i s k i n g .
com/store.
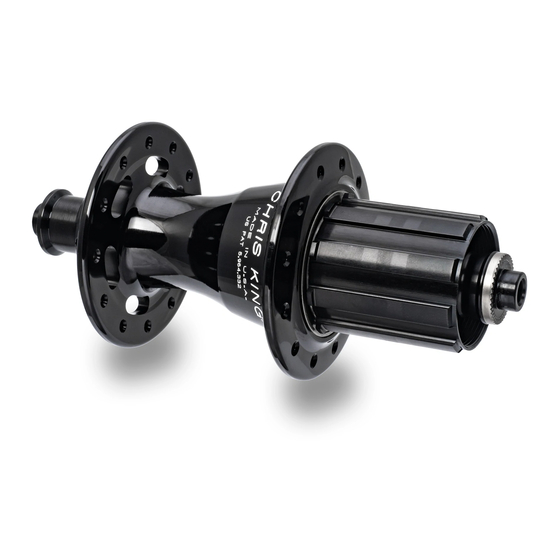
Rear hub basic lubrication
1. A p p l y 1 t o 2 m L o f 1 0 w s y n t h e t i c o i l o n t h e h e l i c a l s p l i n e s b e t we e n t h e d r i ve a n d
driven rings by depressing the drive ring spring inside the hubeshell assembly.
2. Apply a drop of l ightweight, low viscosity oil, with PTFE ( e.g. TriFlow
driveshell, both O-rings on axle and O-ring on QR adaptor.
3. A p p l y a t h i n l a y e r o f g r e a s e o n t o c l e a n t h r e a d s o n a d j u s t i n g c l a m p a n d a d j u s t i n g
clamp 2.5 mm hex screw.
Rear hub basic reassembly
1. I ns er t dr ive shell into the hub s hell; tur n in a cl o c k wi se m o ti o n w hi l e l e tti ng i t pu ll
itself in. A distinctive click sound will indicate that the driveshell is firmly seated.
2. I f o u t b o a r d d r i v e s h e l l b e a r i n g i s s e p a r a t e d f r o m a x l e , s l i d e i t o n t o a x l e w i t h t h e
b l a c k s e a l a n d s i l ve r s n a p r i n g f a c i n g t h e d r i ve s i d e a n d t h e w h i t e b e a r i n g re t a i n e r
facing the non-driveside.
3. I n s e r t m a i n a x l e, t h re a d e d ( n o n - d r i ve s i d e ) e n d f i r s t i n t o d r i ve s h e l l. Co n t i n u e u n t i l
axle is through the hub and driveside end is firmly seated in driveshell.
4. Thread adjusting clamp onto the protruding threads on the non-driveside of axle.
5. Insert R45 QR insert into non-driveside axle end.
6. Snug adjusting clamp up to bearing.
Rear hub adjustment
Th e R 4 5 re a r h u b fe at u re s a n a d j u s t i n g c l a m p a n d b e a r i n g s p a ce r s p r i n g t h at m a i nt a i n
proper bearing preload and seating.
1. Secure "L"-shaped 5 mm hex key in vice with shorter end of "L" facing up
2. W i t h n o n - d r i v e s i d e f a c i n g u p, i n s e r t h u b o n t o 5 m m h e x k e y s o t h a t h u b c a n s i t
freely on vice. If vice is not available, place the hub or wheel onto a flat, firm sur face
with the non-driveside facing up.
3. P u s h d o w n w a r d o n t h e h u b s h e l l . T h i s c o m p r e s s e s t h e b e a r i n g s p a c e r s p r i n g i n
the drive shell and ensures proper bearing seating.
4. W h i l e m a i n t a i n i n g f i r m d o w nw a r d p r e s s u r e o n t h e h u b s h e l l , t i g h t e n t h e a d j u s t i n g
clamp onto axle until it stops against bearing. Do not overtighten.
5. O n ce a d j u s t i n g c l a m p i s i n p o s i t i o n , t i g hte n a d j u s t i n g c l a m p w i t h a 2 . 5 m m h ex k e y
to 10 inch-pounds (1.1 Nm).
6. D o u b l e c h e c k a d j u s t m e n t b y a t t a c h i n g w h e e l t o b i c y c l e f r a m e . C h e c k f o r b e a r i n g
play or binding, and readjust adjusting clamp if needed.
) onto O-ring on
™
9