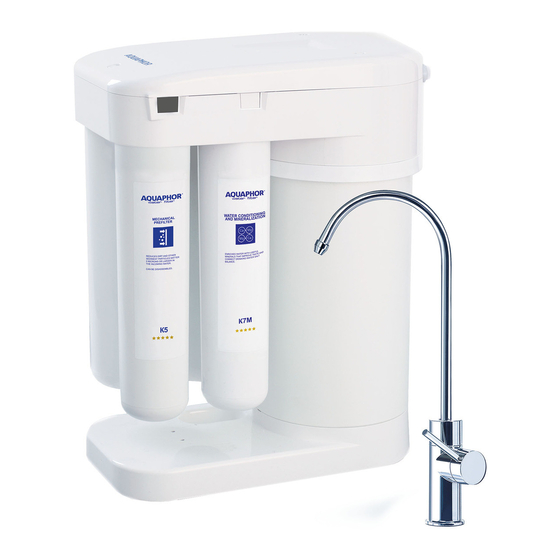
AQUAPHOR DWM-101 Manual de instalação - Página 8
Procurar online ou descarregar pdf Manual de instalação para Sistemas de filtragem de água AQUAPHOR DWM-101. AQUAPHOR DWM-101 16 páginas. Drinking water machine

Installation Steps and Start-Up Procedures, Cont.
Step 6
Install the Drain Saddle Assembly
The drain assembly should be installed above the
P-trap on the vertical or horizontal tailpiece.
A.
Position the drain saddle in the desired location,
mark the spot to be drilled, and remove the saddle.
(See Figure 7).
B.
Drill a 7/16-inch hole through one side of the
drain pipe only.
C.
Peel off the paper backing from the drain gasket
and apply the gasket to the "port" connection of the
drain saddle. (See Figure 8). Make sure to align the
drain saddle to the drilled hole. Attach the drain saddle
to the drain pipe and tighten the two screws evenly.
D.
Cut the 3/8-inch black tube to the desired length
and connect to the drain saddle with the provided
locking clip.
Note: State and local plumbing codes may prohibit
the use of saddle valve connections.
Figure 8: Drain Saddle Assembly
14
Figure 7: Drain Saddle Assembly Mounting
Locations
10/9/2013
Drinking Water Machine
Installation Guide
Installation Steps and Start-Up Procedures, Cont.
Step 7
Connecting the Tubing Procedure
A.
To connect the tubing, remove the red locking clip and wet the
end of the tubing with water. Then insert the tube into the plastic
bushing approximately 1/2-inch (1.3 cm) deep and replace the
locking clip to secure the tubing in place.
B.
To disconnect the tubing, remove the locking clip, and press
the plastic bushing, then pull the tube out of the plastic bushing.
Step 8
Install Filtration Cartridges and
Rinsing Cap
A.
Put on clean latex gloves to help prevent hand contact. Rotate
the plastic fasteners 90° counterclockwise to remove the filter
cartridge.
B.
Remove rinsing caps (3 pcs.) that is located under the
decorative cover. (See Figure 10). Install in positions 1, 2 and 4.
(See Table 1).
C.
Remove the protective film and transportation caps from the
filtration cartridge.
Note: Ensure that the inner surfaces of the flanges are clean. If
the flanges are not clean, rinse the flanges with tap water.
Caution: Do not touch the filter(s) with your bare hands. Peel the
wrapper and use as a sleeve to prevent contamination. Lubricate
O-Rings with glycerin. Never use a petroleum-based lubricant where
it can contact the O-Rings.
D.
Install the cartridges in the "Rinsing" position according to the numbered locking buttons located on the
sides of the manifolds. (See Table 1).
E.
Insert cartridges one by one into the appropriate positions and turn right until they click.
F.
To disconnect the cartridge, press the locking button and turn the cartridge left until it disconnects.
Positions of the Filtration Cartridge
When filter cartridges are in the "Working" position, ensure that the number of each filter cartridge matches the
locking button number. The tops of each filter cartridge match the color of each locking button. Refer to Table 1
to place the filter cartridges in the "Rinsing" position.
Table 1: Positions of the Filter Cartridges
"Start" position
"Working" position
Locking
Cartridge
Locking
Cartridge
button
button
1
Rinsing cap
1
Replacement filter
cartridge K5
2
Rinsing cap
2
Replacement filter
cartridge K2
3
Housing without
3
Membrane cartridge
membrane
(housing with preinstalled
element*
membrane element)
4
Rinsing cap
4
Replacement filter
cartridge K7M
*– open the housing with membrane element, remove membrane element from the housing, close the housing and install it back to the water
filter (See Figure 12).
**– please put the membrane element back into the housing.
Drinking Water Machine
Installation Guide
A
B
Figure 9: Connecting and
Disconnecting Tubing
Figure 10: Rinsing Caps
"1 step Rinsing" position
"2 step Rinsing" position
Locking
Cartridge
Locking
Cartridge
button
button
1
Rinsing cap
1
Replacement filter
cartridge K5
2
Rinsing cap
2
Replacement filter
cartridge K2
3
Membrane cartridge
3
Housing without
(housing with preinstalled
membrane
membrane element)**
element*
4
Rinsing cap
4
Rinsing cap
10/9/2013
15
