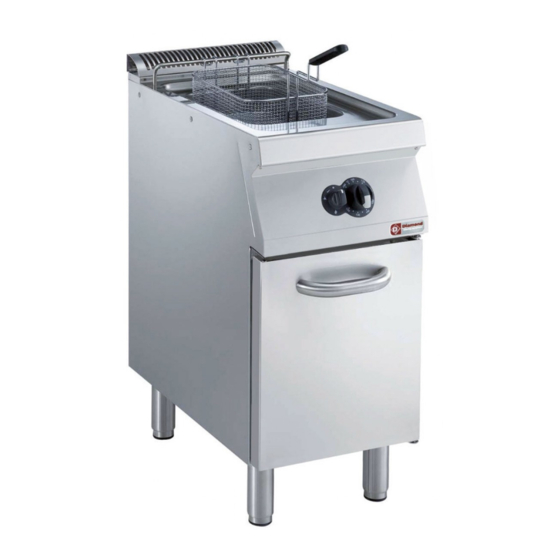
Diamond +7FREH220N Manual do utilizador - Página 6
Procurar online ou descarregar pdf Manual do utilizador para Fritadeira Diamond +7FREH220N. Diamond +7FREH220N 15 páginas.
Também para Diamond +7FREH220N: Manual de início rápido (15 páginas), Manual (15 páginas)

3.1. COMBINING APPLIANCES
• (Fig.1A) Remove the control panels of the appliances by
undoing the 4 fixing screws.
• (Fig.1B) Remove the fixing screw nearest the control
panel, from each side to be joined.
• (Fig.1D) Bring the appliances together and level them by
turning the feet until the tops match.
• (Fig.1C) Turn one of the two plates inside the appliances 180º.
• (Fig.1E) From inside the control panel of the same
appliance, join them at the front side, screwing one TE
M5x40 screw (supplied) on the opposite insert.
3.2. FLOOR FIXING
To avoid accidental tipping of built-in half-module appliances installed
separately, fix them to the floor carefully following the instructions
enclosed with the corresponding accessory (F206136).
3.3 INSTALLATION ON BRIDGE, CANTILEVER
FRAME OR CEMENT PLINTH
Carefully follow the instructions enclosed with the
corresponding accessory. Follow the instructions supplied
with the optional product chosen.
3.4. SEALING GAPS BETWEEN APPLIANCES
Follow the instructions supplied with the optional sealing pa-
ste pack.
4. FUME EXHAUST
For Australia, ventilation must be in accordance with
australian building codes and kitchen exhaust hoods must
comply with AS/NZS1668.1 and AS 1668.2
4.1. TYPE "A1" APPLIANCES
Position type "A1" appliances under an extraction hood to
ensure removal of fumes and steam produced by cooking.
4.2. TYPE "B" APPLIANCES
(in conformity with the definition given in the Installation
Technical Regulations DIN-DVGW G634: 1998)
Whenever the appliance dataplate specifies only type Axx, such appliances
are not designed for being directly connected to a flue or fume exhaust
pipe run to the outside. However, the same appliance can be installed
under an extractor hood or similar forced extraction system for fumes.
4.2.1. CONNECTION FLUE
• Remove the grille from the fume exhaust.
• Install the connection flue, following the instructions
supplied with the accessory (optional).
4.2.2. INSTALLATION UNDER AN EXTRACTOR HOOD
• Place the appliance under the extractor
hood (fig. opposite).
• Raise the fume exhaust pipe without altering
the section.
• Do not install dampers.
• The correct height of the exhaust pipe and
the relative distance from the extraction
hood must comply with current standards.
• The end of the exhaust pipe must be at least
1.8 m from the support surface of the appliance.
Note! The system must ensure that: a) the fume exhaust is not
obstructed; b) the length of the exhaust pipe does not exceed 3 m.
Use the adapter for connecting fume ducts of different diameters.
• SUB CLAUSES 4.1/4.2 are not relevant for australian
standard
22
5. CONNECTIONS
• Any installation work or maintenance to the
supply system (gas, electricity, water) must only
be carried out by the utility company or an
authorised installation technician.
•
See the appliance dataplate for the product code.
•
See the installation diagram for the type and position of
appliance connections.
5.1. GAS APPLIANCES
IMPORTANT! Ensure that the available gas supply matches
the data label; to convert the gas type, follow the instructions
in par. 5.1.8. in this chapter.
5.1.1. BEFORE CONNECTING
•
Make sure the appliance is arranged for the type of gas to
be used. Otherwise, carefully follow the instructions given
in the chapter: "Gas appliance conversion / adjustment".
•
Fit a rapid gas shut-off cock/valve ahead of each appliance.
Install the cock/valve in an easily accessed place.
•
Clean the pipes to remove any dust, dirt or foreign matter
which could block the supply.
•
The gas supply line must ensure the gas flow necessary
for full operation of all the appliances connected to the
system. A supply line with insufficient flow will affect cor-
rect operation of the appliances connected to it.
•
Important! Incorrect levelling of the appliance can af-
fect combustion and cause malfunctioning.
5.1.2. CONNECTION
• See the installation diagram for the position of the gas
connection on the bottom of the appliance.
• Remove the plastic protection cover (if present) from the
appliance gas union before connecting.
• After installation, use soapy water to check connections
for leaks.
•
The Gas Connection is male ½" BSP
5.1.3. SUPPLY PRESSURE CHECK
Make sure the appliance is suitable for the type of gas avail-
able, according to that given on the dataplate (otherwise,
follow the instructions given in par. "Conversion to another
type of gas"). The supply pressure must be measured with
the appliance operating, using a manometer (min. 0.1 mbar).
• Remove the control panel.
• Remove retaining screw "A" from the pressure point and
connect the manometer "O" (fig. 2A-2B).
• Compare the value read on the manometer with that given
in table B (see handbook Appendix)
• If the manometer gives a pressure outside the range of
values in table B, do not start the appliance, and consult
the gas company.
