Aquasana OptimH2O AQ-RO-3 Manual do Proprietário - Página 3
Procurar online ou descarregar pdf Manual do Proprietário para Sistemas de filtragem de água Aquasana OptimH2O AQ-RO-3. Aquasana OptimH2O AQ-RO-3 10 páginas. Whole house water filter
Também para Aquasana OptimH2O AQ-RO-3: Manual do Proprietário (14 páginas), Manual do Proprietário (11 páginas), Manual do Proprietário (16 páginas)

2
2
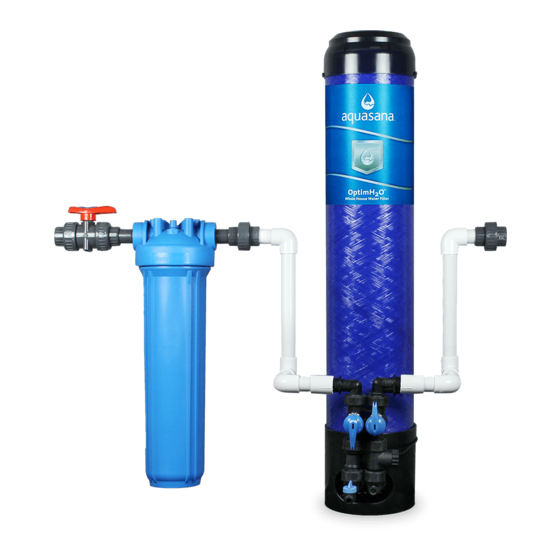
SYSTEM CONFIGURATION
If you have added components to your OptimH2O
note the correct sequencing below.
Filter Cap
Filter Housing
Incoming
Water Supply
Shut-off
Valve
Pre-Filter
Before installing
• Lay out system in appropriate configuration. Improper sequence
of equipment will affect performance, and could possibly damage
your system.
• For all installations: Anticipate the need for additional parts and pieces
including but not limited to PEX tubing, clamps, and mounting screws to
install unit properly (available at a local home improvement stores or through
your plumbing contractor). Due to the varieties of home design, not all
configurations can be addressed in this guide.
• DO NOT install this filter where the line pressure may exceed 100 psi.
The operating pressure range for this filter is between 20psi – 100psi.
• Install on cold water lines only (40° – 90°F).
• Installation of the filtration system must comply with existing state and
local plumbing codes. Aquasana and its manufacturer are not liable for
consequential or incidental damages due to improper installation.
• DO NOT install the unit on its side. It must be installed upright
to maximize contact with media bed.
Water Filter System,
®
Salt Free Conditioner
Optional
UV Filter
Optional
2
Read all precautions and installation instructions
carefully and completely before installing.
Precautions
• Properly tighten all fittings to
ensure a leak-free assembly.
• NSF certified Plumber's Tape is
the only sealer that can be used
on threaded fittings. DO NOT use
pipe dope or PVC primer/glue on
threaded fittings. Exposure to these
compounds will damage nipples
causing leaks.
• Pick an appropriate installation
location. Dimensions of systems
vary—always allow an estimated
minimum of 60" clearance for
height of tank, and a minimum
of 45" for floor space.
• Unit must be installed in an area
where the main water line enters
your home, before connecting to
the water heater. DO NOT install
after a water heater or on the
hot water line.
• It is recommended your system
be installed indoors and out of
direct sunlight. Prolonged
exposure to light can weaken
plastic components, resulting in
filter housing failure. If this is not
possible and the system is outdoors
or in a sunny area, the unit must be
protected from both direct sunlight
and freezing temperatures.
• If installing on metallic plumbing,
two grounding clamps and #4
copper wire are essential for safety.
• Some local codes may require the
use of a licensed plumber or certified
installer when disrupting
a potable water line.
• In areas with high pressure, a
pressure relief valve and a water
hammer arrestor may be necessary.
USE & CARE
Cleaning
The exterior of your filtration
system can be cleaned with warm,
soapy water. Rinse well with fresh,
clean water.
NOTE: Never use chemical cleaning
products on the system's exterior surface
as they may damage the housing.
Specifications
This filter system is designed and
tested for use with genuine Aquasana
parts including replacement filters and
all hardware. Use of parts from other
manufacturers may result in loss of
contaminant reduction performance,
system damage or failure. Use of parts
from other manufacturers will also
void your warranty. Please visit
aquasana.com for replacement parts.
A Pre-Filter is included with your
system. Sediment levels vary from one
location to another. It is recommended
to replace your Pre-Filter every 6
months. If the flow rate has noticeably
decreased, replace your filter cartridge
sooner.
Model: EQ-OPTM-X
Replacement tank: EQ-OPTM-R
Additional Replacements:
20" Pre-Filter: EQ-OPTM-PRE-R
3
