Olympus VANOX Manual de instruções - Página 18
Procurar online ou descarregar pdf Manual de instruções para Microscópio Olympus VANOX. Olympus VANOX 28 páginas. Universal research microscope
V11.
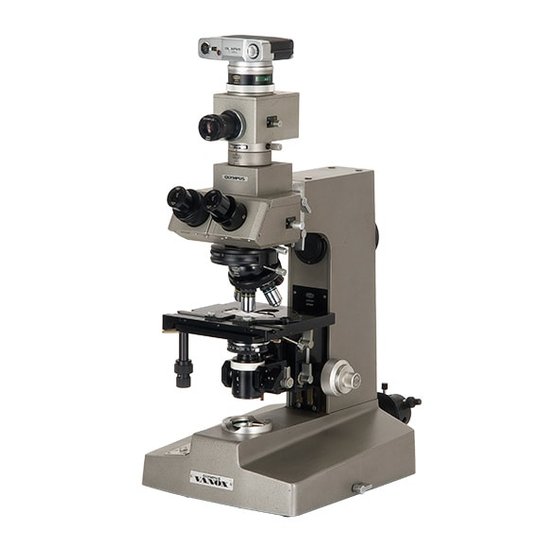
Operating the Microscope
It is good policy to
keep
the microscope irnmaculatel y clean.
Remove visible spots,
specks of dirt, dust or grease from all exposed glass surfaces.
A blower brush is a handy aid for this purpose.
How
t o
put the microscope
in
operation:
1 .
Switch on tungsten light source.
2.
Center t h e light bulb. (See
page
17.
)
3.
Place
a
specimen slide on the mechanical stage.
4.
Push in the light path selector knob on the binocular tube all the
way
(white
band; 100% of the light is directed towards the eyepieces).
5.
Make interpupil lary and dioptric adjustments.
{See page 22.)
6.
Swing in the desired objective.
7 .
Select the auxiliary lens system according t o the objective in use.
(See
page 18.
)
8.
Coarse focus with the coarse adjustment knobs.
9.
Fine focus with the fine adjustment knobs.
10.
Center
the
condenser.
(See
page
17.1
1 1 .
Adjust aperture iris diaphragm and field iris diaphragm.
(See page 21
.I
12.
Adjust light intensity.
A.
Electrical Connection
1
)
Insert the two plugs of the lamp cord into the low voltage outlet.
2)
Insert
the
plug of
the
line cord into the line cord
socket.
3)
Make sure that the voltage adjustment
knob is set at the nearer end to you
(low voltage), then push the main switch to supply AC pawer
to the instru-
ment.
When power is on, power pilot lamp lights.
*
As you push the main switch again, the light is off,
and
all pawer is cut off.
4)
By vaising the voltage progressively, you can ascertain that the bulb is on.
Adjust light intensity to suit your requirement.
o
Line Voltage Adjustment
1
)
Voltage Selector Switch
At t h c bottom of thc
base
is a voltage
selector switch, which
can be turned
with
a
coin, to
correspond
with the
voltage of
main
supply
(1 10V, 120V,
220V or 240V).
2) Line Voltage Adjustment Screw
Thc
minimum voltage required for light source can
be
varied by means uf
the
line voltage adjustment
screw provided
at the
side of microscope base Ion
your left-hand side), since a silicon controlled rectifier ISCR) is adopted in
rhe dimmer circuitry.
If the bulb is dirnmly lit upon switching on light source, the line voltage is
proper, and you have only to manipulate the voltage adjustment knob in order
to obtain optimum light intensity. However, in case the bulb does not light
a t all
or
does light up bright immediately after switching on, rotate gradually
the line voltage adjustment screw with
a coin, until the bulb dims.
NOTE: For low voltage adjustment (0-9.5VJ after dimming the bulb,
use
the voltage adjustment knob.
Voltmeter
Reading
As the voltage adjustment knob
IS
moved along the slit, the red zone shifts
as
shown
schematically. The left-side picture indicates
4V,
and the right-side picture 8V. Avoid
prolonged use of the light source
a t
readings in the red zone.
4-
16
8
-8