C.T.M. HS-855 Folheto de instruções - Página 11
Procurar online ou descarregar pdf Folheto de instruções para Scooter C.T.M. HS-855. C.T.M. HS-855 19 páginas. 8-series; mobility scooter
- 1. Table of Contents
- 2. Introduction
- 3. Important Precautions
- 4. Electromagnetic Interference and Warnings
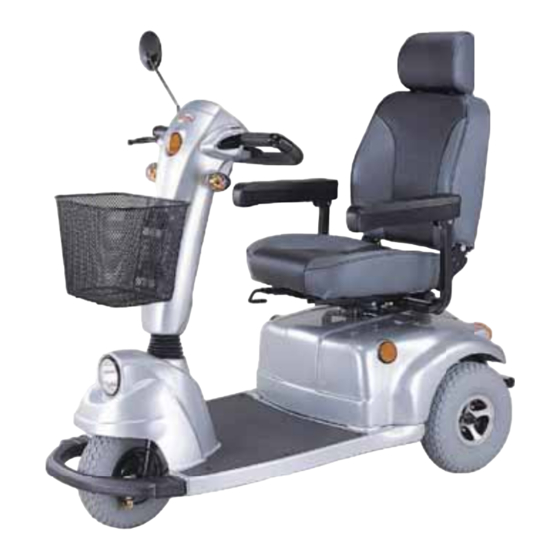
- 5. Identification of Parts
- 6. Operating Your Scooter
- 7. Disassembling Your Scooter
- 8. Assembling Your Scooter
- 9. Charging the Batteries
- 10. Care and Maintenance
- 11. Troubleshooting
- 12. Technical Specifications
8-Series
Keep in mind these rules:
•Release thumb levers and allow scooter to stop completely before changing from
forward to reverse, or reverse to forward.
•When turning a corner, swing front wheels wide, because back wheels will turn more
tightly.
•Use scooter only where it would be safe to walk.
•Use low speeds for reverse, downhill, ramps, curbs,or uneven surfaces.
Other Operating Information:
Hill Climbing: You may need to use a higher speed. For a higher speed, set the speed
control knob in the proximity of the rabbit.
Down Slopes: To proceed with downward slopes slowly, set speed control in proximity
of the turtle. This enables driver control, as the closer the speed control
is set toward the turtle, the slower scooter travels. However, this scooter
will not self accelerate down hills due to the automatic braking taking effect
should you attempt to drive too fast.
Curd Climbing: Approach slowly at right angles to the curb. A slight angle is permissible
with a 4-wheel scooter, but a direct approach is needed on a 3-wheel
scooter. Do not attempt greater than a 60mm curb.
If Self-Diagnostic Warning Light starts to blink, identify problem from
chart on page 15 and take action.
If the scooter breaks down and must be moved, get off scooter, pull the
free-wheeling lever up to disable the drive system and brake system,
move the scooter slowly to a safe location, and push the free-wheeling
lever down to take the scooter out of freewheel mode.
Vertical limit approach approximately : 9cm
Acceptable gap width approximately : 24cm
In unlikely event of a control panel display error, you need to re-set the
display system by cycling the on/off main switch. The display circuitry is
independent of the motor control system. A display console error does not
affect scooter speed control.
Figure 6
Figure 6
9
Instruction Booklet
Figure 7
Figure 7