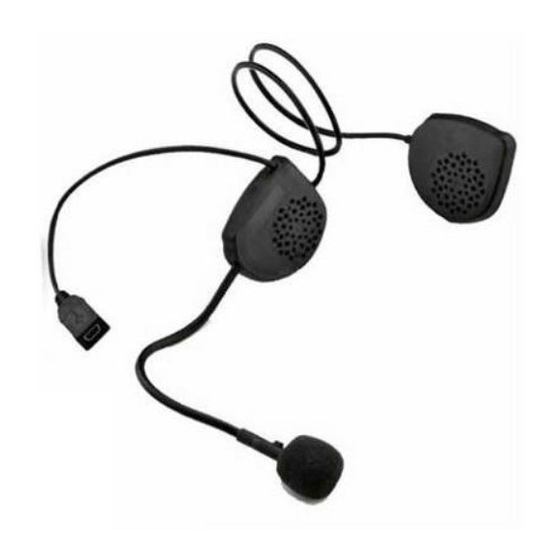
Caberg just speak Manual de início rápido
Procurar online ou descarregar pdf Manual de início rápido para Sistema de conferência Caberg just speak. Caberg just speak 2 páginas. For sintesi / sintesi jet helmet
Também para Caberg just speak: Manual (2 páginas)

SISTEMA CABERG JUST SPEAK PER CASCO KONDA
CABERG JUST SPEAK SYSTEM FOR KONDA
CABERG JUST SPEAK SYSTEM POUR KONDA
SISTEMA CABERG JUST SPEAK PARA EL CASCO KONDA
DAS CABERG JUST SPEAK SYSTEM FUR KONDA
(FOTO 1)
1) Per il montaggio del microfono sul casco Konda rimuovere il
supporto n.1 e n.2
1) For mount the microphone on Konda Helmet take out both
supports n.1 and n.2
1) Pour le montage du micro sur le casque Konda enlever le
support n.1 et n. 2
1) Para montar el micrófono en el casco Konda, extraer ambos
soportes: 1 y 2.
1) Um das kit am helm zu montieren Konda den Träger n.1 oder
n.2 entfernen.
2) Estrarre guanciali ed interno lavabile.
2) Remove the cheek-pads and washable lining
2) Ôter les coussins de joue et l' intérieur lavable
2) Extraiga los protectores faciales y el interior lavable
2) Die Wangenpolster und das washbare Innenpolster
herasnehmen
3) Estrarre tappo calotta che si trova sulla guancia sinistra.
Per farlo, spingere dall'interno verso l'esterno. (FOTO 1)
3) Remove the cap plug on left side.Push outwards to do this
(PIC 1)
3) Enlever le bouchon qui se trouve sur le côté gauche de la
calotte. Pour ce faire pousser de l' intérieur vers l'extérieur
(PHOTO 1)
3) Extraiga el tapón del casquete que se encuentra sobra la
mejilla izquierda. Para hacerlo empuje desde adentro hacia
afuera (FOTO 1)
3) Den Kappendeckel, der sich auf der linken Wangenseite
befindet, herausziehen. Von Innen nach au, en drücken
(FOTOS 1)
(FOTO 2)
(FOTO 3)
(FOTO 4)
(FOTO 5)
4) Agganciare il microfono facendo attenzione a far coincidere la cuffia con
la sede preposta. Accertarsi che i punti stampati sulla testa del microfono
siano rivolti verso l'interno del casco (FOTO 2).
4) Fix the micro, taking care when remounting the inner lining to place it on
ist own area. Make sure that the two dots printed on the microphone head
are oriented towards your mouth. (PIC 2)
4) Boucler le micro faisant attention a fair coincider l'interieur a la place
predisposé. Vérifier que les points imprimés sur la tête du micro soient
tournés vers l'intérieur du casque. (PHOTO 2)
4) Fijar el micrófono, prestando especial atención en colocar el interior en
su lugar correspondiente. Cercionarse que el punto estampado son posi-
cionado hacia el interior del casco. (FOTO 2)
4) Das Mikrofon festschrauben und darauf achten, dass der Popschutz
am vorgesehen Platz anliegt. Vergewissern Sie sich, dass die geprägten
Punkte am Kopf des Mikrofons zum Inneren des Helmes gedreht sind.
(FOTOS 2)
5) Togliere la pellicola protettiva dal biadesivo posizionato sulla tastiera
di comando (FOTO 3).
5) Pell off the protective pellicle from the control keyboard (PIC 3)
5) Enlever le film de protection placé sur le clavier de commandes
(PHOTO 3)
5) Sacar la pelicula proteciva del adhesivo situado en la pieza del
mecanismo (FOTO 3).
5)Die Folie vom Doppelklebeband an der Steuerungstastatur abnehmen
(FOTOS 3).
6) Inserire i cavi nell'apposita sede ed incastrare il supporto della tastiera
nel foro della calotta (FOTO 4)
6) Fit the wires in their holder and place the control keyboard in the
seating of the shell (PIC 4)
6) Insérer les câbles dans l'emplacement prévu à cet effet et placer le
support dans le trou de la calotte (PHOTO 4)
6) Insertar los cables en su lugar y incrustar los botones en el agujero de
la calota (FOTO 4)
6) Die Kabel in die vorgesehene Stelle einführen und den Träger in das
Loch an der Schale einsetzen (FOTOS 4)
7) Inserire il cavo della tastiera nella sede A della scheda in modo che la
scritta "DOWN " sia rivolto verso l'interno della scheda; chiudere i piedini di
fissaggio spingendo nella zona indicata nella FOTO 5 (per sconnettere la
tastiera dovrà essere eseguita l'operazione inversa).
7) Insert the keyboard cable to the seat A of the electronic card so that the
word "DOWN " face downwards; close the pins fastening pushing the area
described in PICTURE 5 (to disconnect the keyboard has to be performed
the reverse).
7) Insérer le câble dans l'emplacement A de la fiche de façon que l'inscrip-
tion DOWN soit tournée vers l'intérieur de la fiche même; à proximité des
broches de fixation poussant la zone décrite à la PHOTO 5 (pour débran-
cher le clavier doit se faire l'inverse).
7) Inserte el cable del teclado a la sede A de la tarjeta electrónica para
que la escrita "DOWN" se encuentre hacia el interior de la tarjeta; cerrar
las clavijas de fijación empujando la zona descrita en la FOTO 5 (para
desconectar el teclado tiene que ser realizado a la inversa).
7) Legen Sie die Tastatur-Kabel an den Sitz einer der elektronischen Karte,
so die Schrift "DOWN" zum Inneren der Anlage drehen; Schließen Sie die
Stifte Befestigung Drücken der Bereich in FOTOS 5 (zum Trennen Sie die
Tastatur hat, die aufgrund der Rückseite).
