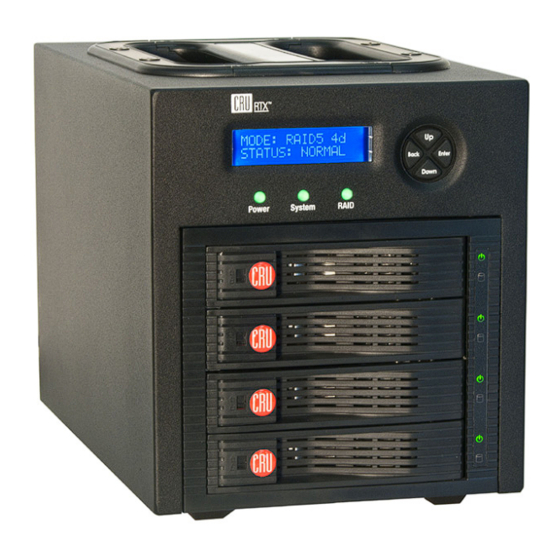
CRU Dataport RTX430-3QR Manual de início rápido - Página 2
Procurar online ou descarregar pdf Manual de início rápido para Invólucro CRU Dataport RTX430-3QR. CRU Dataport RTX430-3QR 2 páginas.
Também para CRU Dataport RTX430-3QR: Manual do utilizador (9 páginas)

Your RTX430-3QR is now ready to use! If the hard drive is already formatted, it can be used right
away. If the hard drive is brand new, or its format is not compatible with your computer, the drive
will need to be formatted before being used. See the "Usage with Mac and Windows Operating
Systems" section of the complete User Manual for formatting instructions.
2 RAID Configuration
You may skip this section if you purchased the RTX430-3QR pre-configured with drives. The RTX430-
3QR ships with RAID 5 as the default mode. Use the LCD and menu selection buttons to complete
these steps if you did not purchase your unit pre-configured. Changing RAID levels will erase
any data on the drives. Make a backup copy of any data you wish to keep before changing
the RAID.
a. Disconnect the RTX enclosure from the computer.
b. Insert four hard drives (preferably all the same make, model, and capacity) into the RTX enclosure
and flip the power switch on the rear of the unit.
c. After the RTX enclosure boots up, it will begin alarming and the LCD will display the error "Error:
Not a RAID Set". Press the Enter button to silence the alarm.
d. Press the Enter button a second time and the LCD screen will ask "Make New RAID?" Press Enter
to confirm.
e. The LCD will display "Select RAID Type". Press Up or Down to cycle through to your desired RAID
type and press Enter.
f. The screen will display "Will Erase all Data OK?" Pressing Enter will result in the loss of all
data on the drives. Ensure all data is backed up, then press Enter.
g. The new configuration will be selected and RTX enclosure will reboot. The RAID is now created.
3 RAID Is Not A Backup
Because your RTX430-3QR features redundant RAID modes which protect against a hard drive me-
chanical failure, it is an excellent part of any backup strategy. However, a RAID is not, in itself, a
backup strategy. Many things besides hard drive failure can damage or erase your data:
•
Corruption caused by unexpected disconnection during data access (e.g. a cable is unplugged
during a data transfer, or the computer crashes or loses power while writing to the drives)
•
Corruption or destruction caused by viruses or other malware
•
Sabotage by a disgruntled employee or acquaintance
•
Theft of your RTX enclosure
•
Natural disasters such as fire, flooding, etc.
Considering these possibilities, any single copy of your important data must always be considered
at risk. That's why backing up is so important. Follow the 3-2-1 backup rule. Data should exist in
three different places on two different storage media and at least one of those copies should be
maintained offsite.
Without an effective backup strategy, recovering data may be impossible, or the cost of data re-
covery may be quite expensive. The CRU warranty does not cover costs associated with data loss
(nor do the warranties of other hard drive manufacturers).
Plan accordingly and backup data to minimize downtime!
4 Technical Specifications
Product Name
RTX430-3QR
RAID Levels Supported
RAID 0, 1, 5, 10
Interface Types & Speeds
• USB2: up to 480 Mbps
• USB3: up to 3.2 Gbps
• eSATA: up to 3 Gbps
• FireWire 800: up to 800 Mbps
Compatibility
3.5" SATA hard drives (SATA1, SATA2, and SATA3)
Data Connectors
One (1) USB3 connector (backward compatible)
One (1) eSATA connector
Two (2) FireWire 800 connectors
Auto-Rebuild
Yes (3-disk RAID 5 configuration only)
LED Indicators
• Power Indicator
• System Indicator
• RAID Indicator
• Bay Power Indicator (one per bay)
• Disk Activity Indicator (one per bay)
Controller Display
LCD screen with backlight/control panel
Operating System
• Windows 8, 7, Vista, or XP
Requirements
• Windows Server 2012, 2008, and 2003 product families
• Mac OS X 10.4.x or higher
• Linux distributions that support the connection type used
RTX220 QR - Manual
