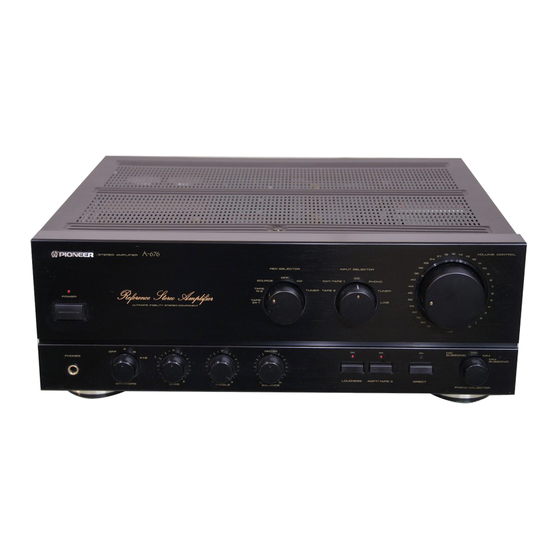
Pioneer A-676 Manual de Instruções - Página 12
Procurar online ou descarregar pdf Manual de Instruções para Amplificador Pioneer A-676. Pioneer A-676 16 páginas. Stereo amplifier
Também para Pioneer A-676: Manual de Instruções (17 páginas), Manual de Instruções (32 páginas)

I
OPERATIONS
I
I
UTILISATION
I
BEFORE BEGINNING OPERATIONS
Set the controls and switches as follows: See page 10.
1. Set the VOLUME CONTROL to minimum.
@
2. Set the POWER switch to ON.
CD
3. Set the SPEAKERS switch to A, B or A
+
B.
@
4. Set the BALANCE control to the center position.
®
5. Set the DIRECT button to OFF.
®
6. Set the ADPT 1/TAPE 3 button to OFF.
®
[A-777 only]
7. Set the MUTING button to OFF.
@
I
PLAYBACK PROCEDURES
1. Set the INPUT SELECTOR or ADPT 1/T APE 3 button.
@,®
How to select playback source;
• When listening to programs from equipment connected to the LINE
jacks: Set to [LINE].
• When listening to an AM/FM broadcast: Set to [TUNER].
• When listening to a record: Set to [PHONOJ.
PHONO EO button to ON (A-777 only).
Set PHONO SELECTOR switch to MM (MM SUBSONIC) or MC (MC
SUBSONIC) according to the type of cartridge being used.
• When listening to a compact disc: Set to [CD].
• When listening to a tape: Set to [OAT ITAPE 11. [TAPE 2] or [ADPT 1I
TAPE 3].
2. Operate the playback equipment.
3. Adjust playback volume with the VOLUME CONTROL
on this unit.
@
RECORDING TAPES
1. Select the recording source with REC SELECTOR
switch.
®
• When set to the SOURCE position, the signals from the device
selected by INPUT SELECTOR switch are recorded. (To record signals
from a device connected to the PHONO or LINE jacks, set the REC
SELECTOR switch to SOURCE and set the INPUT SELECTOR switch
to PHONO or LINE).
When recording the signal from the PHONO jacks, set PHONO EO
button to ON position (A-777 only).
• Recording is impossible when the switch is set to OFF.
NOTE:
When this switch is set at other than SOURCE and OFF position, the
equipment
selected by REC SELECTOR switch
can be recorded,
regardless of the setting of INPUT SELECTOR or DIRECT buttons.
2. When usingthe cassette deck connected to the ADPT
1/T APE 3 jacks for recording.
The source selected with the INPUT SELECTOR will be recorded,
regardless of the REC SELECTOR position.
However, recording will not be possible when the DIRECT button is ON.
20
<ARE1194>
EnlFr
AVANT
UTILISATION
Regier com me suit les commandes et commutateurs:
Voir page 10.
1. Reglez Ie VOLUME CONTROL au minimum.
@
2. Placez l'interrupteur d'alimentation (POWER) sur la
position ON.
CD
3. Placez Ie selecteur d'enceintes (SPEAKERS) sur la
position A, B ou A
+
B.
@
4. Placez la commande de BALANCE en position
mediane.
®
5. Placez la touche d'entree directe (DIRECT) sur la
position OFF.
®
6. Placez la touche de contrale de bande 3 (ADPT 1/
TAPE 3) sur la position OFF.
®
[A-777 seulement]
7.
Placez la touche de sourdine(MUTING) sur la position
OFF.@
~OCEDURE
DE REPRODUCTION
1. Reglez Ie selecteur d'entree (INPUT SELECTOR) ou
appuyez sur la touche de contrale de bande 3
(ADPT 1/TAPE 3).
@,
®
Comment selectionner la source a reproduire;
• Pour ecouter un programme reproduit sur un appareil raccorde aux
prises d'entree de Iigne (LINE): Position [LINE].
• Pour ecouter une emission AM ou FM: Position [TUNER].
• Pour ecouter un disque: Position [PHONOl.
Placez Ie commutateur
du correcteur
phono (PHONO EO) sur la
position ON (A-777 seulement).
Placez Ie selecteur PHONO SELECTOR sur la position MM (MM
SUBSONIC) (aimant mobile) ou MC (MC SUBSONIC) (bobine mobile)
en fonction du type de cellule utilisee.
• Pour ecouter un compact disc: Position [CDl.
• Pour ecouter une bande: Position [DATITAPE
1], [TAPE 2] ou
[ADPT 1
IT
APE 3]
2. Faire fonctionner I'equipement de reproduction.
3. Regier Ie volume de reproduction avec la commande
de volume (VOLUME CONTROL) de cet appareil.
@
I
ENREGISTREMENT
DE
BAN DES
1. Selectionner la source d'enregistrement avec Ie
selecteur d'enregistrement (REC SELECTOR).
®
• Lorsque Ie selecteur est sur la position SOURCE, les signaux en
provenance du commutateur
d'appareil selectionne par Ie selecteur
d'entree (INPUT SELECTOR) sont enregistres. (Pour enregistrer les
signaux en provenance de I'appareil raccorde aux prises d'entree
PHONO
ou LINE, placez
Ie selecteur
d' enregistrement
(REe
SELECTOR) sur la position SOURCE et placez Ie selecteur d'entree
(INPUT SELECTOR) sur la position PHONO au LINE.
Pour enregistrer les signaux en provenance des prises PHONO, placer
Ie commutateur
du correcteur phono (PHONO EO) sur la position
"ON"
(A-777 seulement).
• L'enregistrement
est impossible lorsque Ie selecteur est regie sur la
position OFF.
REMARQUE:
Lorsque ce selecteur est regie sur une position autre que SOURCE ou
OFF, un enregistrement peut etre effectue depuis /'apparei/ selectionne
par Ie selecteur d'enregistrement
(REC SELECTOR), quels que soient
les reglages du selecteur d'entree (INPUT SELECTOR) et de la touche
DIRECT.
2. Lorsquevous utilisez la platine cassette raccorde aux
prises ADPT 1/T APE 3 pour enregistrer.
La source selectionnee par Ie selecteur d'entree (INPUT SELECTOR) sera
enregistree, ceci quelle que soit la position du selecteur d'enregistrement
(REC SELECTOR). L'enregistrement
n'est cependant
pas possible
lorsque Ie commutateur d'entree directe (DIRECT) est sur la position ON.
