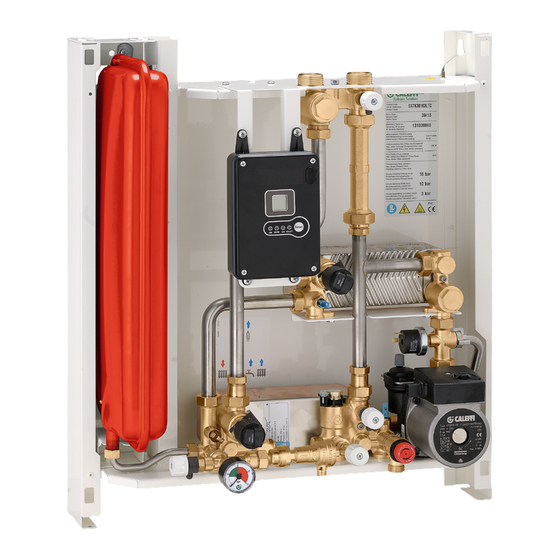
CALEFFI SATK30 Series Instruções de instalação, colocação em funcionamento e manutenção - Página 12
Procurar online ou descarregar pdf Instruções de instalação, colocação em funcionamento e manutenção para Equipamento de gravação CALEFFI SATK30 Series. CALEFFI SATK30 Series 16 páginas. Wall-mounted compact indirect heat interface unit

Maintenance
All maintenance procedures should be carried out by an authorised
technician.
Regular maintenance guarantees better efficiency and helps to
save energy.
Before carrying out any maintenance, repair or part replacement
work, proceed as follows:
- Cut off the electric supply
- Remove the cover
- Close the shut-off valves
- Empty the HIU using the drain cocks provided.
Heat exchanger replacement
- Remove the heat exchanger, loosening the 2 hex socket head
screws fixing it in place (A)
- Replace the heat exchanger and the O-rings.
- Tighten the two fixing screws (A).
N.B. The pins fixing the heat exchanger are positioned in such a way
as to allow it to be placed only in the correct direction.
A
Strainer cleaning
All heat interface units have a strainer on the inlet for water from the
centralised system.
To clean these strainers, carry out the following maintenance
procedure:
- Unscrew the cap (B)
- Remove the strainer mesh and discard any impurities
- Refit the strainer mesh
- Refit the cap and tighten it.
Temperature probe replacement
- Disconnect the probe cable by bending tab (C) slightly
and extracting the connector (see page 13, ref. 1-3-7)
- Unscrew the probe
- Fit the new probe
- Reconnect the connector respecting the only possible way it can
be inserted.
Vessel pre-charge check
For correct operation of the system periodically check (at least
once every six months) the vessel pre-charge value.
C
Replacing the valve obturator
- Extract the fixing clip (D) and then the actuator
- Position the new actuator (E)
- Insert the fixing clip, respecting the correct direction
- Reconnect the connector.
Replacing the valve obturator
- Disconnect the valve actuator (see previous paragraph)
- Extract the obturator by unscrewing the locking nut (F)
- Replace the obturator, screw on the locking nut (F) and then fit
the actuator
- Insert the fixing clip, respecting the correct direction
- Reconnect the connector.
A
Replacing the DHW priority flow meter
- Disconnect the flow meter cable acting on the connector (see
page 13, ref. 2)
- Extract the flow sensor (G)
- Position the new sensor
- Reconnect the connector respecting the only possible way it can
be inserted.
Replacing or cleaning the DHW priority flow meter turbine
Extract the flow sensor
- Unscrew and remove the cartridge (H)
- Remove any impurities or change the cartridge if necessary
- Screw the cartridge back into place
- Refit the flow sensor
When carrying out maintenance on the electrical part, for the
connections follow the diagram on page 13.
After concluding maintenance, proceed with the filling and
checking operations described in the chapter "Commissioning"
and fit the cover.
If you require any information regarding spare parts, please contact
Caleffi spa.
12
D
F
G
H
