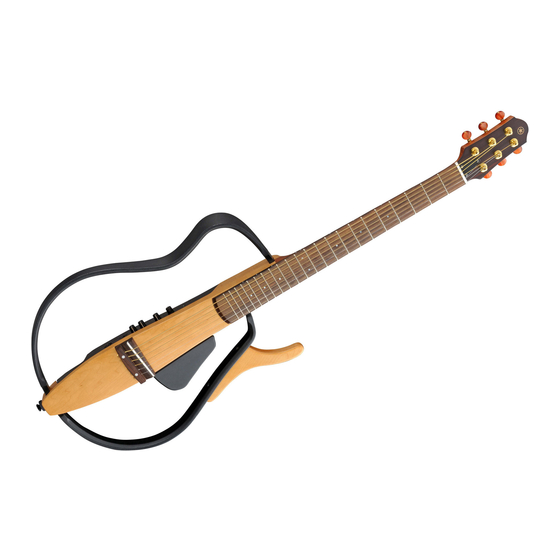
Yamaha Silent Guitar SLG-100S Manual de serviço - Página 7
Procurar online ou descarregar pdf Manual de serviço para Instrumento musical Yamaha Silent Guitar SLG-100S. Yamaha Silent Guitar SLG-100S 22 páginas. Yamaha rbx374: product brochure
Também para Yamaha Silent Guitar SLG-100S: Manual do Proprietário (15 páginas), Brochura (18 páginas), Brochura (40 páginas)

QQ
3 7 63 1515 0
DISASSEMBLY PROCEDURE
Preparations
Make the following preparations;
Turn off the power switch.
Remove the battery cover and battery.
1.
Left Frame
(Time required: About 1 minute)
1-1 Loosen the adjusting bolt (front) marked [E15] and the adjusting
bolt (rear) marked [E16]. The left frame can then be removed.
(Fig.1)
2.
Bracket Assembly, Bracket, Sleeve
(Time required: About 2 minutes each)
2-1 Remove the left frame. (See procedure 1.)
2-2 Bracket Assembly:
Remove the two (2) screws marked [D05]. The upper bracket
assembly can then be removed from the left frame. (Fig.1)
The lower bracket assembly can be removed in the same manner.
2-3 Bracket, Sleeve:
Remove the two (2) screws marked [E19]. The upper bracket
and the upper sleeve can then be removed. (Fig.1)
The lower bracket and the lower sleeve can be removed in the
same manner.
3.
Right Frame
3-1 Remove the four (4) screws marked [E22]. The right frame can
then be removed with the horn. (Fig.1)
TE
4.
Horn, Right Bracket
L 13942296513
4-1 Remove the right frame. (See procedure 3.)
4-2 Horn:
Remove the two (2) screws marked [D08]. The horn can then be
removed. (Fig.1)
4-3 Right Bracket:
Remove the two (2) screws marked [E21]. The upper right
bracket can then be removed. (Fig.1)
The lower right bracket can be removed in the same manner.
Peg
(糸巻き)
Bracket
(フレーム受けプレート)
Bracket assembly
(ブラケットAss'y)
[E19]
Sleeve
[D05]
(スリーブ)
Left frame
(フレーム (L) )
Bracket assembly
(ブラケットAss'y)
www
[E19]
[D05]
Sleeve
(スリーブ)
.
Bracket
(フレーム受けプレート)
http://www.xiaoyu163.com
(Time required: About 1 minute)
(Time required: About 2 minutes each)
Peg
(糸巻き)
Panel holder assembly
Strings
(パネルホルダー集成)
(弦)
[E15]
[E22]
[E21]
Right bracket
(ブラケット (R) )
[D08]
x
ao
Right bracket
y
(ブラケット (R) )
[E21]
i
[E16]
[E22]
http://www.xiaoyu163.com
8
(分解手順)
準備
作業を行う前に下記のことを行って下さい。
電源スイッチを OFF にします。
バッテリーカバーを外し、 中のバッテリー(乾電池)を取り
外します。
1.
フレーム(L)
1-1 [E15]の調整ボルト(F) 1 本と[E16]の調整ボルト(R) 1 本を
緩めて、フレーム(L)を外します。 (図 1)
2.
ブラケット Ass'y、フレーム受けプレート、スリーブ
(所要時間:各約 2 分)
2-1 フレーム(L)を外します。 (1 項参照)
2-2 ブラケット Ass'y:
[D05]のネジ 2 本を外して、フレーム(L)から上側のブラ
ケット Ass'y を外します。 (図 1)
下側のブラケットAss'yも、 同様にして外すことができま
す。
2-3 フレーム受けプレート、スリーブ:
[E19]のネジ 2 本を外して、上側のフレーム受けプレート
とスリーブを外します。 (図 1)
下側のフレーム受けプレートとスリーブも、同様にして
外すことができます。
3.
フレーム(R)
3-1 [E22]のネジ 4 本を外して、ホーンと共にフレーム(R)を外
します。 (図 1)
Q Q
4.
ホーン、ブラケット(R)
3
6 7
1 3
4-1 フレーム(R)を外します。 (3 項参照)
4-2 ホーン:
[D08]のネジ 2 本を外して、ホーンを外します。 (図 1)
4-3 ブラケット(R):
[E21]のネジ 2 本を外して、上側のブラケット(R)を外しま
す。 (図 1)
下側のブラケット(R)も、 同様にして外すことができます。
[F02] X 4
Panel holder
[D05]: Flat Head Tapping Screw-2
(パネルホルダー)
3.0X8 (QC667000)
Spacer
[D08]: Flat Head Tapping Screw
(基板スペーサー)
3.5X20 (QC667100)
PUP2
[E15]: Adjusting Bolt, Front
M6.0XP1X25 (QC653400)
Pickup assembly
[E16]: Adjusting Bolt, Rear
(ピックアップAss'y)
M6.0XP1X12 (QC653500)
[E19]: Flat Head Tapping Screw
3.0X10 ZMC2BL (QA406400)
Horn
[E21]: Flat Head Tapping Screw
(ホーン)
3.0X10 ZMC2BL (QA406400)
u163
[E22]: Flat Head Tapping Screw-2
3.0X8 (QC667000)
.
[F02]: Bind Head Tapping Screw-1
Right frame
(フレーム(R) )
3.0X10 ZMC2BL (20404200)
Fig.1
(図1)
2 9
9 4
2 8
(所要時間:約 1 分)
(所要時間:約 1 分)
(所要時間:各約 2 分)
1 5
0 5
8
2 9
9 4
(+皿タッピングネジ2種)
(+皿タッピングネジ)
(調整ボルト(F) )
(調整ボルト(R) )
(+皿タッピングネジ)
m
(+皿タッピングネジ)
co
(+皿タッピングネジ2種)
(+バインドタッピング1種)
SLG-100S
9 9
2 8
9 9
7
