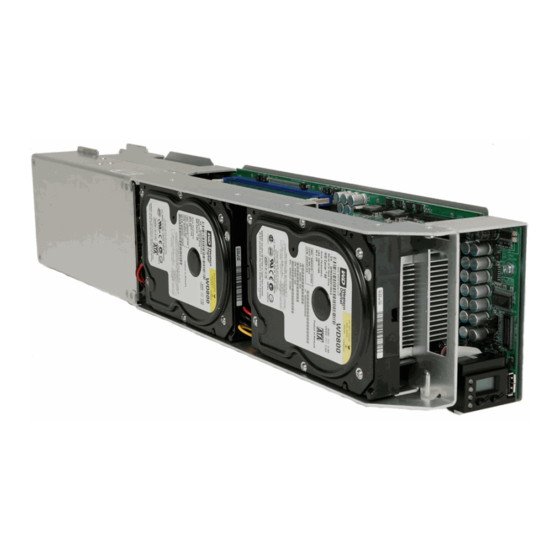
DIMM slots
(U5 on bottom)
WEEE Disposal Guidelines
In the European Union, this electronic
product falls under the European
Directive (2002/96/EC) WEEE. When it
reaches the end of its useful life or is
no longer wanted, it should not be dis-
carded with conventional waste, but
disposed of at an approved designated
recycling and/or treatment facility.
Laws are different in each country, so
please check with your local authori-
ties for proper disposal instructions.
For assistance, contact ClearCube at
RoHS
ClearCube Technology
8834 Capital of Texas Hwy N
•
For a 16-port EP6 module in an R4300 chassis, all ports are avail-
able. The primary ports on the blade are connected to the corre-
sponding primary ports on the EP6, and the secondary ports on the
blade are connected to the corresponding secondary ports on the
EP6. When Ethernet port availability in the data center is an issue,
always connect to the primary Ethernet ports on the EP6 first.
•
For an R1300 installed in an R4200 chassis, only the primary ports
on the R1300 are connected.
Upgrading the Memory on an R1300
The R1300 can work with a single DIMM, as well as two DIMMs of different
sizes and speeds. When equal size DIMMs are used, the memory control-
ler on the R1300 uses interleaved memory to give better performance.
To replace or upgrade the memory on the R1300, do the following:
Note: Using mismatched DIMMs incurs a performance penalty. With
equal-sized DIMMs, a mismatch in speed or timing causes the system to
run at the slower of the two DIMMs. With mismatched sizes, the system
always runs in non-interleaved mode at the slower speed or timing of the
two DIMMs.
Use only ClearCube-approved memory.
Changing the Interposer on an R1300
ClearCube offers two separate kits that allow changing the interposer on
an R1300 from the 30-pin to the 44-pin interposer, or from the 44-pin to the
30-pin interposer. With the 30-pin interposer, the R1300 works in either the
R4200 or the R4300 chassis. With the 44-pin interposer, the R1300 works
in the R4300 chassis and provides the convenience of a back-apron USB
2.0 port. For more information, contact your Account Executive.
The R Series Data Center Products Reference Guide contains more
details on the R1300 blade.
For more information, please contact ClearCube Technical Support.
Email:
Website:
In the US
Outside the US
Austin, Texas 78759
1. Pull the tabs on either side of the mem-
ory socket apart to remove the module.
2. Carefully insert the new memory mod-
ule into the socket, making sure that the
tabs snap inward securing the module in
place. Always populate slot U5 (closest
to the bottom of the blade) first.
support.clearcube.com
(866) 652-3400
+1 (512) 652-3400
voice 512 652 3500 www.clearcube.com
G020088-B rev 8/31/2006