ClearCube A1410 Manual de início rápido
Procurar online ou descarregar pdf Manual de início rápido para Hardware informático ClearCube A1410. ClearCube A1410 2 páginas. I/port
Também para ClearCube A1410: Manual de início rápido (2 páginas), Manual de início rápido (2 páginas), Início rápido (2 páginas), Manual de início rápido (2 páginas)
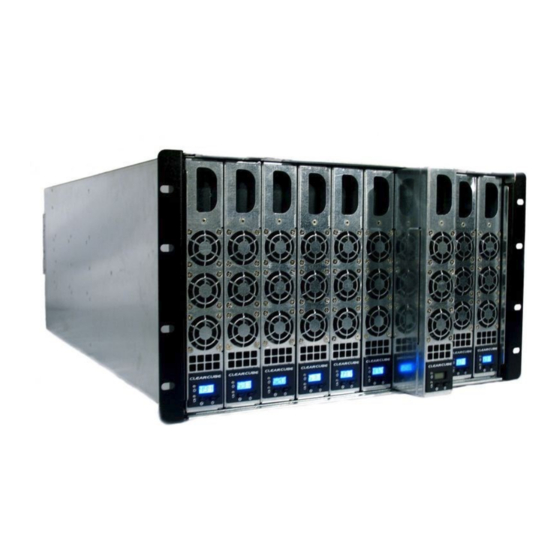
A1410 Blade
PS/2, VGA and USB
Connectors for Configuration
outside of Chassis
Handle
Power
LED
Hard Disk
LED
Reset Button
LCD Bezel
ClearCube Technology
Quick Start Guide
This guide describes how to install a ClearCube A1410 PC blade in an
A3100 chassis, how to enable a blade for out-of-band management, and
how to install images on the blade. Before setting up and installing an
A1410 blade, ensure that your A3100 chassis is set up as described in
A3100 Quick Start Guide and A–Series Setup and Installation Guide. See
Setup and Installation Guide for information about the following
requirements: space and floor support, cooling and airflow, blade and
chassis power and cabling.
Installing Blades in A3100 Chassis
1. Open the chassis front bezel by pressing in on the latch located on
2. From the top, pull the bezel toward you and lift up to remove the bezel.
3. To insert a blade, hold the blade so the D-shaped handle in the front
4. Replace the bezel after inserting your blades.
5. Insert Ethernet cables in the active port or ports, located on the
6. To power on a blade, press the right-most button
LCD Bezel
Configuring A1410 Blades for Out-of-band Management
A1410 blades are enabled with Intel® Active Management Technology
(AMT). See A–Series Setup and Installation Guide for information about
AMT. The following steps assume that the blade is in an A3100 chassis, that
blades are on an isolated, wired network, and that the computer you are using to
configure the blade is on the same subnet as the blade you are configuring.
LCD
Note: By default, A1410 blades are configured to use DHCP.
The following figure shows the recommended network configuration
for configuring A1410 blades.
DHCP Server
Power Button
8834 Capital of Texas Hwy N
the upper-right side of the chassis.
Note: When pressing the latch to open the front bezel, hold the
bezel with one hand to ensure that the bezel does not fall.
panel is upright and is facing you. Align the blade with the top and
bottom guides in the chassis and slowly insert the blade into the
chassis. There is a slight resistance when blade connectors are
inserted into backplane connectors. When properly seated, a PC
blade is flush with the front edge of the bottom guide bracket.
expansion backplane, for each blade in the chassis. Active ports are
indicated by illuminated LEDs.
PXE Server
Sentral
Austin, Texas 78759
voice 512 652 3500 www.clearcube.com
on the front of the blade.
Rack and Blades
Switch