3M Multimedia Projector MP8610 Instruções de configuração rápida
Procurar online ou descarregar pdf Instruções de configuração rápida para Projetor 3M Multimedia Projector MP8610. 3M Multimedia Projector MP8610 2 páginas. Ceiling mount kit
Também para 3M Multimedia Projector MP8610: Manual de início rápido (2 páginas)
MP8610 Multimedia Projector Quick Setup Instructions
Projector Packout
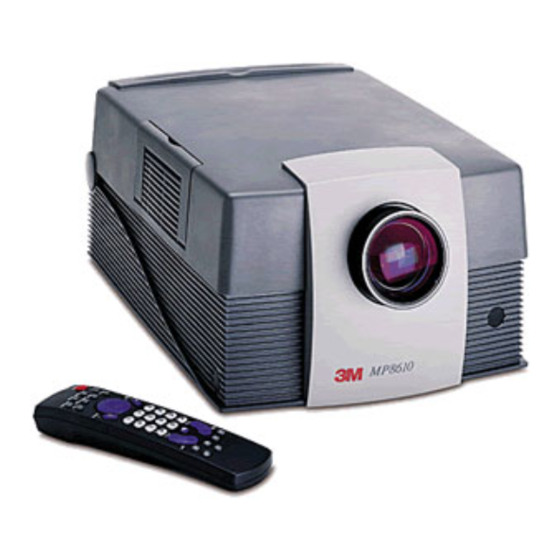
1.
MP8610 Multimedia Projector
2.
Remote control transmitter (AAA batteries included)
3.
VGA cable 15-15 pin male to male)
4.
Mouse cable (9–9 pin female to female)
5.
Power cord set (U.S., UK, and European)
6.
PS/2 mouse adapter
7.
Audio cable (RCA–mini jack)
8.
S-video cable
9.
RCA video cable
PC
VIDEO
AUX
MENU
ENTER
1
2
3
4
5
6
7
8
9
REVEAL
BLANK
TIMER
0
OPTIMIZE
VOL
BRIGHT
MOUSE
POINTER MAGNIFY
FREEZE
2
1
6
7
Remote Control
Remote Button
PC
VIDEO
VIDEO
AUX
PC
MENU
AUX
MENU
DISC PAD
ENTER
L/ENTER
R
1-6
L
R
1
2
3
REVEAL/7
BLANK/8
4
5
6
TIMER/9
7
8
9
REVEAL
BLANK
TIMER
0
OPTIMIZE
OPTIMIZE
VOL
BRIGHT
MOUSE
FREEZE
BRIGHT
POINTER MAGNIFY
MOUSE
POINTER
8610-05aA
MAGNIFY
FREEZE
3
4
5
8
9
8610-10A
Description of Button Functions
Switch between Standby mode (lamp off, fan off) and operation mode (lamp on, fan on).
Switches to PC mode.
Switches to video mode. Press repeatedly to select video source.
Not used
Display On Screen Menu System.
Mouse emulation ON , disc pad controls the movement of the pointing device.
Emulation OFF , disc pad centers image on screen.
Mouse emulation ON, left mouse button. Mouse emulation OFF, Enter button for confirmation.
Right mouse button, when mouse-emulation active.
Not used.
Press REVEAL to mask image. Use the disc pad to reveal image or press REVEAL for full image.
Display white background. Press again to return projection image.
Press for timer-window. The timer starts with the last used adjustment. A new start value is entered
by operating the ENTER key and adjusting the value with the disc pad. Operating the ENTER key
again starts the timer. When the timer has run down, the timer blinks.
Optimize (adjust) brightness and contrast settings for best picture.
Volume adjustment.
VOL
Mute.
Brightness adjustment.
ON: The L and R buttons operate the left and right mouse key functions. Drag-and-drop functions
are possible by simultaneous operation of the L/R mouse key and disc pad.
OFF: L button is the Enter confirmation key. R button not used. Disc pad centers image.
Places a pointing device on the screen. Move pointer by operating the disc pad.
Press MAGNIFY to double the image size in horizontal and vertical direction. Move the disc pad to
displace the magnified area within the image. Press the MAGNIFY key again to switch back to
normal presentation.
In Video mode , press MAGNIFY to switch between scaled & unscaled representation (NTSC only).
Stores (freezes) the projected image. Press FREEZE again to return normal image.
Start Up Procedure
1.
Press the power switch (1) to ON to apply power to
the projector (| = ON, O = OFF). The red LED (3)
will illuminate.
2.
Press the Standby button (2). The green LED (3)
will illuminate and an image will appear and grow
brighter on the screen.
3.
Check all ventilation slots and clear away any
obstructions.
4.
Turn the lens (4) to focus the image.ctions.
5.
Press the foot lock button (5) to release the height
adjustment feet.
6.
Raise/lower projector body to extend or retract feet
(6) to obtain best image height.
7.
Rotate feet (7) for fine adjustment.
8.
Power up your computer source and video
source(s).
√ Note
In most cases, the projector will automatically adjust to the
graphic mode of your computer by selecting a pre-programmed
setting.
3
2
1
4
5
6
7
Standby Mode
1.
Press the Standby button.
2.
The lamp will switch off and the red LED will
illuminate.
3.
Press the standby button again to illuminate
the lamp and project an image on the screen.
√ Note
In standby mode, the fan motor will continue to run for a
few minutes until the projector cools down.
Shutdown Procedure
1.
Wait until the cooling fan motor cycles off
then press the main power switch to Off.
2.
Turn off the power to your input devices.
3.
To transport the projector, disconnect the
power cord, computer cable, mouse cable
and audio/video cables. Fully retract the
projection lens to protect it during transport.
√ Note
Switching the power off before the fan has cycled off, will
decrease the life of the projection lamp.
8610-11A