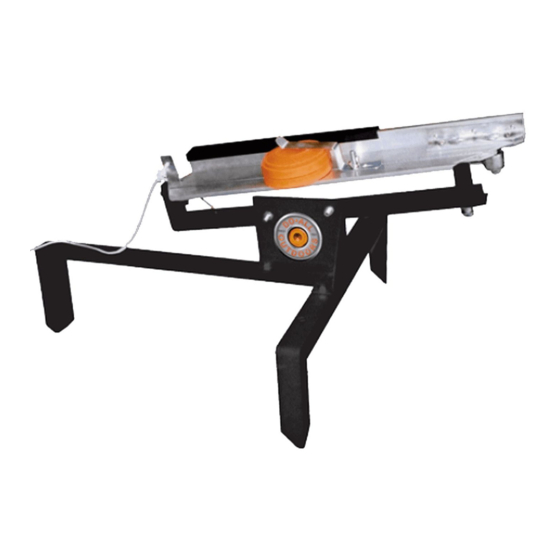
Do-All Outdoors CT101 Manual de instruções - Página 4
Procurar online ou descarregar pdf Manual de instruções para Desporto & Ar livre Do-All Outdoors CT101. Do-All Outdoors CT101 4 páginas.

2. Firmly step on each of the 3 corner frame spikes to "plant" the trap in the ground. For maximum stability, drive large
nails or stakes (not included) into the ground using the holes in each leg section.
3. The Trap should be imbedded deep enough to where the top of the base is flush with ground.
4. Elevation of clay targets are adjustable by removing wing nut & bolt on support leg hole and moving it to another
5. The elevation wing nut must be re-tightened following the adjustment. Flight direction is determined by the location of
the clay on the throwing arm.
6. With the throwing arm in the 12 o'clock position, place a clay pigeon under the clay pigeon clamp and rotate clockwise
until it reaches the 6 o'clock position and locks into the trigger.
DIRECTION AWAY FROM BYSTANDERS. ALWAYS PRACTICE USING THE THROWER IN AN OPEN AREA AWAY FROM PEOPLE,
TREES, OR ANIMALS (RECOMMENDED AT LEAST 400 METER OPEN FIELD/SHOT FALL ZONE).
7. With the shooter positioned 30 feet to the left of the Trap, pull the string to release the arm and throw the clay!
Clay pigeons only throwing a short distance -
Make sure the Trap is firmly pressed into the ground or securely mounted on a tire.
Tighten the wing nut on the spring which will increase arm swing speed.
Clay pigeons breaking during use -
Clay pigeon clamp is too close to the trigger. Uncock the machine and loosen the
wing nut and slide the clamp forward on the arm. Re-tighten wing nut.
Register your product online at www.doalloutdoors.com or call customer service at
1(866)SHOT-DOC. Receipt is required for warranty registration. ONE YEAR PARTS
CUSTOMER SERVICE
1(866)SHOT-DOC
Monday - Friday 8:00 AM to 4:00 PM
Register your warranty online at
www.doalloutdoors.com
DO-ALL OUTDOORS, LLC
Nashville, Tennessee, USA
Find tech tips, instructions,
troubleshooting videos, and more
online!
OPERATION
1. Position Trap in desired location suitable for shooting Trap.
adjustment hole.
NEVER ADJUST THE TRAP WHILE IT IS COCKED!
TROUBLESHOOTING
WARRANTY
GUARANTY.
SHOWN MOUNTED ON TIRE (TIRE NOT INCLUDED)
DO ALL OUTDOORS
CT101
ALWAYS MAKE SURE YOU POINT THE TRAP IN A SAFE
