SECTION 4 - OPERATION
4.1
General
The AquaFix™ 406 GPS P-EPIRB models are designed to be manually deployed and activated. It is
only to be activated when all other means of self-rescue have been exhausted. Activation of the
P-EPIRB tells Search and Rescue who you are, where you are, and that you are facing a life
threatening situation.
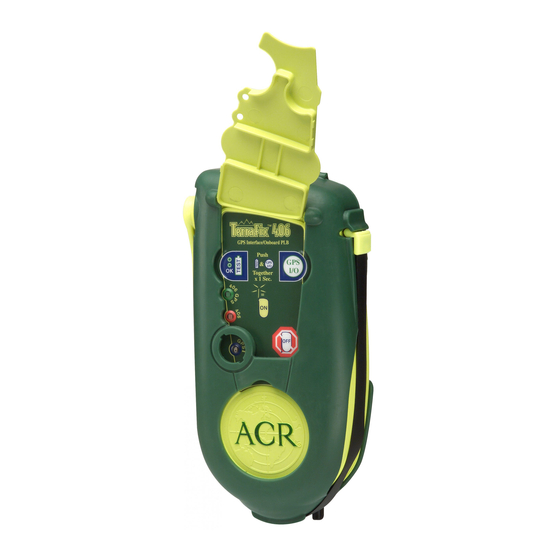
Self Test Button
Green & Red LED
GPS Interface
4.2
AquaFix™ 406 GPS P-EPIRB Emergency Activation
4.2.1 Activation
To activate your P-EPIRB in an emergency situation, unfasten the antenna from the case or holster
and move it into the upright position (See figure 2). Lift the holster cover revealing the P-EPIRB
keypad (see figure 3). Depress the "self-test" and "GPS I" or "GPS I/O" buttons simultaneously for
at least 1/2 second and less than 5 seconds (see figure 4). Your P-EPIRB is now activated. While
transmitting your emergency signal, the red LED will flash once every 2 seconds alerting you that
your P-EPIRB is activated. If GPS data is present in the P-EPIRB via the GPS I or GPS O the red
LED will turn off and the green LED will take over flashing once every 2 seconds.
4.2.2 Activation with GPS I (P/N 2797.2 and P/N 2797.4)
The AquaFix™ 406 GPS I and GPS I/O are equipped with a GPS Interface. Prior to activating
your P-EPIRB you can download your GPS LAT/LON into the P-EPIRB using an external GPS
receiver and the GPS Interface cable provided with the P-EPIRB. Once your external GPS has
acquired good global positioning data, press the GPS test button for at least ½ second and no longer
than 5 seconds and your GPS data will download into the P-EPIRB (for full instructions see Section
4.7.2). Once you activate your P-EPIRB, your GPS coordinates are included in the distress signal.
Figure 1. Key Pad Functions
(P/N 2797.4 shown)
GPS Test Button
-
-
Off Button
5
GPS I (P/N 2797.2)
GPS I/O (P/N 2797.4)
ON
Press both test and
GPS buttons
together for 1
second to activate
the beacon in an
emergency
Y1-03-0173 Rev. E

