BobsCNC Evolution E6 Series Краткое руководство по эксплуатации - Страница 3
Просмотреть онлайн или скачать pdf Краткое руководство по эксплуатации для Системы управления BobsCNC Evolution E6 Series. BobsCNC Evolution E6 Series 3 страницы. Cnc router engraver bearing and rail dust kit
Y-Axis Installation
The first thing to do is to thoroughly clean both the rod and bearing on the Y-axis of
Left
all dust.
Side
The Y-axis bag contains the Y-axis parts, see photo 8. It will contain, 1 each
Right
part RY1 and LY1, 1 each part RY2 and LY2, 1 each part RY3 and LY3, 2 each
Side
4mm nut, flat washer, and 4mm x 20mm long screws, see photo 6 showing
each part in order as described. The third smaller screw, that is in
the picture, is the one taken out of the X-axis previously.
Photo 8
Y axis parts
Start by removing the 2 - 4mm X 16mm screw just above and just
below of the left bearing (see picture 9 red arrow for location) and leave the nut in place. It is best to place masking
tape over the nuts to hold them in place before removing the screws as shown for the X-axis.
Then using the 2 - 4mm X 20mm screw from the Y-axis kit, mount part RY1 by inserting the 2
Photo 9
screws back through part RY1 into the frame and into the existing nuts and tightening the
screws. Then using the 1 - 4mm 16mm screw that you took off previously from the x -axis,
insert it through part RY1 from the back of RY1. Then through the felt parts RY2, then add
plywood part RY3 and install 4 mm nut, as shown in Photo 10. Don't tighten the screw yet.
Adjust the felt pad so that it is rubbing on the rail, then tighten the screw.
Then repeat the above steps on the other side using the LY parts. Lastly, remove the masking
tape you put on to hold the nuts from all axes. Once installed, the pads will brush clean both of
the rails while the Y-axis moves, keeping both clean.
Right
This now completes the installation. You should no longer have a problem with the dust
Side
getting under your bearings and rails. Remember, after every few projects are completed on
your CNC, best to blow air over the felt pads so the dust is removed off of the felt pads to stop
them from clogging then over time.
I hope you enjoy having your bearing and rods clean while the CNC is running. Please let your
friend, with the same Bob CNC, know where they may get a set for themselves or order another
to give away as a gift to someone you know.
Photo 10
Thank you
Old Country Woodworker
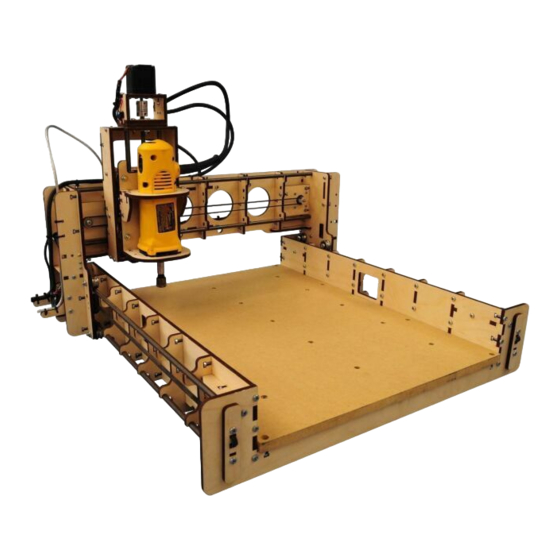
Photo 11
Y-axis
Finished
Installation
Please contact us with any questions at [email protected]
Page 3 of 3