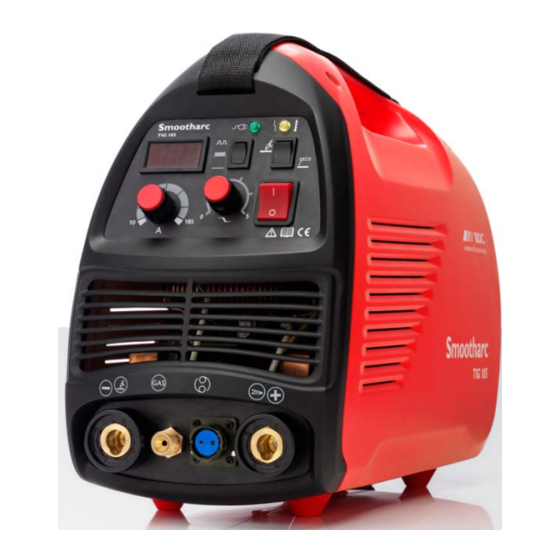
BOC Smootharc TIG 185 DC Руководство по эксплуатации - Страница 13
Просмотреть онлайн или скачать pdf Руководство по эксплуатации для Сварочная система BOC Smootharc TIG 185 DC. BOC Smootharc TIG 185 DC 15 страниц. Boc smootharc tig 185 dc welder
Также для BOC Smootharc TIG 185 DC: Руководство по эксплуатации (19 страниц)

24
BOC Smootharc TIG 185 Operating Manual
6.0 Troubleshooting guide
Problem
Cause
Excessive
Inadequate gas flow
electrode
Improper size electrode for
consumption
current required
Operating of reverse polarity
Electrode contamination
Excessive heating inside torch
Electrode oxidising during cooling
Shield gas incorrect
Erratic arc
Incorrect voltage (arc too long)
Current too low for electrode size
Electrode contaminated
Joint too narrow
Contaminated shield gas.
Dark stains on the electrode or
weld bead indicate contamination
Base metal is oxidised, dirty or oily
Inclusion
Poor scratch starting technique
of tungsten
or oxides
Excessive current for tungsten
in weld
size used
Accidental contact of electrode
with puddle
Accidental contact of electrode
to filler rod
Using excessive electrode
extension
Inadequate shielding or
excessive drafts
Wrong gas
Heavy surface oxides not
being removed
Solution
Increase gas flow
Use larger electrode
User larger electrode or change polarity
Remove contaminated portion, then prepare again
Replace collet. Try wedge collet or reverse collet
Increase downslope
Change to Argon (no oxygen or CO
)
2
Maintain short arc length
Use smaller electrode or increase current
Remove contaminated portion, then prepare again
Open joint groove
The most common cause is moisture or aspirated
air in gas stream. Use welding grade gas only.
Find the source of the contamination and eliminate
it promptly
Use appropriate chemical cleaners, wire brush,
or abrasives prior to welding
Many codes do not allow scratch starts. Use copper
strike plate. Use high frequency arc starter
Reduce the current or use larger electrode
Maintain proper arc length
Maintain a distance between electrode and filler
metal
Reduce the electrode extension to
recommended limits
Increase gas flow, shield arc from wind,
or use gas lens
Do not use ArO
or ArCO
GMAW (MIG) gases for
2
2
TIG welding
Use wire brush and clean the weld joint prior
to welding
Problem
Cause
Porosity
Entrapped impurities, hydrogen,
in weld
air, nitrogen, water vapour
deposit
Defective gas hose or
loose connection
Filler material is damp
(particularly aluminium)
Filler material is oily or dusty
Alloy impurities in the base metal
such as sulphur, phosphorous,
lead and zinc
Excessive travel speed with rapid
freezing of weld trapping gases
before they escape
Contaminated shield gas
Cracking
Hot cracking in heavy section or
in welds
with metals which are hot shorts
Crater cracks due to improperly
breaking the arc or terminating the
weld at the joint edge
Post weld cold cracking due to
excessive joint restraint, rapid cooling
or hydrogen embrittlement
Centreline cracks in single
pass weld
Underbead cracking from
brittle microstructure
Inadequate
Gas flow blockage or leak in
shielding
hoses or torch
Excessive travel speed exposes
molten weld to atmospheric
contamination
Wind or drafts
Excessive electrode stickout
Excessive turbulence in gas stream
Arc blow
Induced magnetic field from
DC weld current
Arc is unstable due to
magnetic influence
Short
Cup shattering or cracking in use
parts life
Short collet life
Short torch head life
BOC Smootharc TIG 185 Operating Manual
Solution
Do not weld on wet material. Remove condensation
from line with adequate gas pre-flow time
Check hoses and connections for leaks
Dry filler metal in oven prior to welding
Replace filler metal
Change to a different alloy composition which
is weldable. These impurities can cause a tendency
to crack when hot
Lower the travel speed
Replace the shielding gas
Preheat. Increase weld bead cross-section size.
Change weld bead contour. Use metal with fewer
alloy impurities
Reverse direction and weld back into previous
weld at edge. Use Amprak or foot control to
manually down slope current
Preheat prior to welding. Use pure or non-
contaminated gas. Increase the bead size. Prevent
craters or notches. Change the weld joint design
Increase bead size. Decrease root opening.
Use preheat. Prevent craters
Eliminate sources of hydrogen, joint restraint
and use preheat
Locate and eliminate the blockage or leak
Use slower travel speed or carefully increase the
flow rate to a safe level below creating excessive
turbulence. Use a trailing shield cup
Set up screens around the weld area
Reduce electrode stickout. Use a larger size cup
Change to gas safer parts or gas lens parts
Rearrange the split ground connection
Reduce weld current and use arc length as short
as possible
Change cup size or type. Change tungsten position
Ordinary style is split and twists or jams
Change to wedge style
Do not operate beyond rated capacity. Use water
cooled model. Do not bend rigid torches
25
