d2itsu CS259-R Руководство по эксплуатации - Страница 17
Просмотреть онлайн или скачать pdf Руководство по эксплуатации для Пульт дистанционного управления d2itsu CS259-R. d2itsu CS259-R 20 страниц.

Dry Operation
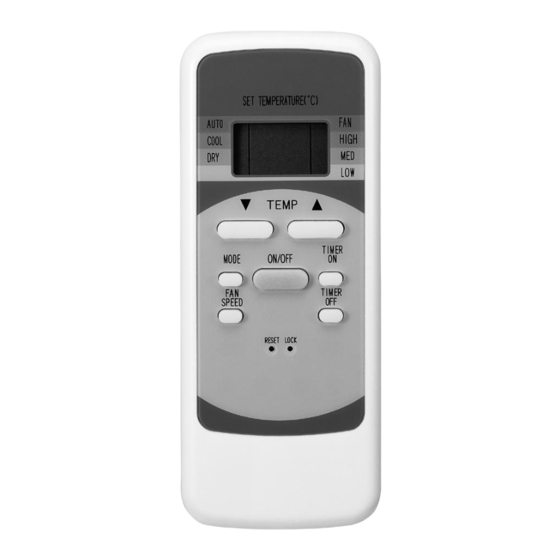
1. Push the MODE button to select DRY.
2. Push the TEMP button to set the desired temperature from 21ºC/70ºF to 28ºC/82ºF.
3. Push the ON/OFF button. The operation lamp lights and the air conditioner starts to operate in the DRY mode. Push the ON/OFF
button again to stop this unit operation.
TIMER Operation
TIMER ON button can set the auto-on time of the unit. TIMER OFF button can set the auto-off time of the unit.
1. To set the starting time.
1.1 Push the TIMER ON button, then the remote controller shows TIMER ON, the last set time for the starting operation and the
signal "h" will be shown on the DIGITAL DISPLAY area. You are now ready to reset the time to START the operation.
1.2 Push the TIMER ON button again to set desired unit start time.
1.3 After setting the TIMER ON, there will be a one-half second delay before the remote controller transmits the signal to the air
conditioner. Then, after approximately another 2 seconds, the signal "h" disappears and the set temperature will re-appear on
the digital display.
2. To set the stopping time.
2.1 Push the TIMER OFF button and the remote controller will show TIMER OFF, the last set time for the stopping operation and
the signal "h" will be shown on the DIGITAL DISPLAY area. You are now ready to reset the time of the STOP operation.
2.2 Push the TIMER OFF button again to set the time you want to stop the operation.
2.3 After setting the TIMER OFF, there will be a one-half second delay before the remote controller transmits the signal to the air
conditioner. Then, after approximately another 2 seconds, the signal "h" disappears and the set temperature will re-appear on
the digital display.
3. Set the starting & stopping time.
3.1 Push the TIMER ON button, the remote controller will show TIMER ON, the last set time for START operation and the signal "h"
will be shown on the DIGITAL display area. You are now ready to readjust the TIMER ON to start the operation.
3.2 Push the TIMER ON button again to set the time you want to start the operation.
3.3 Push the TIMER OFF button, the remote controller will show TIMER OFF, the last set time for STOP operation and the signal
"h" will be shown on the DIGITAL display area. You are now ready to reset the time to STOP operation.
3.4 Push the TIMER OFF button again to set the time you want to stop the operation.
3.5 After setting the TIMER, there will be a one-half second delay before the remote controller transmits the signal to the Air
Conditioner. Then, after approximately another 2 seconds, the set temperature will re-appear on the digital display.
Note:
1. Please reset the TIMER after cancelling the former time settings.
2. The setting time is relative time. That is the time set is based on the delay of the current time.
Warning
1. Be sure there are no barriers between the remote controller and the receiver of indoor unit otherwise the air conditioner will
not work.
2. Keep the Remote Controller away from all liquids.
3. Protect the Remote Controller from high temperatures and exposure to radiation.
4. Keep the indoor receiver out of direct sunlight or the Air Conditioner may malfunction.
5. Keep controller away from EMI (Electro-Magnetic Interference) supplied by other household appliances.
OPERATION
15
