DPCAV AV681TX Краткое руководство по эксплуатации - Страница 6
Просмотреть онлайн или скачать pdf Краткое руководство по эксплуатации для Передатчик DPCAV AV681TX. DPCAV AV681TX 8 страниц. 5.8ghz a/v transmitter kit
Также для DPCAV AV681TX: Инструкция по сборке Руководство (8 страниц)
10
FINAL ASSEMBLY: JOIN THE TWO PCB's TOGETHER
9
10.1
Using an approved PCB cleaner, remove the flux
from ALL soldered connections. Flush trim all the
component leads from sides
9
10.2
Inspect your work. Now is the time to find errors --
once the boards are joined it will be very
inconvenient to do this.
9
10.3
See Figure 10. Cut the double-sided foam pad in
half. Stack the two pieces together to form a thicker
pad. Install the pad on the RF end of the Airwave
module.
9
Stack the two PCB's with sides ã and ä facing each other. The four posts will
10.4
mate with the corresponding holes on side
Figure 11, Heatshrink
11
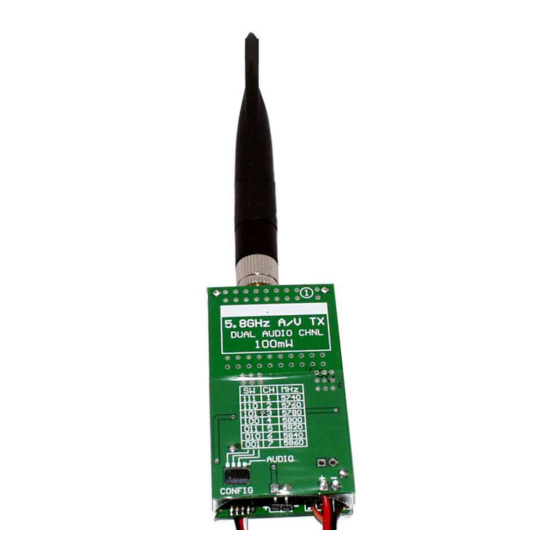
FREQUENCY CONFIGURATION
11.1
The DIP switch is used to change the transmitted frequency. The transmitter and
receiver must both be on the same channel. The three switches are set as
follows:
CH
1
2
3
4
5
6
7
AV681TX-Kit, Rev C
â
9
10.5
While lightly squeezing the foam pad end, ensure that the
two boards are parallel and close together. There should
be a slight air space between the Vreg IC's and the top of
the Airwave module. Hold this position while you solder
the four posts. Trim the excess leads.
9
10.6
See Figure 11. Slide a 1.75 inches (45mm) long piece of
heatshrink over the transmitter so that it covers the end
with the exposed electronics. About 0.25 inches (6mm)
should hang over the end that has all the wires. Airflow is
needed so do NOT totally cover the end. Use a heat gun
or hot hair dryer and neatly shrink the tubing. Matches
and lighters are not recommended.
MHz
SW1
SW2
5740
ON
ON
5760
ON
ON
5780
ON
OFF
5800
ON
OFF
5820
OFF
ON
5840
OFF
ON
5860
OFF
OFF
Page 6
å
and
.
ã
.
SW3
ON
OFF = switch open
(Front position)
OFF
ON
ON
= switch closed
(Back position)
OFF
ON
OFF
ON
Figure 10, Foam Pad
© Nov-03-2008