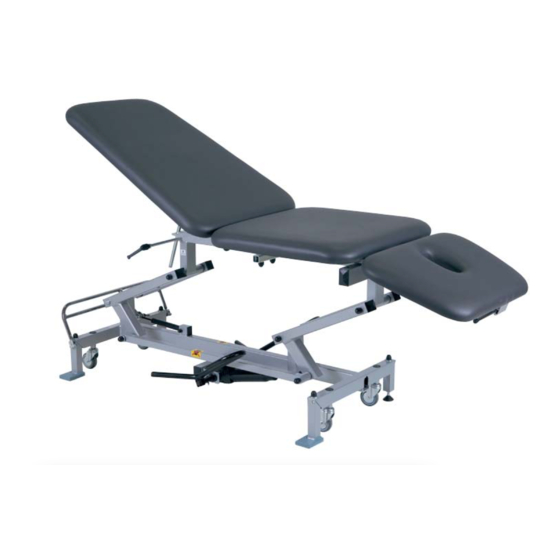
FOLLO FUTURA Follo Corpus M Руководство - Страница 9
Просмотреть онлайн или скачать pdf Руководство для Медицинское оборудование FOLLO FUTURA Follo Corpus M. FOLLO FUTURA Follo Corpus M 20 страниц.

Follo Corpus M
Unpacking/installation
1.
Take care when removing packing materials. DO NOT use a knife or other sharp instrument to avoid damaging the contents.
2.
Inspect the bench for transport damage.
Safety instructions
1.
Study and learn the operation of the handles and switches.
2.
Take care to avoid pinching when making adjustments.
3.
Do not overload the bench.
How to use (drawing on page 4)
Height adiustment of electrically powered benches: Use the pedals (10) to adjust the bench to the required height.
Height adiustment of hydraulically powered benches: Pump the bar (12) and adjust the bench to the required height. Lift the
bar to lower the bench.
Adiustment of head cushion (2): The handle (3) in front of/beneath the head cushion, releases the head cushion locking
device enabling it to be tilted up or down (4). The head cushion is locked into position when the handle is released.
Adjustment of rear cushion (5) BAS and CERVI: To raise the rear cushion, grip the cushion and adjust to the required
position (7). The cushion will remain in position when released. To lower the cushion, use the handle (6) at the side of and
beneath the rear cushion, gripping the cushion at the same time. Lower the cushion to the required position and release the
handle. The cushion will then remain in position. There are adjustment handles on both sides if the bench.
Adjustment of armrest (8) CERVI: The position and height of the armrests can be adjusted by loosening the handle (9)
underneath the armrest. To provide optimum adjustment, there are two handles on each armrest. Lock the armrest in
position by tightening the handles.
Adjustment of drainage: To adjust drainage, grip the rear end of the rear cushion (5) and loosen the handle (13). The
cushions can then be tilted/adjusted to the required position (4). Lock in position by tightening the handle (14). There are
handles on both sides of the bench. To get the maximum angle of the drainage. Turn the handle (6) and lift the rear cushion
(5) slightly and raise the drainage to the desired position.
To raise wheels (1):
Maintenance instructions
Check the following at regular intervals (every third month):
1.
Make sure that all wheels run smoothly.
2.
Make sure that the power cables are not damaged or chafed.
3.
Check that the height adjustment and that all handles, levers and pedals are functioning properly.
4.
Wash and dry the bench and apply a thin layer of ordinary silicon spray to all sliding surfaces.
To maintain the appearance of PVC Coated Fabrics they should be cleaned regularly to remove fatty substances, which
may reduce their service life. A soft cloth and warm soapy water should be used to clean the surface of the material. Mild
soap or soap flakes are recommended and residual soap should be removed using cold water. The surface should be
scrubbed with a soft brush. Solvent cleaners, wax polishes strong detergents and patent chemical cleaners should not to be
used. The use of these substances is likely to harmful to the Coat and repeated use can result in the removal of elasticity
from the PVC coating, which will result in hardening and subsequent cracking of the material's surface. PVC Coated Fabrics
are resistant to most mild acids, alkalis and household stains. Some substances such as ballpoint pen ink, lipstick,
newsprint and foodstains may be absorbed by the vinyl and cause permanent staining. This can often be minimised by
immediate cleaning with damp, soap cloth or sponge. Never place hot or cold items directly on PVC Coated Fabrics.
Hydraulic models: Hydraulic tables are equipped with a long-life heavy hydraulic lifting unit. However, the unit some times
after transport needs an airing. To do that, activate the foot-pedal 4-6 times after the table has come up to maximum level.
Electric models: Electrically powered tables are equipped with a long-life maintenance-free electric motor. Should any
problems occur with this unit please check the following items:
1.
Check the plug to see that it is securely plugged into the electric outlet.
2.
Check the electric plug on the electric motor to see that it is fastened properly.
3.
Check the air tube to the switch to see that the tube is not crushed or disconnected.
05/12/17
Side 9
Rev: 37
