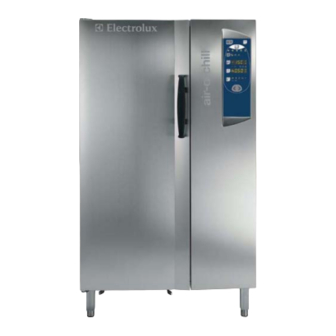
Electrolux AOFP102U Руководство по эксплуатации и техническому обслуживанию - Страница 24
Просмотреть онлайн или скачать pdf Руководство по эксплуатации и техническому обслуживанию для Морозильная камера Electrolux AOFP102U. Electrolux AOFP102U 27 страниц. Bcf 30kg 6 gn1/1 lw (240/3/60hz), bcf 50kg 10 gn1/1 lw (240/3/60hz) / bcf 100kg 20 gn1/1 lw (240/3/60hz) / bcf 70kg 10 gn2/1 lw (240/3/60hz) / bcf 180kg 20 gn2/1 lw (240/3/60hz) / bcf 30kg 6 gn1/1 lw (208/3/60hz) / bcf 50kg 10 gn1/1 lw (208/3/60hz) / bcf

D.3 TROUBLESHOOTING
D.3.1 QUICK TROUBLESHOOTING GUIDE
In some cases faults can be remedied easily and quickly. Below
there is a list of possible faults and remedies:
A. The appliance doesn't switch on:
- check that the mains socket is powered.
B. The appliance does not reach the set internal temperature:
- check that the condenser is clean;
- check that the cycles have been set properly;
- check that the product has been loaded properly into
the chamber;
- check that the probe is working properly.
C. The appliance is excessively noisy:
- check that the appliance is properly levelled.
If it is unbalanced this could cause vibrations.
- check that the cabinet is not touching other units, as this may
cause resonant vibrations;
D. The appliance functions with time, even with the probe
inserted:
- make sure the probe is correctly inserted (see below -
INSERTING THE CORE PROBE IN THE PRODUCT);
- check that 5 minutes after cycle start with probe inserted, the
luminous indicator
INSERTING THE CORE PROBE IN THE PRODUCT
Make sure the probe is clean and sterilized whenever inserting
it in food, and always take care when handling the probe,
because it has a sharp point.
Using the core probe in the chilling cycles guarantees good
results. To be certain of this, it is important to position the probe
correctly, i.e. right at the center of the largest piece of food,
making sure it doesn't come out the other side and being very
careful not to touch the tray.
7
remains off.
If the problem persists after making all these checks, contact the
service center, remembering to give the following details:
• the kind of fault;
• the appliance's PNC (production number code);
• the Ser. No. (appliance serial number).
Note: the code and serial number are essential for identifying
the type of appliance and date of manufacture.
Example: PNC 726662 00 - Ser.No. 72500010
726662 00: chiller freezer R404A
72500010: manufactured in 2007, week 25, 10th item.
D.4 WASTE DISPOSAL AND DEMOLITION
D.4.1 WASTE STORAGE
At the end of the appliance's working life, make sure it is
disposed of properly. The doors must be removed before
disposing of the appliance.
Special waste can be stored temporarily whilst awaiting
processing for disposal and/or permanent disposal. In any
event, the binding environmental protection laws in the country
of use must be observed.
D.4.2 PROCEDURE FOR PRELIMINARY DISMANTLING OF THE
APPLIANCE
The laws vary from country to country, but the laws and regulations
in the country where the demolition takes place are the ones that
must be observed.
In general terms, the refrigerator must be taken to specialised
collection/demolition centers, after dismantling the components
and grouping them together according to their chemical
characteristics. Remember that the compressor contains
lubricant oil and coolant, which can be recovered and re-used
and that the refrigerator components are classed as special
waste that cannot be assimilated with urban waste.
ATTENTION:
Make the appliance unusable by removing the power supply
cable and any device that closes the internal compartments, to
avoid the possibility of somebody getting trapped inside.
THE DISMANTLING MUST BE DONE BY QUALIFIED PERSONNEL.
D.5 ENCLOSED DOCUMENTS
• Set of test documents
• Wiring diagram
24
PNC 726622
Ser.No.72500010
