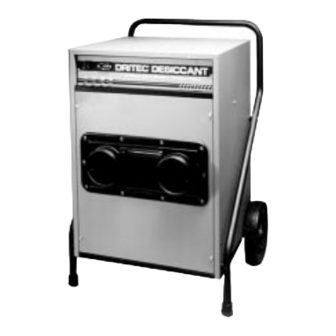
Dri-Eaz DRITEC 325 Руководство пользователя - Страница 7
Просмотреть онлайн или скачать pdf Руководство пользователя для Осушитель Dri-Eaz DRITEC 325. Dri-Eaz DRITEC 325 11 страниц. Desiccant dehumidifiers
Также для Dri-Eaz DRITEC 325: Руководство пользователя (11 страниц)

react ducting is greater as the length of the ducting is in-
creased.
Warning!
Never operate or store the unit outdoors, or otherwise ex-
pose the unit to water. The housing is not waterproof, and
water allowed inside the unit could cause an electrical shock
hazard or damage to the unit. If electrical components be-
come wet, allow the unit to dry thoroughly before operating.
Connecting the Ductwork
There are some simple rules for arranging the ductwork
for the DriTec Desiccant Dehumidifier:
1. The process air outlet may be vented to the area to
which is being dried.
2 . The reactivation air outlet can be very damp, so it
should be vented to a space where this moisture is not a
problem. Even though this air is heated, it is too damp
for most space heating purposes. Normally, the
reactivation air should be vented directly outdoors.
3. Protect outlets. Wherever an outlet duct opens to the
outdoors, protect it from the elements. Install weather
hoods to prevent water from running into the dehumidi-
fier and screens to prevent birds or rodents from entering
the unit.
4. Duct connection clearances. Allow the following clear-
ances for the intake and outlets:
Air Intake – Allow at least 7" clearance from nearby
walls for process intake.
Process Outlets – The DriTec 325 connects to 5" or
larger round ductwork. The DriTec 150 connects to 4" or
larger round ductwork.
Reactivation Outlet – Both the DriTec 325 and DriTec
150 connect to 4" round ductwork. Always vent to out-
side area.
Connecting the Power
1. Electrical Connections, DriTec 325. The power cord
on the DriTec 325 should be plugged into a 230V
50/60Hz 30A outlet. The "Unit On" light will indicate
when there is power to the unit. The voltage to the unit
should not vary by more than 10%.
2. Electrical Connections, DriTec 150. The power cord
on the DriTec 325 should be plugged into a 115V 60Hz
15A outlet.
3.
Start the unit. Turn the switch to "On" to start the unit.
Look through the process outlet grills to check the rotor
rotation. The rotor should start turning clockwise as you
view it through the process outlet grills. If the unit does
not start, refer to the Troubleshooting section.
MAINTENANCE
The DriTec Desiccant requires very little regular mainte-
nance. Check the following points every 30 days when using
the unit on a regular basis or as needed.
Clean the Air Filter
COPYRIGHT © 1999 2000 DRI EAZ PRODUCTS INC
Remove the filter from the filter shroud by inserting a
finger or screwdriver into the access hole at the bottom of
the filter shroud and pushing up. To clean the filter use a
light vacuum, or wash with water and mild detergent. Spray
directly against the foam in the direction of the air flow. Be-
gin at the top of the filter and work down. Allow the filter to
drain before reinstalling it in the filter shroud.
Check Reactivation Outlet Temperature
After the unit has been operating for 30 minutes, the
temperature at the outlet of the reactivation air stream should
be about 30°F (17°C) higher than the temperature of the
room air. Check this outlet temperature with a thermometer.
If the outlet temperature varies significantly from the above,
see the section on Troubleshooting.
Always ensure that correct voltage is used. Failure to do so
could cause an electrical shock or fire hazard.
Check the Rotor Air Seals
1. Turn off all power to the unit (see ELECTRICAL
DANGER note.) Unscrew the four fasteners holding on the
front panel and remove to expose the front side of the desic-
cant rotor.
2. (DriTec 325 only.) Remove the two control panel
screws and let the panel hang loosely. It is not necessary to
disconnect any wires.
3. Place a 5" high block of wood under the front edge of
unit for support. Remove the cover screws and lift the cover
straight up, being careful not to damage any foam edge seal.
4. Air flow through the rotor is controlled by a system of
air seals. Inspect the air seals for any signs of abrasion or
cuts. Be sure the outer surface of the seals are smooth. If the
seals must be replaced, please contact the Dri-Eaz Service
Department.
Check the Rotor
1. With the cover removed, pull back the tensioner to
loosen the drive belt. Check the drive belt for signs of wear.
The belt should be flexible. Replace the belt if it is stiff or
cracked.
2. Remove the belt from the drive sprocket on the motor.
Turn the rotor by hand and make sure it turns smoothly,
though with some drag. If the rotor does not turn smoothly,
the seals may be worn.
3. Check the rotor for passages clogged by dirt or dust.
To inspect the passages, hold a 60 watt bulb behind the ro-
tor. If the passages are clear, the light from the lamp should
shine through the rotor. If any part of the rotor is plugged
you will see a dark area. Inspect and clean the rotor once per
year when operating under normal conditions, and more if
the unit is operating in a dusty environment. Despite the in-
line filter the rotor can pick up dirt and dust, resulting in
reduced water extraction.
4. Clean the rotor if it seems dirty or clogged. Use a vac-
uum with a soft-bristled dusting brush attachment. Vacuum
both surfaces of the rotor.
7
Warning!
