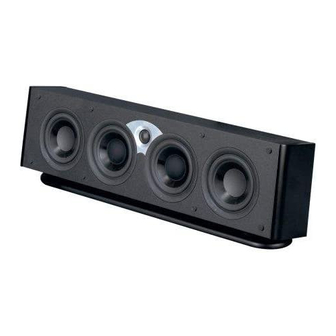
Atlantic Technology 2200 SR Руководство по эксплуатации - Страница 7
Просмотреть онлайн или скачать pdf Руководство по эксплуатации для Система домашнего кинотеатра Atlantic Technology 2200 SR. Atlantic Technology 2200 SR 12 страниц. Atlantic technology system 1200c: product brochure
Также для Atlantic Technology 2200 SR: Руководство по обзору (3 страниц), Брошюра и технические характеристики (2 страниц)

Instruction Manual
Surround Effects and Speaker Locations
AllAtlantic Technology speakers are"voiced"to the same standards of tonal
neutrality and sonic accuracy.We design all of our speakers to transmit the
program material into the listening environment as precisely as possible.
Therefore,any of our surround speakers,such as our model 2200SR Bipole/
Dipole surround speakers, would be an excellent match for an FS-3200-
based home theater system. Begin with the side speakers set to "Dipole, "
then experiment with the Bipole/Dipole switch to obtain the most pleasing
and realistic effect in your listening room.
See your Atlantic dealer or visit our website (www.atlantictechnology.com)
for more information.
The best location for surround speakers is straight out to the sides, or
slightly behind the primary listening area,approximately 1-2 feet (.3-.6m)
above seated ear level,but no closer than 2 feet (.6m) from the ceiling.(See
figure 6.) The surround speakers are primarily intended to re-create the
ambient sounds taking place in the movie scene. Therefore, throughout
most of a movie or TV program you may not be consciously aware of output
from these speakers. In other words, don't worry if you aren't hearing the
surround speakers.Please try to avoid the trap of turning the surrounds up
and up so that you hear them most of the time. The result will be a much
less believable surround experience.
6.1 and 7.1 Channel Systems
For best performance in a 7.1 channel system, we recommend using
another pair of 920, 1200 or 2200 LR's on the back wall, and 2200 SR's on
the side walls.
If you are setting up a system that uses back surround speaker(s) as well
as side surrounds (Dolby Digital EX, DTS ES, etc.) you can choose to use
either SR model speakers in Dipole or Bipole mode or another pair of front
LR speakers in the back of the room.If the 2200 SR's are used as back sur-
rounds in a 6.1 or 7.1 channel system, they should be installed with the
Right speaker placed over the listener's left shoulder and the Left speaker
placed over the listener's right shoulder. About one-third of the way out
from the corners in most rooms is a good starting point.
If you are using a THX Ultra 2 certified controller/receiver,you should place
the back surround speakers approximately 1 to 2 feet (.3-.6m) apart in the
center of the back wall. The special circuitry in the processor will help to
create a believable and effective surround field using this placement.Please
read the electronics manual to learn more about this placement option.
FS-3200 Manual.indd 7
Connecting Your System
We recommend that you connect your system using high quality dual
conductor stranded wire of 16 gauge or heavier, for lengths up to 25 feet
(8m) . Remember, the lower the gauge number, the heavier the wire. Use
heavier gauge wire for longer runs. Please contact your audio/video dealer
or installer for specific cable recommendations and further information
regarding special circumstances.The terminals themselves are designed to
allow the use of very heavy speaker wire or connectors. Be sure to tighten
them securely,but don't over-tighten them.
WARNING: To prevent risk of electrical shock or damage to your
equipment, always switch off the amplifier or receiver when making
any system connections.
You can connect your speakers by using a variety of audio connectors such as
banana plugs,pin connectors,spade lugs,etc.,or you can:
1. Remove ½" (13mm) of insulation from each wire end.
2. Twist the stranded wire together, keeping the two ends
separate.
3. Place the appropriate wire through the postholes in the
connectors. These holes are revealed when you loosen the
connector's capscrew.
4. Tighten down the capscrew tightly, but be careful not to
over tighten it.
5. Check the tightness of the capscrews 24 hours after hookup
and occasionally after that, as they can loosen over time.
We recommend that you check your local electrical codes to make sure that
you are not using improper connectors. It's important to observe polarity
while making speaker connections:red (+) terminals on the amplifier to red
(+) on the speaker, black (–) on the amplifier to black (–) on the speaker.
Look carefully at the wires you are using and note that one of the conductors
of each pair will typically be identified by color,printing on the outer jacket,
ridges on the outer jacket,or a thread intertwined with the wire strands.By
convention,the marked wire is connected to the red (+) terminal.Whether
you are connecting a complete system, or adding a single speaker compo-
nent to your present system, the wiring should look like the system wiring
diagrams on the opposite page
WARNING: Before turning on the amplifier, be certain that no stray
wire strands are touching across any terminals as this might damage
your amplifier.
Finally, check the polarity of your front speakers by listening to some ste-
reo music with good bass content. If the sound seems"hollow", unusually
spread out,or seem to have weak bass,recheck your connections for proper
polarity and correct any out of phase connections by reversing the connec-
tions to one speaker only,if necessary.
7
Connecting Your System
10/6/04 11:00:12 AM
