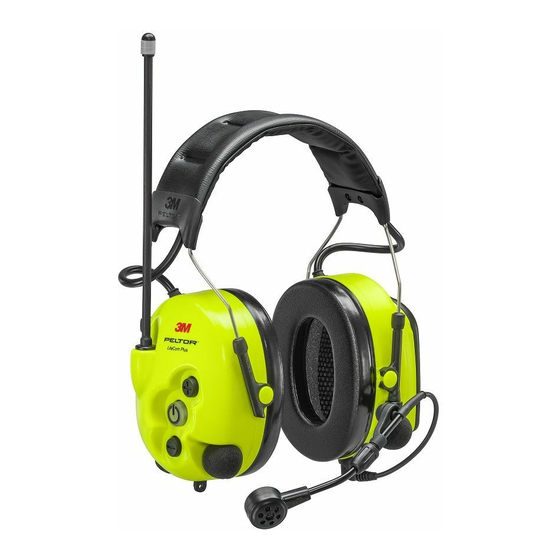
3M Peltor MT7H7B4610-NA Руководство пользователя - Страница 6
Просмотреть онлайн или скачать pdf Руководство пользователя для Гарнитуры 3M Peltor MT7H7B4610-NA. 3M Peltor MT7H7B4610-NA 19 страниц. Peltor litecom plus

EN
3M™ Peltor™ LiteCom Plus
Hearing protector with built-in two-way radio, level dependent function for ambient listening and option to connect external
equipment. Read these instructions carefully before use and save them for future reference.
1. COMPONENTS
1.1 Headband (figure A)
(A:1) Headband
(A:2) Headband padding (PVC foil)
(A:3) Headband wire (stainless steel)
(A:4) Two-point fastener (POM)
(A:5) Ear cushion (PVC foil and PUR foam)
(A:6) Attenuation cushion (PUR foam)
(A:7) Cup
(A:8) Microphone for level dependent function for ambient listening
(A:9) Speech microphone (dynamic microphone)
(A:10) On/Off/Mode
(A:11) +
(A:12) –
(A:13) Antenna
(A:14) Speech microphone input (J22)
(A:15) PTT (Push To Talk button) for built-in communication radio
(A:16) PTT auxiliary. (Push To Talk button) for externally connected equipment (A:17)
(A:17) External input/output (e.g. for external communication radio, external telephone)
(A:18) Lithium-ion battery (rechargeable)
1.2 Helmet attachment (figure B)
(B:1) Cup supporting arm (stainless steel)
1.3 Neckband (figure C)
(C:1) Neckband wire (stainless steel)
(C:2) Neckband cover (POX)
2. FITTING AND ADJUSTMENT
Note! Brush aside hair around your ears so the ear cushions (A:5) fit snugly.
Spectacle frames should be as thin as possible and fit close to the head to minimize acoustic leakage.
2.1 Headband (figure D)
(D:1) Slide out the cups (A:7).Tilt the upper part of the headset outwards to ensure the wires are outside the headband wires (A:3).
(D:2) Adjust the height of the cups by sliding them up or down while holding the headband in place.
(D:3) The headband should be positioned across the top of your head.
2.2 Helmet attachment (figure E)
(E:1) Insert the helmet attachment in the slot on the helmet and snap it into place.
(E:2) Working mode. To switch the unit from ventilation mode to working mode, press the headband wires inwards until you hear
a click on both sides. Make sure that the cups and the headband wires do not press on the edge of the helmet when in working
mode as this can cause noise leakage.
(E:3) Ventilation mode. Avoid placing the cups against the helmet as this prevents ventilation (E:4).
3. USAGE/FUNCTIONS
3.1 Inserting batteries
Insert the rechargeable battery (ACK081) in the battery compartment. Push down the clamp.
Low battery level is indicated by a voice message: "low battery", repeated every five minutes. If the batteries are not replaced
a "battery empty" warning will eventually be heard. The unit will then switch off automatically. Note! Use following battery in this
product: 3M Peltor ACK081 charged with cable 3M Peltor AL2AI connected to a 3M Peltor FR08 (power supply).
Note! Performance may deteriorate as the batteries get low.
6
