247Security mDVR 500 Series Быстрый монтаж - Страница 6
Просмотреть онлайн или скачать pdf Быстрый монтаж для Камера безопасности 247Security mDVR 500 Series. 247Security mDVR 500 Series 11 страниц.
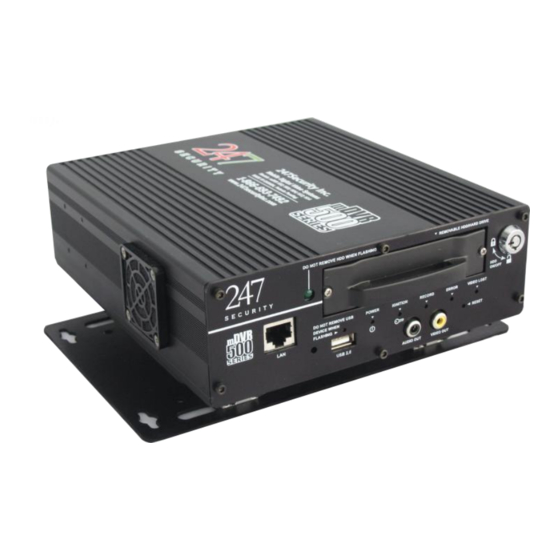
4. EQUIPMENT TEST
When all of the cameras, cables, and add-on modules have been installed and when the DVR is connected to your
on-site laptop, the completed setup needs to be tested. To begin the test, ensure the DVR's Hard Drive is inserted in
the DVR and the lock is turned to the locked position and then turn the vehicle's ignition to ACC or ON. Starting the
vehicle's engine—and, by extension, the alternator to charge the battery—during the test is not essential. Ensure that
you have direct line-of-sight to the front of the DVR to see the LED indicators.
Note: At the first sign of a hazard/malfunction (electrical fire, smoke) immediately turn the vehicle's ignition OFF.
The 514M Series DVR normal boot sequence is as follows:
Time Elapsed
Sequence
[minutes : seconds]
1
0:05
2
0:15
3
0:20
4
0:45
5
0:50
6
1:00
The IGN (ignition) indicator will turn on. The DVR is idling in Stand-By
mode. It is not online or recording.
The PWR (power) indicator will turn on while the IGN (ignition) indicator
will flash, repeatedly. The DVR is now undergoing its boot sequence.
The green POWER indicator on the Event Marker will turn on. The DVR
cooling fan (four channel DVR's) will turn on.
The IGN (ignition) and PWR (power) indicators will turn on solid. The DVR
has completed its boot sequence.
The record light on the front of the DVR will come on.
The amber RECORD light on the Event Marker will turn on solid, also
indicating that the hard drive is recording data. The DVR is now ready to
record, or to be serviced through the Ethernet Cable from your laptop.
NOTE: ON THE 514M SERIES DVR'S WHEN THE X-CROSS CABLE IS
CONNECTED TO THE DVR FOR CONFIGURING THE BUS AND AIMING
CAMERAS, THE UNIT WILL NOT RECORD, AS SOON AS YOU DISCONNECT
THE X-CROSS CABLE FROM THE DVR WITH-IN 10 SECONDS THE DVR WILL
AGAIN BEGIN RECORDING. THIS CAN BE CHANGED IN THE SET-UP OF THE
DVR IN THE SYSTEM TAB.
6
Activity