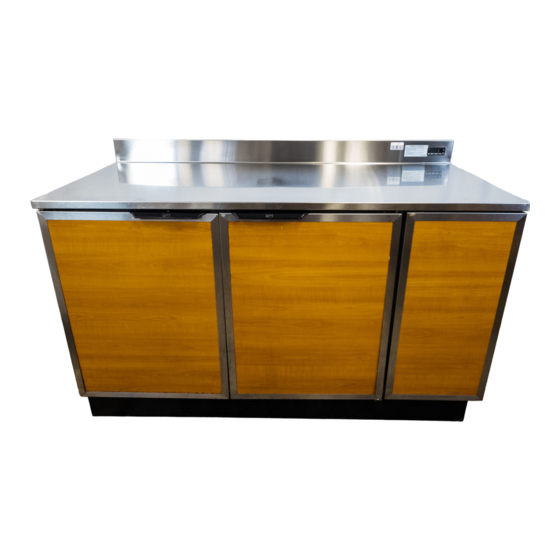
Duke RBC 60 Руководство по установке и эксплуатации - Страница 5
Просмотреть онлайн или скачать pdf Руководство по установке и эксплуатации для Холодильник Duke RBC 60. Duke RBC 60 8 страниц. 48/60 inch refrigerated back counter digital
Также для Duke RBC 60: Руководство по эксплуатации (16 страниц)

RECEIVING & INSPECTING THE EQUIPMENT
Care should be taken during unloading so the equipment is not damaged while being moved into the building.
1.
Visually inspect the exterior of the package and skid or container. Any damage should be noted and reported to
the delivering carrier immediately.
2. If damaged, open and inspect the contents with the carrier.
3. In the event that the exterior is not damaged, yet upon opening, there is concealed damage to the equipment
notify the carrier. Notification should be made verbally as well as in written form.
4. Request an inspection by the shipping company of the damaged equipment. This should be done within 10 days
from receipt of the equipment.
5. Check the lower portion of the unit to be sure legs/casters are not bent.
6. Also view compressor compartment housing and visually inspect the refrigeration package. Be sure lines are se-
cure and base is still intact.
7. Freight carriers can supply the necessary damage forms upon request.
8. Retain all shipping material until an inspection has been made or waived.
INSTALLATION - Location
Units represented in this manual are intended for indoor use only. Be sure the location chosen has a floor or
counter strong enough to support the total weight of the units. Reinforce the floor or counter if necessary to provide
for maximum loading. For the most efficient operation, be sure to provide good air circulation inside and out. These
units should be located so that they can be moved for service. Major service to the refrigeration system is done from
the end of the cabinet.
The outline dimensional drawings for the units are shown in Figures 1 and 2.
INSTALLATION – Inside Unit
Take care not to block air flow to the fans and allow space along the front, back and sides.
INSTALLATION – Outside Unit
Be sure that the unit has access to ample air; avoid hot corners and locations near stoves and ovens.
This unit exhausts air to the bottom and the back. Do not seal the unit to the wall or set unit on a curb. The
INSTALLATION – Leveling
Be sure that the units are placed on a firm, flat surface/floor. Check for cracks in flooring or tile and avoid these areas
if possible. If necessary place support pads, properly rated for the weight of the unit, to "bridge" uneven or cracked
flooring. Level unit accordingly.
INSTALLATION – Stabilizing
Use the leg adjustments to insure that the unit is solid to the floor surface at all four contact points. Insure that the unit
does not "rock" when pressure is applied to the top corners.
INSTALLATION – Electrical Wiring
The RBC 48 and RBC 60 are available as a 120VAC, 60 Hz or as 220VAC, 50 Hz dependent on model. All
connections should be performed by a certified electrician and should comply with local electrical codes for your
municipality.
REFER TO THE AMPERAGE DATA LIST IN THE SPECIFICATIONS OR THE SERIAL TAG DATA AND YOUR LOCAL CODE
OR THE NATIONAL ELECTRICAL CODE TO BE SURE UNIT IS CONNECTED TO THE PROPER POWER SOURCE. A PRO-
TECTED CIRCUIT OF THE CORRECT VOLTAGE AND AMPERAGE MUST BE RUN FOR CONNECTION OF THE SUPPLY
CORD OR PERMANENT CONNECTION TO THE UNIT. THE POWER MUST BE TURNED OFF AND DISCONNECTED
INSTALLATION
ventilation slots in the kickplate must remain open.
WHENEVER PERFORMING MAINTENANCE OR REPAIR FUNCTIONS.
Installation and Operation of: Refrigerated Back Counter
CAUTION:
electrical
5
