4ms Company Dual Looping Delay Руководство пользователя - Страница 11
Просмотреть онлайн или скачать pdf Руководство пользователя для Музыкальная педаль 4ms Company Dual Looping Delay. 4ms Company Dual Looping Delay 20 страниц.
Также для 4ms Company Dual Looping Delay: Информация о выпуске (10 страниц)

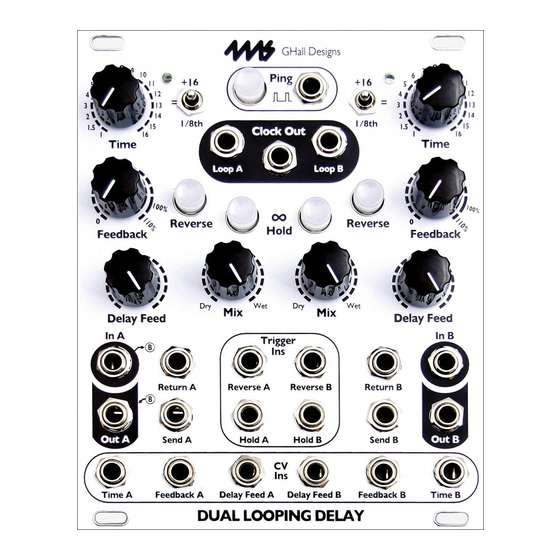
Quantized Change Mode
Hold...
and tap
jacks, no change will be made until the next Ping clock. If the Ping clock changes (due to tapping the
Ping button or a change in the tempo of an external clock patched into the Ping jack), then any queued
changes to parameters will immediately take effect.
The factory default setting for QCM is off. To enter QCM, hold down the Reverse button and tap the
Ping button once. The Ping and Reverse lights will flash three times evenly to show entry into QCM.
Exit QCM with the same procedure, in which case the same lights will flash six times in a staggered
pattern.
QCM is best explored with a rhythmic patch, sequencer, or drum unit locked with the Looping Delay
clock. Asynchronous modulations and triggers can be used freely, since they will be forced to quantize
with the Ping clock. In this sense, QCM might be thought of as a kind Sample and Hold that locks
modulation sources with the fundamental time. Go ahead, experiment! It can be addicting.
Note that continually toggling Reverse in this mode can lead to quite a lot of "memory scraps" that
come back at surprising times, especially when the Reverse switching continues after an input source
is killed. This can be a real plus as these bits and pieces will remain locked to the clock. If it gets out of
hand, you can use the Memory Clear function, or discontinue triggers to Reverse so that the "scraps"
eventually clear themselves out.
Using the Looping Delay with External Clocks
Whenever possible, use the Looping Delay as a the clock source by patching out of the Clock Out
jack to your other clock modules. However, sometimes you have to clock the Looping Delay with
another source, in which case you would patch the external clock into the Ping jack. There are many
issues with clock sync that arise from using different manufacturers' gear together, and an investigation
of every type of issue is beyond the scope of this section. However, here are some initial things to try if
you are having difficulties syncing clocks:
• Use the least jittery device as the clock source. Try to use the Looping Delay, or some other
high-end gear that guarantees a low-jitter clock. Analog devices generally drift over time. Digital
devices can also have jitter due to rounding errors and processor lag or latency. If you're using
something else as the clock source, try running it directly into the Looping Delay and then using the
Looping Delay's Clock Out jack as the clock source for other gear.
• Try running the clock source into a clock divider before into the Looping Delay. This will
average out some jitter, and slow down how often the Looping Delay's ping time is updated. You
may wish to configure your clock source equipment to generate a faster clock (such as 24ppq or
48ppq) and then divide it down with a Rotating Clock Divider or some other clock divider module.
• Try the Looping Delay's five different External Clock De-Jitter modes (see System Settings
Mode section). One mode in particular may work best with your equipment. Analog clock sources
tend to drift, so Linear Average of 4 is best (or use a clock divider, see above). Digital clock sources
with Inf. Hold on the Looping Delay might prefer a Moving Average of 2, or Ignore 1%. Digital clock
sources without Inf. Hold on the Looping Delay might prefer Ignore 1% or Ignore 0.2ms if you are
concerned with phasing between the layers.
Normally Reverse, Inf. Hold, and Time work as you would expect: changes to
the control take effect immediately, no matter when they occur. In the
Quantized Change Mode (or QCM), any change to these parameters will be
delayed until the next pulse of the Ping clock.
This means that if you press the Reverse and Inf. Hold buttons, turn the Time
knob, flip the Time switch, or apply CV or gates to the Time, Reverse and Hold
Page
11
of
20
