Datavideo RMC-180 Руководство по эксплуатации - Страница 7
Просмотреть онлайн или скачать pdf Руководство по эксплуатации для Контроллер Datavideo RMC-180. Datavideo RMC-180 16 страниц. Ptz camera control unit
Также для Datavideo RMC-180: Руководство по эксплуатации (13 страниц), Руководство по эксплуатации (16 страниц), Руководство по эксплуатации (19 страниц)

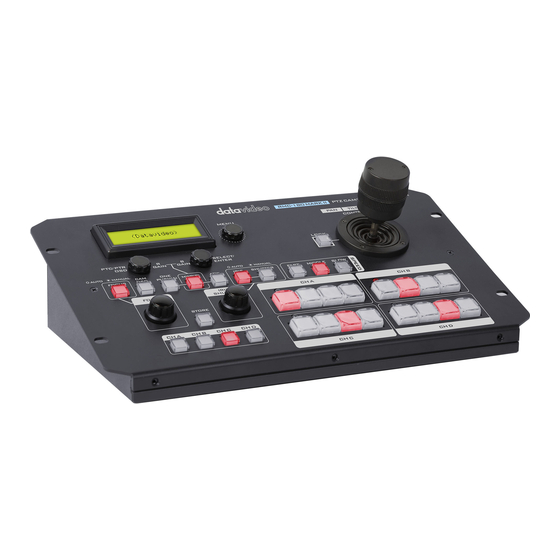
Channel A, B, C, D buttons
To control or set up a connected camera first select it using these
buttons. The selected camera button will be illuminated or ON.
PTZ Joystick Control
Before attempting to use the joystick to PAN, TILT or ZOOM a
selected camera first unlock the joystick by pressing the LOCK
button.
PAN – Move the joystick horizontally to the left or right to pan the
selected PTZ camera head from left to right or vice versa.
TILT – Move the joystick up or down to tilt the selected camera
head up or down.
ZOOM – Twist the joystick clockwise (to the right) or anti-clockwise
(to the left) to have the selected camera zoom in or out.
Speed
The speed at which the selected camera moves can be chosen by
pressing one of three speed buttons.
STR
Pressing this button toggles RMC-180 into or out of STORE
MODE. When active this allows the current camera position to be
stored within a chosen Channel Memory Button.
Channel Memory Buttons
These buttons may be used to store up to four camera positions
for each camera. Each button relates to only one camera and one
stored position. The active button for each camera is illuminated.
Tally Indicator LEDs
Above each set of four memory buttons is a Tally Indicator LED.
This LED feature becomes active when the RMC-180 is connected
to the tally output of a compatible Datavideo Switcher such as the
HS-2000 or HS-2200.
When the HS-2000 or HS-2200 Switcher is sending camera A's
video to the program output then CH A's tally LED will be
illuminated on the RMC-180. Additional equipment and cabling are
required.
7
