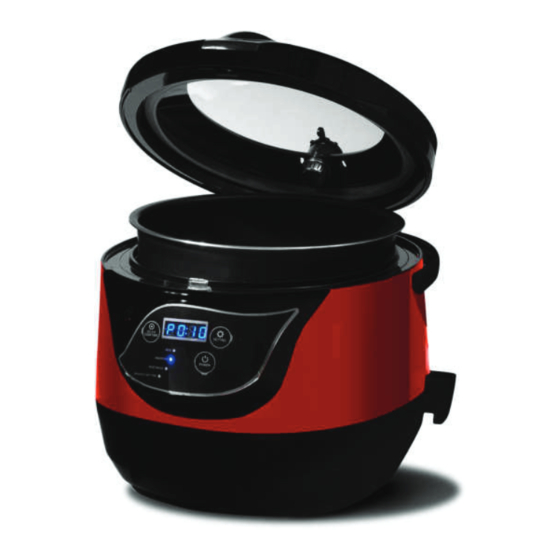
Cook's essentials K39960/EPCM-55 Руководство по эксплуатации и рецепты - Страница 9
Просмотреть онлайн или скачать pdf Руководство по эксплуатации и рецепты для Кухонная техника Cook's essentials K39960/EPCM-55. Cook's essentials K39960/EPCM-55 19 страниц. 5 preset cooking functions

OPERATING INSTRUCTIONS
instructions on page 14-15 under "Manually Set Time Function."
7.
Once a cooking function has been set, the cooking time selected will flash 10 times. Then, the
display screen will show the desired delay time on the screen and begin to countdown the
DELAY time.
8.
Once the delay time has expired, the selected cooking function will be initiated.
9.
Once cooking is complete, the cooker will enter "Keep Warm" and "bb:00" will appear on the
display.
NOTE: Food can be kept warm up to 4-hours. Additional time may cause a change in flavor,
appearance and cause food to spoil.
10. After cooking is finished, push the POWER button once. The blue display will shut off and the
red POWER light will begin blinking to indicate it is now in "Stand-by" mode. Remove the
contents of the inner pot and serve. Unplug the unit.
Tip#9: You will notice that when using the delay timer function, the red POWER
indicator light continues to blink because it still remains in "Stand-by" mode. The
red POWER indicator light will continue to blink until the delay time has expired.
The selected cooking function will automatically initiate and the red POWER
indicator light will no longer appear.
Tip#10: *CAUTION: It is not recommended to use the Delay Timer function to cook
foods that may spoil. Leaving raw foods inside the cooker for long periods of time
prior to cooking may result in the food spoiling. Cook food that can be left out
such as rice, beans, grains or other foods that will not spoil.
Tip#11: You can only make adjustments to the time or change the function while a
function is flashing. Once the cooker begins to heat up, you can no longer make
changes to the settings, you will need to CANCEL out by pressing POWER.
K
E
E
P
K
E
E
P
HOW TO USE THE
•
When the display screen shows "bb:00" it indicates that the unit is in "Keep Warm" mode.
•
The "Keep Warm" Setting allows you to keep cooked food warm. It can be used manually and
also comes on at the end of each cooking function.
1.
To set manually, plug the power cord into a standard 120V electrical outlet. You will hear a beep
and the red indicator light within the POWER button will begin blinking, indicating that the
cooker is in "Stand-by" mode.
2.
Prepare desired food and place into cooking pot, adjust the RELEASE VALVE to the
"Middle/Medium" position and close the lid.
3.
Press the POWER button once. The Rice function is the default cooking function and the
display screen will show "A---".
4.
Press the SETTING button eight times until you see "bb:00" appear on the display. Food can
be kept warm up to 4-hours. Additional time may cause a change in flavor, appearance and
cause food to spoil.
5.
The Delay Timer function cannot be used in conjunction with the "Keep Warm" function.
6.
You cannot program the "Keep Warm" function to keep warm for a specific amount of time.
The display screen will show how much time has elapsed while the unit has been on "Keep
Warm."
7.
Press the POWER button to cancel the "Keep Warm" setting.
W
A
R
M
F
U
N
C
T
I
O
N
:
W
A
R
M
F
U
N
C
T
I
O
N
:
16
OPERATING INSTRUCTIONS
F
R
O
F
R
O
HOW TO COOK WITH
Cooking frozen food inside the Smart n' Healthy Cooker is quick and easy but has certain
restrictions. Only cook individual cuts of frozen meats that are up to 1 inch thick, the cooking time
does not need to be altered. The cooking process will not begin until the internal temperature has
reached a preset level. The Smart n' Healthy Cooker will heat up to a set internal temperature and
then begin the cooking process. With frozen foods, the 'heat-up' period will just take longer than
when cooking with non-frozen foods.
It is not recommended to cook larger cuts of frozen meats such as a whole roast, a block of frozen
ground meat or a whole chicken. Larger cuts will require increased cooking times of up to one third
more, and the results may not be the same when compared to meats that were thawed (or at least
partially thawed) and browned before cooking.
CLEANING & MAINTENANCE
1.
Always make sure the Cooker is unplugged and completely cooled down before cleaning or
dismantling.
2.
Use a non-abrasive sponge or damp wash cloth to clean the exterior of the cooker. NEVER
immerse the cooker in any liquids.
3.
Remove the Condensation Collector by sliding it out towards you (Figure 11), rinse it thoroughly
and let dry. Slide it back into place (Figure 12).
Figure 11
4.
Use a non-abrasive sponge or damp wash cloth to clean the interior and exterior of the lid,
including the Rubber Gasket and the Removable Filter. The Rubber Gasket is NOT removable.
5.
The Removable Filter is located on the underside of the lid and can be removed for cleaning. To
remove, pull vertically (Figure 13). To re-attach, simply line up the filter and press down to
secure the filter (Figure 14).
Figure 13
Z
E
N FOODS:
Z
E
N
Figure 12
Figure 14
17
